
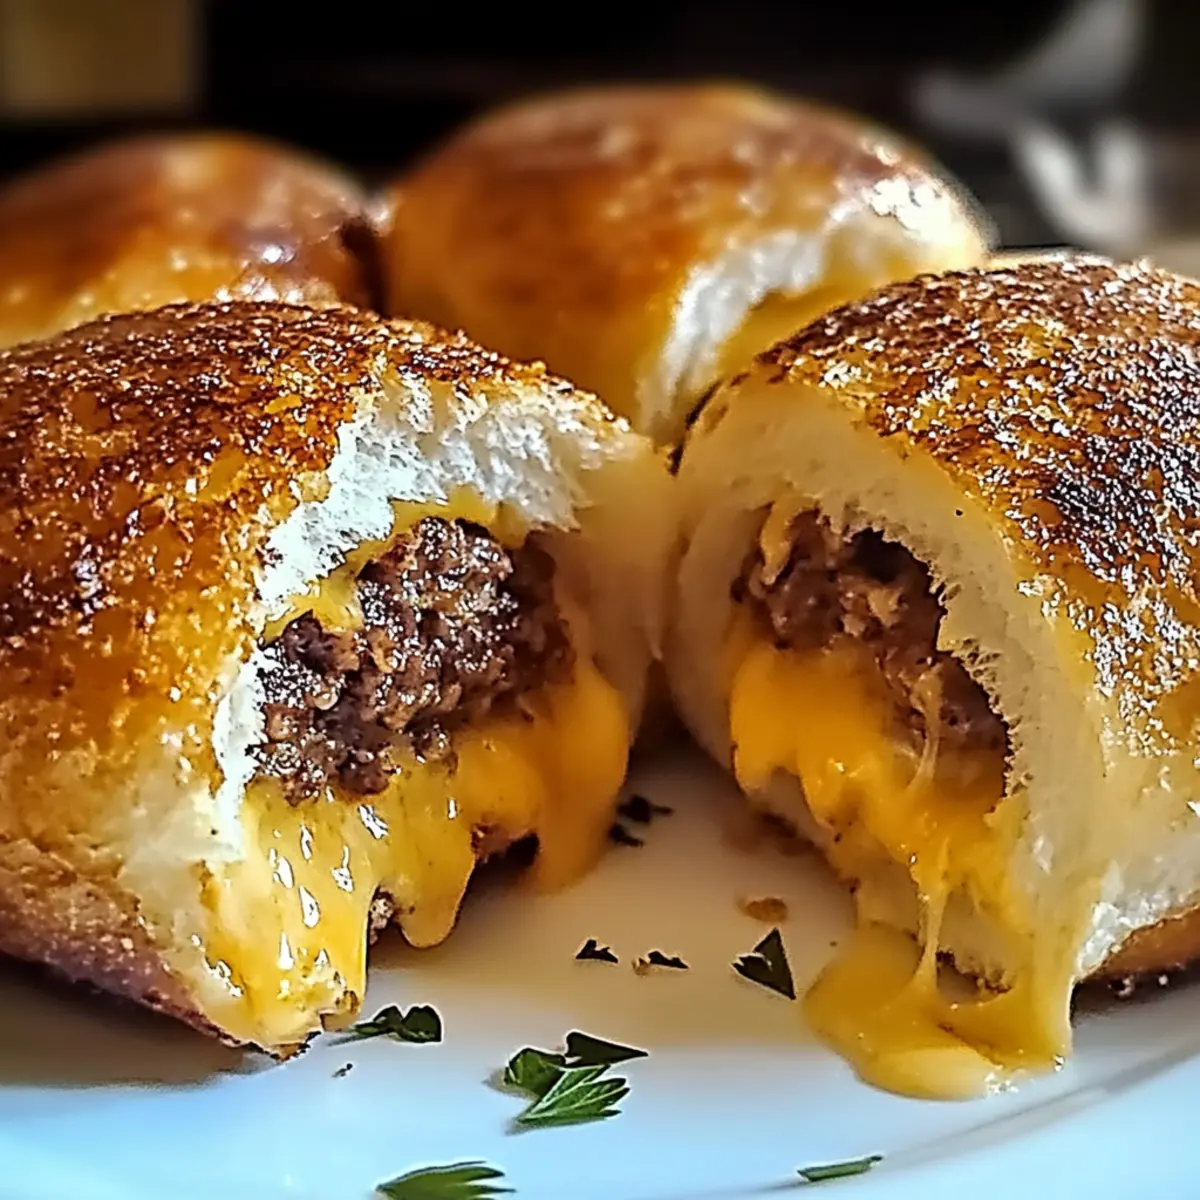
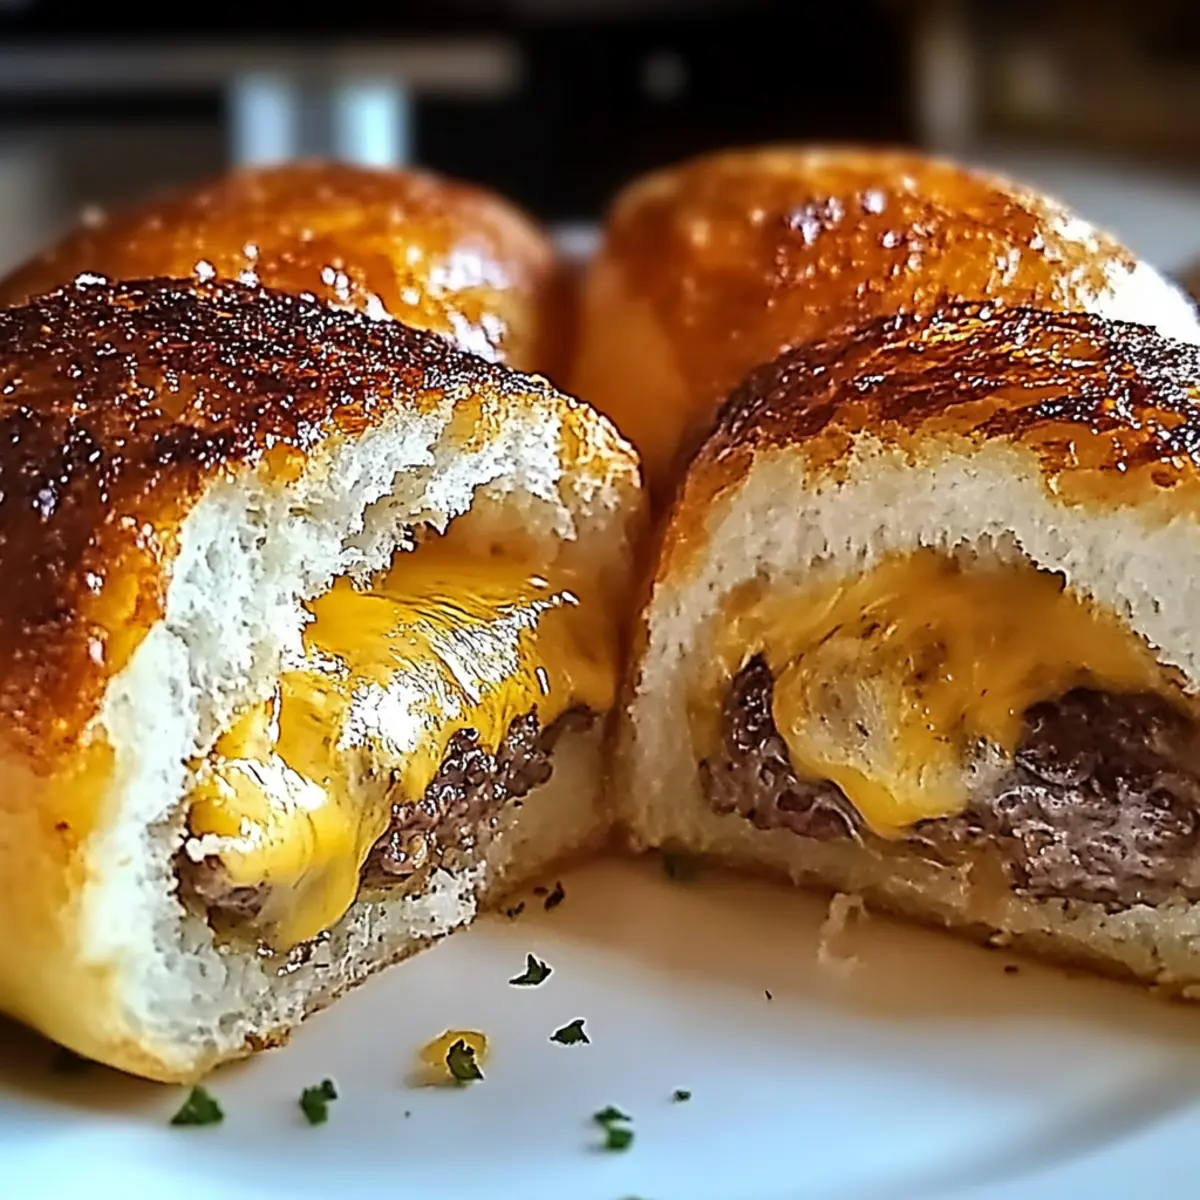
As I rushed through a busy evening, the sound of sizzling meat mingling with the buttery, garlicky fragrance wafting through my kitchen pulled me in. That’s when I realized I was about to unveil a family favorite: Garlic Parmesan Cheeseburger Bombs. These delightful bites combine a crispy biscuit crust with a gooey, cheesy filling that will satisfy even the pickiest eaters, making them a perfect addition to game days or casual get-togethers! Not only are they incredibly easy to prepare with just a handful of ingredients, but they’re also freezer-friendly—meaning you can whip up a batch ahead of time and enjoy them whenever the craving strikes. Curious about how to make these delicious bites with your own twist? Let’s dive into the recipe!
Why are Garlic Parmesan Cheeseburger Bombs a Must-Try?
Irresistible Comfort Food: These bombs perfectly marry your love for cheeseburgers and the comforts of home cooking.
Easy to Customize: Whether you’re opting for a spicy variation with jalapeños or a vegetarian spin using mushrooms, the options are endless.
Freezer-Friendly: Prep them in advance, stash them in your freezer, and enjoy these mouthwatering bites whenever you crave a snack.
Quick to Make: Whip these up in no time—ideal for last-minute gatherings or game day feasts. Pair them with Garlic Rolls Every for an indulgent spread!
Crowd-Pleaser: Perfectly portioned, these appetizers are sure to impress friends and family alike, making them a hit at any party.
Garlic Parmesan Cheeseburger Bombs Ingredients
For the Filling
- Ground Beef – The main protein source; substitute with turkey or plant-based meat for lighter options.
- Shredded Cheese – Adds creaminess and flavor; use cheddar or pepper jack for a spicy kick.
- Minced Garlic – Essential for flavor enhancement; fresh garlic maximizes aroma and taste.
- Fresh Parsley – Optional for garnish; omit or substitute with other herbs if desired.
For the Dough
- Biscuit Dough – Provides the outer shell; can be replaced with crescent dough for a different texture.
For the Topping
- Butter – Adds richness and moisture; unsalted is recommended to better control seasoning.
- Parmesan Cheese – Crisps up beautifully during baking; use vegan alternatives for a dairy-free option.
These Garlic Parmesan Cheeseburger Bombs combine beloved flavors in a perfect package!
Step‑by‑Step Instructions for Garlic Parmesan Cheeseburger Bombs
Step 1: Preheat and Prepare
Begin by preheating your oven to 375°F (190°C). While the oven warms up, line a baking sheet with parchment paper to avoid sticking. This simple preparation ensures your Garlic Parmesan Cheeseburger Bombs come out perfectly golden without mess—keeping your kitchen both tidy and efficient as you cook.
Step 2: Cook the Ground Beef
In a skillet over medium heat, add the ground beef and cook for 7-10 minutes, breaking it apart with a spatula. Stir occasionally until it’s browned and no longer pink. Once cooked, drain excess fat, and season to your liking. This flavorful beef serves as the heart of your bombs, so be generous with the seasoning for an irresistible filling.
Step 3: Melt the Cheese
After draining, stir in the shredded cheese with the cooked ground beef until it melts completely, creating a gooey, cheesy mixture. Allow this filling to cool for a few minutes, preventing soggy biscuit dough. Cooling is essential for keeping the bombs intact while baking, ensuring a delightful experience with every bite of your Garlic Parmesan Cheeseburger Bombs.
Step 4: Prepare the Biscuit Dough
On a floured surface, flatten each biscuit round to approximately 4 inches in diameter. This is crucial for forming the perfect outer shell of your bombs. The dough should be rolled evenly, creating a sturdy base to hold the cheesy beef filling. Take your time with this step to achieve the right thickness for delicious results.
Step 5: Fill the Dough
Spoon about a tablespoon of your beef and cheese mixture into the center of each dough round. Carefully pinch the edges together, sealing the filling inside like a little treasure. Make sure to seal them well, as this helps prevent the cheese from oozing out during baking, leading to perfectly encapsulated Garlic Parmesan Cheeseburger Bombs that burst with flavor!
Step 6: Arrange on Baking Sheet
Place the sealed bombs seam-side down on the prepared baking sheet, allowing space between each for expansion during baking. This arrangement is vital for getting that lovely crispy texture all around each bomb. Visualize a beautiful spread as they puff up and turn golden brown in the oven, creating a wonderful snack for your gathering.
Step 7: Prepare Garlic Butter Mixture
In a small saucepan, melt the butter over low heat, then mix in minced garlic and fresh parsley. Brush this aromatic mixture generously over each bomb before baking. This step infuses your Garlic Parmesan Cheeseburger Bombs with rich flavor and enticing fragrance, making it hard for anyone to resist them!
Step 8: Add Parmesan Topping
Sprinkle freshly grated Parmesan cheese on top of each bomb, ensuring an even coat. This not only enhances flavor but also contributes to a lovely crispy topping when baked. The combination of garlic butter and Parmesan promises to elevate your snacks, turning them into a decadent treat that everyone will adore.
Step 9: Bake to Perfection
Place your baking sheet in the oven and bake for 15-18 minutes, or until the bombs are puffed up and golden brown. Keep an eye on them to achieve the perfect doneness. The aroma wafting through your kitchen will be mouthwatering, ensuring your guests will eagerly await these delicious Garlic Parmesan Cheeseburger Bombs.
Step 10: Cool and Serve
Once baked, allow the bombs to cool slightly on a wire rack before serving. This cooling period helps the cheesy filling set a bit, making them even more enjoyable to eat. Pair these delightful bites with your favorite dipping sauces—like creamy ranch or spicy sweet chili sauce— for a complete snacking experience that satisfies every craving.
Expert Tips for Garlic Parmesan Cheeseburger Bombs
-
Cool the Filling: Allow your beef and cheese mixture to cool before filling the dough. This prevents the bombs from bursting during baking and ensures a nice texture.
-
Perfect Portioning: Stick to about a tablespoon of filling per bomb. Overstuffing can lead to messy outcomes, so be cautious.
-
Dough Type Matters: If using biscuit dough, be aware of potential allergens. Consider crescent dough as a tasty alternative for unique texture variations.
-
Crispy Final Touch: For optimal texture, reheat baked bombs in the oven rather than the microwave. This helps retain their crispiness.
-
Garnish Wisely: Fresh parsley adds a lovely flavor, but if you don’t have it on hand, feel free to use dried herbs or omit it. You’ll still enjoy these Garlic Parmesan Cheeseburger Bombs!
What to Serve with Garlic Parmesan Cheeseburger Bombs
There’s nothing quite like a cozy meal built around these delightful bites, creating the perfect symphony of flavors and textures.
-
Creamy Coleslaw: This crunchy, tangy side adds a refreshing contrast to the richness of the bombs, balancing each bite beautifully. The crispness of the cabbage pairs well with the warm, gooey filling.
-
Garlic Knots: These soft, buttery bites are a natural companion to the cheeseburger bombs, echoing their savory garlic flavor while providing a delightful chewiness. Serve with marinara for a dipping option!
-
Loaded Nachos: Top tortilla chips with cheese, jalapeños, and sour cream for a fun, shareable platter that complements the handheld nature of the bombs. A perfect party food with similar bold flavors.
-
Steamed Broccoli: For a lighter option, bright green broccoli adds a pop of color and a nutritious touch to your meal. Drizzle with lemon juice for an zesty lift that pairs well with the rich cheeseburger flavors.
-
Spicy Sweet Chili Sauce: Serve as a dipping option, adding a touch of heat and sweetness that elevates the experience of enjoying each bomb. The contrast enhances the buttery garlic notes wonderfully!
-
Beer or Cider: A cold lager or crisp apple cider offers a refreshing sip alongside your bombs. The carbonation will cleanse your palate, making each bite even more enjoyable.
Each of these pairings creates a delightful dining experience that invites friends and family to gather around the table with joy!
How to Store and Freeze Garlic Parmesan Cheeseburger Bombs
Fridge: Store any leftovers in an airtight container for up to 3 days. This keeps your Garlic Parmesan Cheeseburger Bombs fresh and ready to enjoy anytime.
Freezer: Freeze uncooked bombs before baking for up to 2 months. Arrange them on a baking sheet until frozen solid, then transfer to a freezer-safe bag to save space.
Reheating: For best results, reheat baked bombs in the oven at 350°F (175°C) for about 10-15 minutes to restore their crispy texture. Microwaving may result in a soggy crust.
Thawing: If freezing before baking, simply bake from frozen, adding an extra few minutes to the cooking time for those crispy, golden bites you love!
Make Ahead Options
These Garlic Parmesan Cheeseburger Bombs are a fantastic choice for meal prep enthusiasts! You can prepare the filling with ground beef, cheese, and garlic up to 3 days in advance; simply store it in an airtight container in the refrigerator. Additionally, you can assemble the bombs and refrigerate them for up to 24 hours before baking—just be sure to cover them tightly to maintain moisture and prevent the dough from drying out. When you’re ready to serve, brush the bombs with garlic butter, sprinkle with Parmesan, and bake as directed. This way, you’ll enjoy delicious, ready-to-eat snacks with minimal effort, perfect for busy weeknights or last-minute gatherings!
Garlic Parmesan Cheeseburger Bombs Variations
Feel free to personalize your Garlic Parmesan Cheeseburger Bombs with these fun and creative twists that will tantalize your taste buds!
-
Dairy-Free: Use vegan cheese alternatives for the filling to make it completely dairy-free while still maintaining that gooey texture. You’ll barely miss the real thing!
-
Spicy Kick: Add diced jalapeños or crushed red pepper flakes into the meat mixture for a fiery flavor that will satisfy spice lovers. This twist is perfect for those seeking an adventurous bite!
-
Vegetarian: Replace the ground beef with sautéed mushrooms, chickpeas, or caramelized onions for a deliciously rich umami experience. It’s a perfect way to delight vegetarian friends!
-
Bacon Lovers: Mix in crispy, cooked bacon bits with the cheesy beef filling for an added burst of smokiness and flavor; because who can resist bacon, right?
-
Mini Bombs: For bite-sized delights, simply cut each biscuit in half before filling, creating adorable mini bombs that are perfect for appetizers or parties.
-
Herb Infusion: Add fresh herbs like dill or thyme to either the filling or the garlic butter drizzle for another level of fragrant flavor that complements the cheeseburger taste.
-
Italian Style: Use pepperoni in place of ground beef and add Italian seasoning to create a pizza-inspired version. Dip these bombs in a marinara sauce to complete the flavor profile!
As you experiment with these variations, you may find it helpful to pair your creations with some delicious sides, like Garlic Rolls Every or some smooth Creamy White Garlic Pizza Sauce.
Garlic Parmesan Cheeseburger Bombs Recipe FAQs
How do I select ripe ingredients for my Garlic Parmesan Cheeseburger Bombs?
Absolutely! When it comes to fresh ingredients, opt for ground beef that is bright red without any dark spots, indicating freshness. If using garlic, choose bulbs that are firm and skin that is papery—as fresh as it gets! For the herbs, look for bright green parsley, free of wilting or browning.
What is the best way to store leftover Garlic Parmesan Cheeseburger Bombs?
Leftovers should be stored in an airtight container in the fridge for up to 3 days. Make sure they’re cooled down completely before sealing them to maintain their texture. If you’re looking to keep them longer, freezing is a great option!
Can I freeze Garlic Parmesan Cheeseburger Bombs?
Yes, you can! Prepare the bombs, but before baking, arrange them on a baking sheet, freeze them until solid (about 2 hours), and then transfer them to a freezer-safe bag. They can be frozen for up to 2 months. When you’re ready to enjoy, you can bake them straight from frozen; just add a few extra minutes to the cooking time.
What should I do if my bombs are bursting during baking?
Very good question! If your Garlic Parmesan Cheeseburger Bombs are bursting, the filling might be too hot when you seal them. Ensure you let the beef and cheese mixture cool for a few minutes before assembling. Additionally, stick to about a tablespoon of filling per bomb to avoid overstuffing!
Are there any dietary considerations for Garlic Parmesan Cheeseburger Bombs?
Absolutely! For those needing dairy-free options, simply use vegan cheese alternatives instead of traditional cheese and butter. If you or anyone in your household has allergies, always check the ingredients on packaged items like biscuit dough, as they may contain allergens.
How can I ensure my baked bombs stay crispy after cooking?
Great question! To maintain that delightful crispiness, reheat baked Garlic Parmesan Cheeseburger Bombs in the oven instead of the microwave. Preheat your oven to 350°F (175°C) and bake for about 10-15 minutes. This way, they’re piping hot while keeping their perfect texture!
Garlic Parmesan Cheeseburger Bombs: The Ultimate Snack Delight
Ingredients
Equipment
Method
- Preheat your oven to 375°F (190°C) and line a baking sheet with parchment paper.
- Cook the ground beef in a skillet over medium heat for 7-10 minutes until browned. Drain excess fat and season.
- Stir in the shredded cheese until it melts completely, then let the filling cool.
- Flatten each biscuit round to approximately 4 inches in diameter.
- Spoon about a tablespoon of beef and cheese mixture into the center of each dough round and seal.
- Place the sealed bombs seam-side down on the prepared baking sheet, leaving space between each.
- Melt butter over low heat, then mix in minced garlic and fresh parsley. Brush over each bomb.
- Sprinkle Parmesan cheese on top of each bomb.
- Bake for 15-18 minutes or until puffed and golden brown.
- Allow to cool slightly on a wire rack before serving.
Leave a Reply