
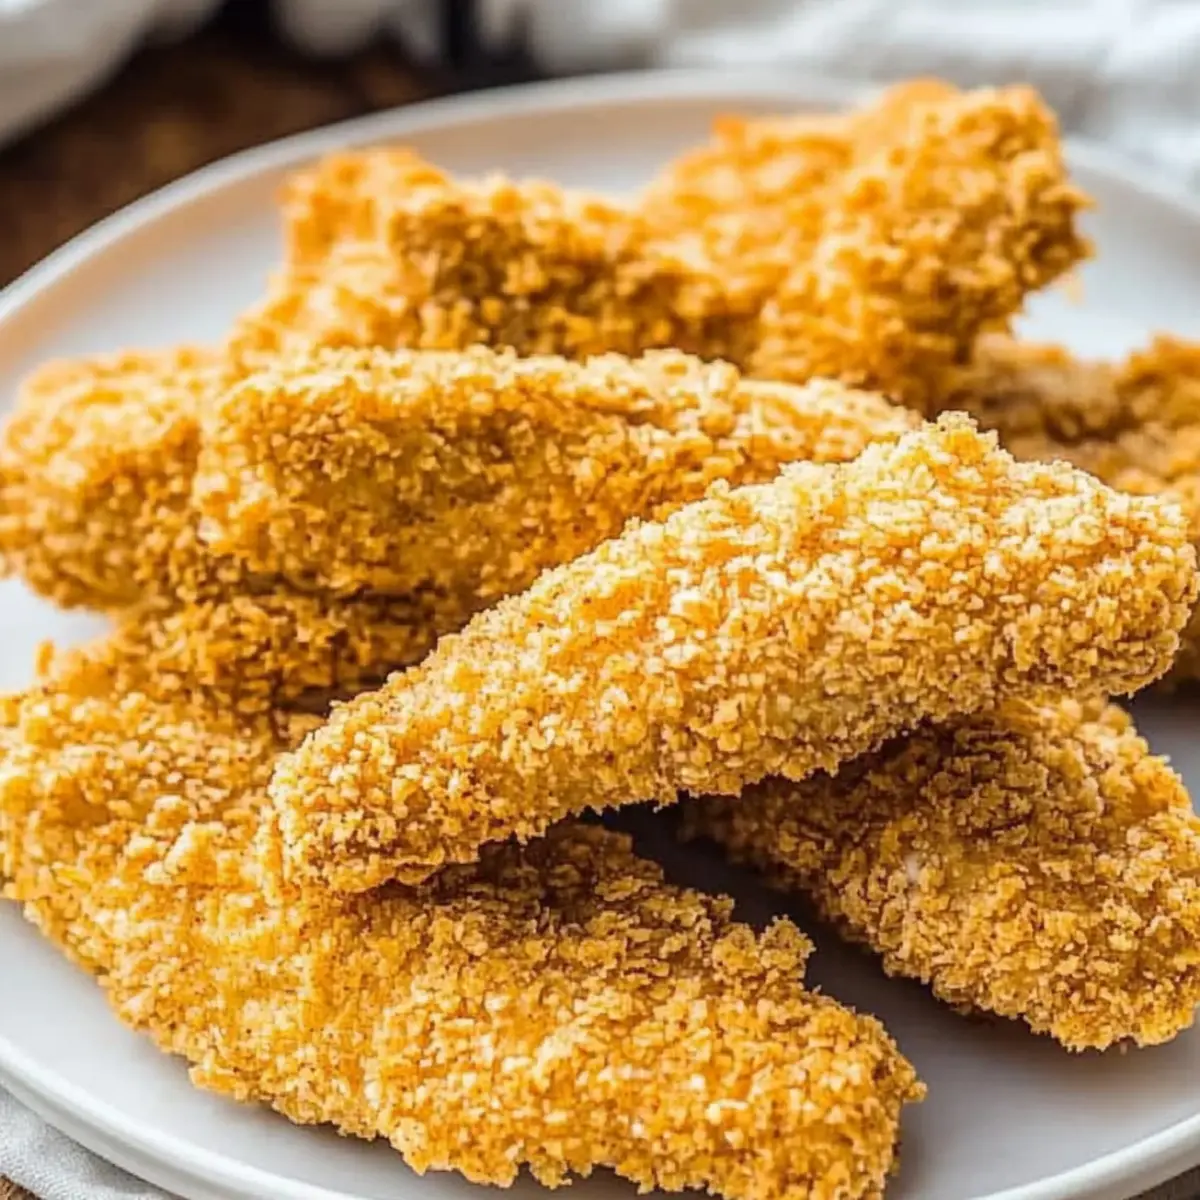
“Did you hear that everyone’s talking about the crunch?” Well, it’s time to join the conversation with my Oven-Baked Crunchy Chicken Tenders! Set your frying pans aside, because these tenders pack a satisfying crunch without any frying—making them an incredibly easy, family-friendly dish that’s sure to impress. Whether you’re whipping them up for a quick weeknight dinner, packing them in a lunchbox, or serving them as game day snacks, they offer the versatility to fit any occasion. Plus, they’re a healthier twist on a classic favorite, ensuring you won’t sacrifice flavor for convenience. So, who’s ready to dive into the delicious world of crunchy chicken goodness? Let’s get cooking!

Why Are These Chicken Tenders Irresistible?
Guilt-Free Crunch: Enjoy all the crunch you crave without the guilt of frying! These tenders are oven-baked, keeping calories in check while delivering on flavor.
Quick and Easy: With a straightforward method, even beginner cooks can whip up a delicious meal in no time.
Versatile Delight: Customize with spices or serve them with various dips for a unique twist each time. Perfect as a family meal or party appetizer!
Family-Friendly Fun: Kids adore them, making dinner time a breeze. Serve alongside some veggies or tuck them into a tortilla for crunchy chicken tacos!
Crispy Coating: Thanks to panko breadcrumbs, you get that sought-after crunch that’s usually only achievable with frying, all while keeping it healthy. For those craving more chicken adventures, check out my Firecracker Chicken Spicy recipe for flavor-packed options!
Crunchy Chicken Tenders Ingredients
• Dive into the simplicity of these crunchy chicken tenders with the following ingredients!
For the Chicken
- 600g Chicken Tenderloins (~21oz) – The main protein source, or substitute with boneless, skinless chicken breasts cut into strips if needed.
For the Coating
- 1 ½ – 3 teaspoons Salt – Enhances flavor and promotes juiciness; adjust based on dry brining (use less if dry brining).
- 2 ½ cups Panko Breadcrumbs – Provides the perfect crunchy texture; can substitute with regular breadcrumbs, but expect a different crunch.
- 2 tablespoons Oil (40ml) – Binds the breadcrumbs and achieves that golden color; use olive oil or melted butter for variations.
- ½ cup All-Purpose Flour – Helps the coating adhere better; gluten-free flour can be used as a substitute.
- 2 large Eggs – Acts as a binder for the coating; no substitutes suggested for binding.
- 2 tablespoons Water (40ml) – Adjusts the consistency of the batter for coating.
For Flavor
- 1 teaspoon Onion Powder – Adds depth of flavor; alternative: garlic powder for a bolder taste.
- ¼ teaspoon Garlic Powder – Enhances overall taste; omit for a milder flavor.
- ¼ teaspoon Ground Black Pepper – A classic seasoning for taste; add more for an extra kick.
Step‑by‑Step Instructions for Crunchy Chicken Tenders
Step 1: Brine the Chicken (Optional)
Begin by mixing the chicken tenderloins with the salt in a bowl, ensuring all pieces are thoroughly coated. Cover and refrigerate for 30-40 minutes. This step enhances the meat’s juiciness, but remember to rinse the chicken under cold water afterward to remove excess salt, ensuring a perfectly seasoned Crunchy Chicken Tenders finish.
Step 2: Toast the Breadcrumbs
Preheat your oven to 180°C (350°F). In a mixing bowl, combine the panko breadcrumbs and oil, stirring until the crumbs are evenly coated. Spread the mixture onto a baking sheet in a single layer and place it in the oven. Bake for 8-10 minutes, stirring halfway through, until the breadcrumbs are golden brown and aromatic, ready to add crunch to your chicken tenders.
Step 3: Prepare the Batter
In a large bowl, whisk together the eggs, water, flour, onion powder, garlic powder, and pepper until you achieve a smooth consistency. This batter will serve as the glue for the coating on your Crunchy Chicken Tenders. If you chose to brine the chicken, feel free to omit any additional salt to maintain a balanced flavor.
Step 4: Coat the Chicken
Take the chicken tenderloins and dip each piece into the prepared batter, allowing any excess to drip off. Next, transfer the battered chicken into the toasted panko breadcrumbs, gently pressing down to ensure an even coating. This step is crucial for achieving that delightful crunch that makes these chicken tenders stand out!
Step 5: Bake the Tenders
Line a baking sheet with parchment paper and arrange the coated chicken tenders in a single layer, ensuring they’re not touching. Preheat your oven to 200°C (400°F) and bake the tenders for 10-12 minutes. The tenders are ready when they reach an internal temperature of 74°C (165°F) and are golden brown, signaling a perfect Crunchy Chicken Tenders experience.
Step 6: Serve and Enjoy
Once baked, remove your chicken tenders from the oven and let them cool slightly. Serve them hot, paired with your favorite dips like sweet chili sauce or ranch dressing. These crunchy chicken tenders make for a fantastic quick meal or a delightful snack that everyone will love.
Crunchy Chicken Tenders Variations
Feel free to explore these delicious ideas and make the recipe your own!
- Spicy Twist: Add cayenne pepper to the coating for a kick. Perfect for those who love a little heat in every bite!
- Herb-Infused: Mix fresh herbs like parsley or thyme into the panko for fragrant, garden-fresh flavor. This adds a new layer of taste, celebrating what’s in season.
- Cheesy Delight: Sprinkle grated parmesan cheese into the breadcrumb mixture for a savory, rich finish. Cheese lovers will rejoice over this added depth!
- Asian Fusion: Replace the onion and garlic powder with five-spice powder and serve with soy sauce or sweet chili sauce. It’s a delightful way to switch things up!
- Vegetarian Version: Swap the chicken for zucchini or eggplant strips for a crunchy veggie alternative that’s just as satisfying. Kids and adults alike won’t even miss the chicken!
- BBQ Flavor: Brush the chicken tenders with your favorite BBQ sauce before coating to infuse it with smoky sweetness. It makes for a perfect summer treat!
- Southwestern Style: Add taco seasoning to the breadcrumbs for a Tex-Mex flair. Perfect served in tortillas with salsa, just like my Taco Bell Chicken recipe!
No matter which variation you choose, you’re sure to create a dish that your family will rave about!
Make Ahead Options
These Crunchy Chicken Tenders are a fantastic choice for busy evenings, allowing you to save time with some simple preparations! You can prepare the chicken tenders up to 24 hours in advance by breading them and refrigerating them in an airtight container. To maintain their crispy texture, it’s best to bake them fresh just before serving; however, if you’re feeling particularly efficient, you can also freeze the uncooked coated tenders in layers separated by parchment paper for up to 3 months. When you’re ready to enjoy, simply bake straight from frozen at 200°C (400°F) for an additional few minutes, and you’ll have delicious, crispy chicken tenders ready to impress your family with minimal effort!
Storage Tips for Crunchy Chicken Tenders
Fridge: Store cooked Crunchy Chicken Tenders in an airtight container for up to 3-4 days. This keeps them fresh while making it easy to enjoy leftovers.
Freezer: To keep them longer, freeze uncooked tenders layered between parchment paper. They can be stored for up to 3 months before cooking.
Reheating: For the best results, reheat in the oven or air fryer at 180°C (350°F) for about 10 minutes to restore their delightful crunch.
Room Temperature: If serving at a gathering, keep the chicken tenders at room temperature for no more than 2 hours for food safety.
What to Serve with Oven-Baked Crunchy Chicken Tenders
To elevate your dining experience, consider these delightful pairings that truly complement the tantalizing flavors of your chicken tenders.
-
Creamy Mashed Potatoes: These buttery, fluffy potatoes are a comforting side that balances the crunchiness of the tenders perfectly. Their creamy texture invites you to savor each bite as they soak up your favorite sauces.
-
Fresh Garden Salad: A crisp salad with mixed greens, colorful veggies, and a tangy vinaigrette adds essential freshness and brightness to the meal. Each crunchy bite of salad provides a refreshing contrast to the tenders’ satisfying crunch.
-
Sweet Potato Fries: Baked or air-fried, these sweet, tender fries are a wonderful alternative to traditional sides. The natural sweetness pairs beautifully with the savory tenders, creating a harmony of flavors that everyone will love.
-
Crispy Roasted Vegetables: Toss seasonal veggies like carrots, zucchini, and bell peppers with olive oil and cozy spices, then roast until tender and crispy. Their earthy flavors amplify the crunch factor while adding healthy nutrients to your meal.
-
Honey Mustard Dipping Sauce: Whip up a quick dip with equal parts honey and mustard for a sweet and tangy accompaniment that contrasts beautifully with the chicken tenders’ crunchiness. It’s the perfect way to add an extra burst of flavor!
-
Sparkling Lemonade: A refreshing drink that’s both fizzy and tangy, sparkling lemonade is an ideal way to cleanse your palate while enjoying your meal. The vibrant citrus notes can brighten any dinner table and keep everyone feeling lively.
Expert Tips for Crunchy Chicken Tenders
-
Dry Brining Is Key: Don’t skip the dry brining if you want juicy chicken. Limit the time to 30-40 minutes to prevent over-salting.
-
Breadcrumb Toasting: Make sure to toast your panko breadcrumbs until golden brown. This extra step enhances the crunch factor of your chicken tenders.
-
Don’t Rush the Coating: Allow excess batter to drip off before rolling in the breadcrumbs. This ensures a thicker, more satisfying crunchy coating on your tenders.
-
Uniform Size Matters: Cut chicken into uniform strips for even cooking. This helps all pieces cook through at the same rate, avoiding undercooked spots.
-
Perfect Baking Temperature: Use the right oven temperature of 200°C (400°F) to achieve crispy tenders. Avoid overcrowding the baking sheet for optimal air circulation.
Crunchy Chicken Tenders Recipe FAQs
What kind of chicken should I use?
Absolutely! You can use 600g of chicken tenderloins, which are perfect for achieving tenderness and juiciness. If you can’t find them, boneless, skinless chicken breasts cut into strips work just as well!
How should I store cooked chicken tenders?
After cooking, make sure to store your Crunchy Chicken Tenders in an airtight container in the fridge for up to 3-4 days. Reheating them in the oven or air fryer at 180°C (350°F) for about 10 minutes helps retain that delightful crunch!
Can I freeze the chicken tenders?
Certainly! To freeze uncooked Crunchy Chicken Tenders, layer them between sheets of parchment paper and place them in a freezer-safe container. They can be stored for up to 3 months. When you’re ready to cook, bake them straight from the freezer, adjusting the cooking time as needed.
What if my coating isn’t crunchy enough?
Fear not! If your coating isn’t as crunchy as you’d like, ensure you’re toasting the panko breadcrumbs to a golden brown before applying them. A fine coating of batter is also crucial; make sure to let any excess batter drip off before rolling in breadcrumbs. This allows for a thick, satisfying crunchy layer!
Are these chicken tenders pet-friendly?
Not quite! While chicken is generally fine for pets, remember that these tenders contain additional ingredients like salt, flour, and seasonings that may not be suitable for them. Always stick to plain, cooked chicken for your furry friends!
Oven-Baked Crunchy Chicken Tenders for Guilt-Free Indulgence
Ingredients
Equipment
Method
- Mix the chicken tenderloins with the salt in a bowl and refrigerate for 30-40 minutes.
- Preheat oven to 180°C (350°F) and bake the panko breadcrumbs mixed with oil for 8-10 minutes.
- Whisk together eggs, water, flour, onion powder, garlic powder, and pepper until smooth.
- Dip chicken in the batter, then coat with toasted panko breadcrumbs.
- Bake the coated tenders on a parchment-lined sheet at 200°C (400°F) for 10-12 minutes.
- Remove from oven, let cool slightly, and serve with favorite dips.
Leave a Reply