
As I sift through my memories of summer treats, the creamy bliss of Dairy Queen’s Buster Bars stands out. Today, I’m excited to share a healthier take on these nostalgic delights—introducing Healthy No-Bake Peanut Butter Buster Bars! With just around 200 calories each and over 15 grams of protein, these bars are perfect for satisfying those sweet cravings without the guilt. What makes them even better is their three-ingredient simplicity and no-bake magic, ensuring that you’ll be enjoying this rich, peanut buttery goodness in no time. Plus, they’re customizable for various dietary needs, including vegan and keto diets. Are you ready to dive into this homemade treat that blends nostalgia with health? Let’s get started!
Why Are Buster Bars So Irresistible?
Indulgent yet Healthy: These no-bake peanut butter Buster Bars offer a guilt-free answer to your sweet tooth cravings, proving that you don’t need to sacrifice health for flavor.
Quick to Make: With a straightforward process, you can whip these up in just moments—ideal for busy schedules.
Versatile Options: You have the freedom to customize ingredients to suit your dietary needs, whether you prefer vegan or keto options!
Rich Flavor Profile: The mouthwatering combination of creamy peanut butter and rich chocolate creates a satisfying experience that will have you coming back for more.
Perfect for Sharing: Need a crowd-pleaser? These bars are sure to impress at any gathering, making them a fantastic choice for parties or picnics.
For more delicious and healthy treats, check out our tips on creating delightful no-bake desserts.
Buster Bars Ingredients
For the Base
- Yogurt – Use Greek yogurt for a higher protein content; substitute with any non-dairy option for a dairy-free version.
- Peanut Butter – Rich in flavor and protein; consider almond, cashew, or seed butter for nut allergies.
For Sweetening
- Sweetener – Choose from sugar, maple syrup, honey, or sugar-free options like stevia; adjust to your yogurt’s sweetness level.
For the Chocolate Coating
- Chocolate Chips – Regular or dairy-free chocolate chips work for a vegan-friendly option; these create the delicious outer layer.
- Coconut Oil (optional) – Helps achieve a smooth chocolate coating; can be omitted for a thicker shell.
For Crunch (optional)
- Peanuts – Adds an extra crunchy texture, or swap with another nut or omit entirely for a nut-free treat.
With these simple ingredients, you’re just a few steps away from creating your own delectable Buster Bars!
Step‑by‑Step Instructions for Buster Bars
Step 1: Prepare the Base Mixture
In a mixing bowl, combine yogurt, peanut butter, and your choice of sweetener. Whip together using a whisk or electric mixer until the mixture reaches a smooth and creamy consistency, which should take about 2-3 minutes. This creamy base will serve as the heart of your Buster Bars, ensuring a deliciously rich texture.
Step 2: Mix in Chocolate Chips
Now, fold in the mini chocolate chips for added texture and sweetness. Use a spatula to gently incorporate the chips into the peanut butter mixture, being careful not to break them apart. This step enhances the flavor and keeps that delightful chocolate burst in every bite of your Buster Bars.
Step 3: Form the Bars
Line a baking tray with parchment paper to prevent sticking. Using a spoon or ice cream scoop, drop generous spoonfuls of the mixture onto the lined tray, spacing them out evenly. Insert popsicle sticks into each mound, then use a spatula to smooth the tops, creating a uniform shape for your Buster Bars.
Step 4: Freeze to Set
Place the tray in the freezer for about 2 to 3 hours, or until the bars are firm and easily hold their shape. This freezing step is crucial, as it allows the flavors to meld together while ensuring a solid base for coating, reminiscent of the classic Dairy Queen treat.
Step 5: Melt the Chocolate Coating
While the bars are freezing, melt the chocolate chips in a microwave-safe bowl in 20-30 second intervals, stirring between each burst until silky smooth. If desired, stir in a little coconut oil to help achieve a more pourable consistency. This melted chocolate will create a luscious coating for your Buster Bars.
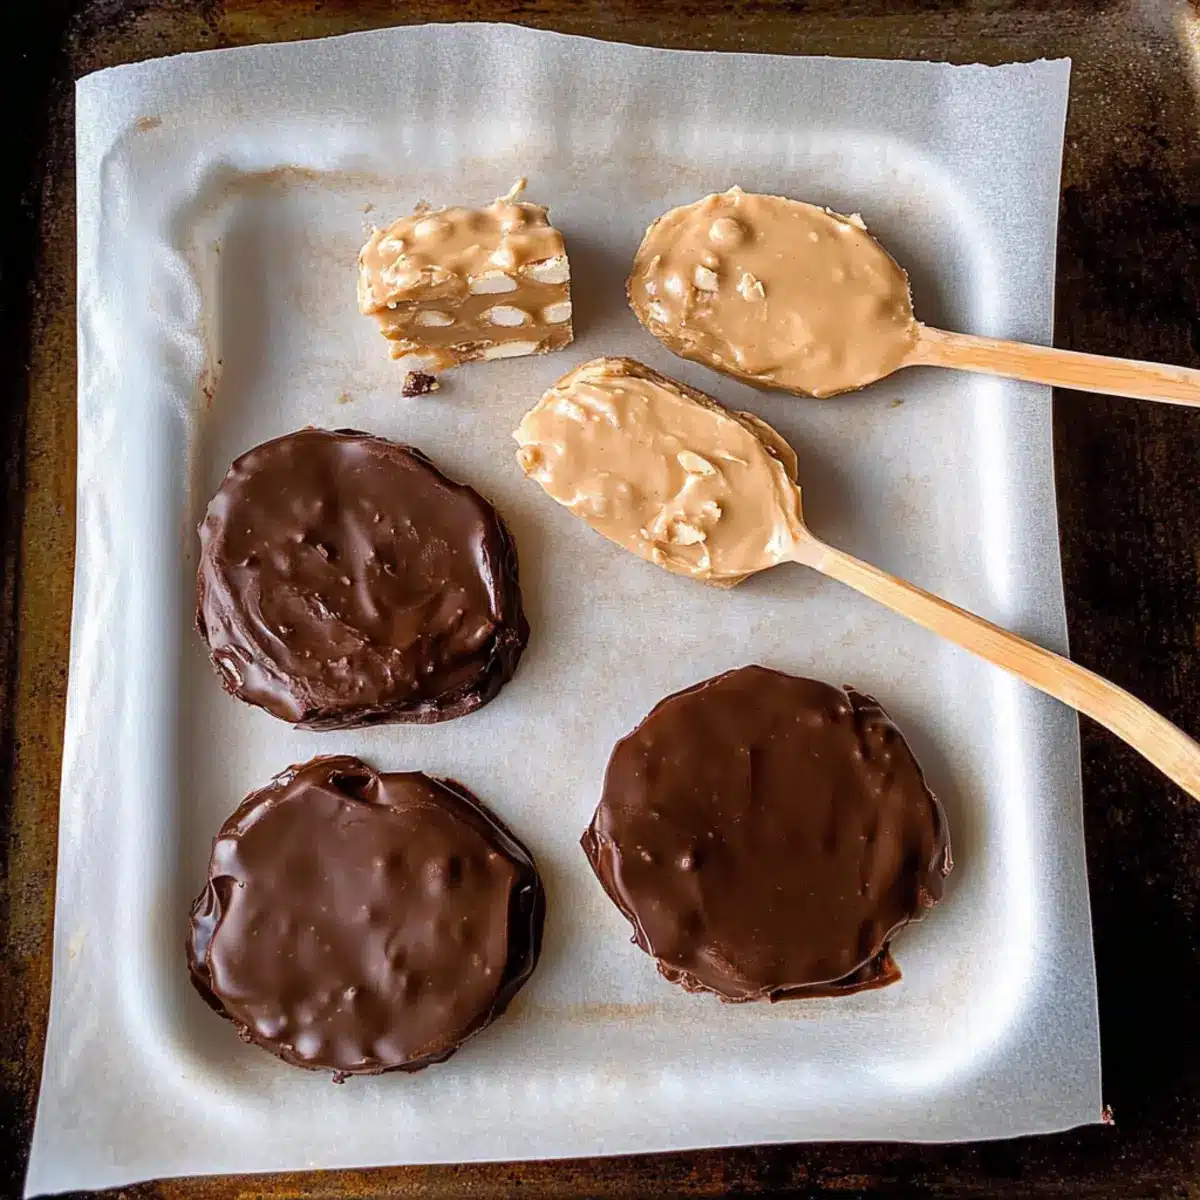
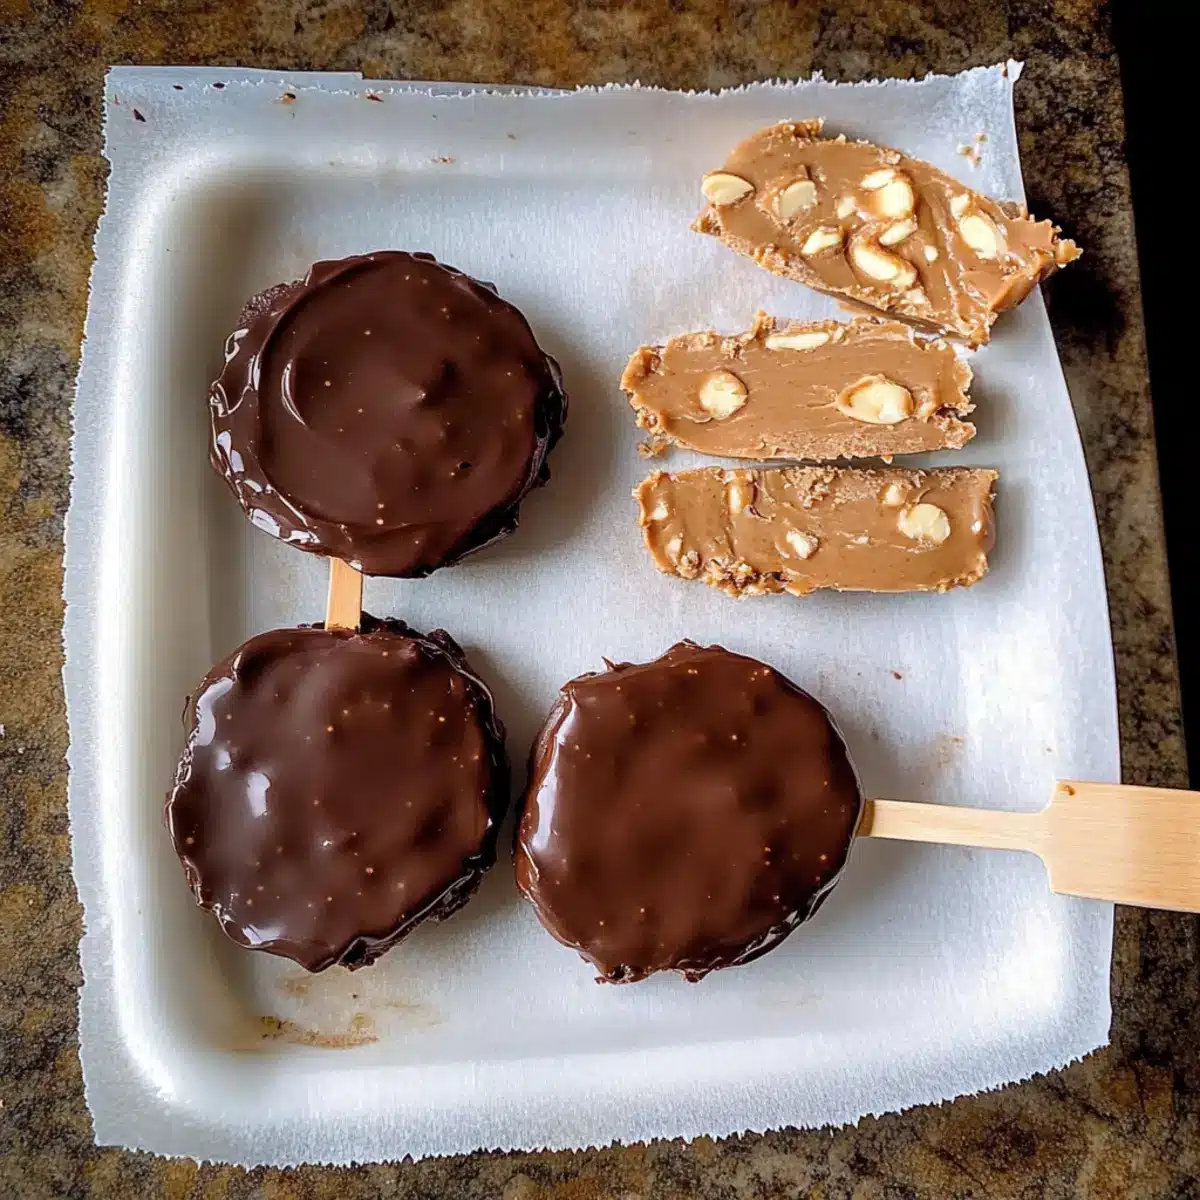
Step 6: Dip the Frozen Bars
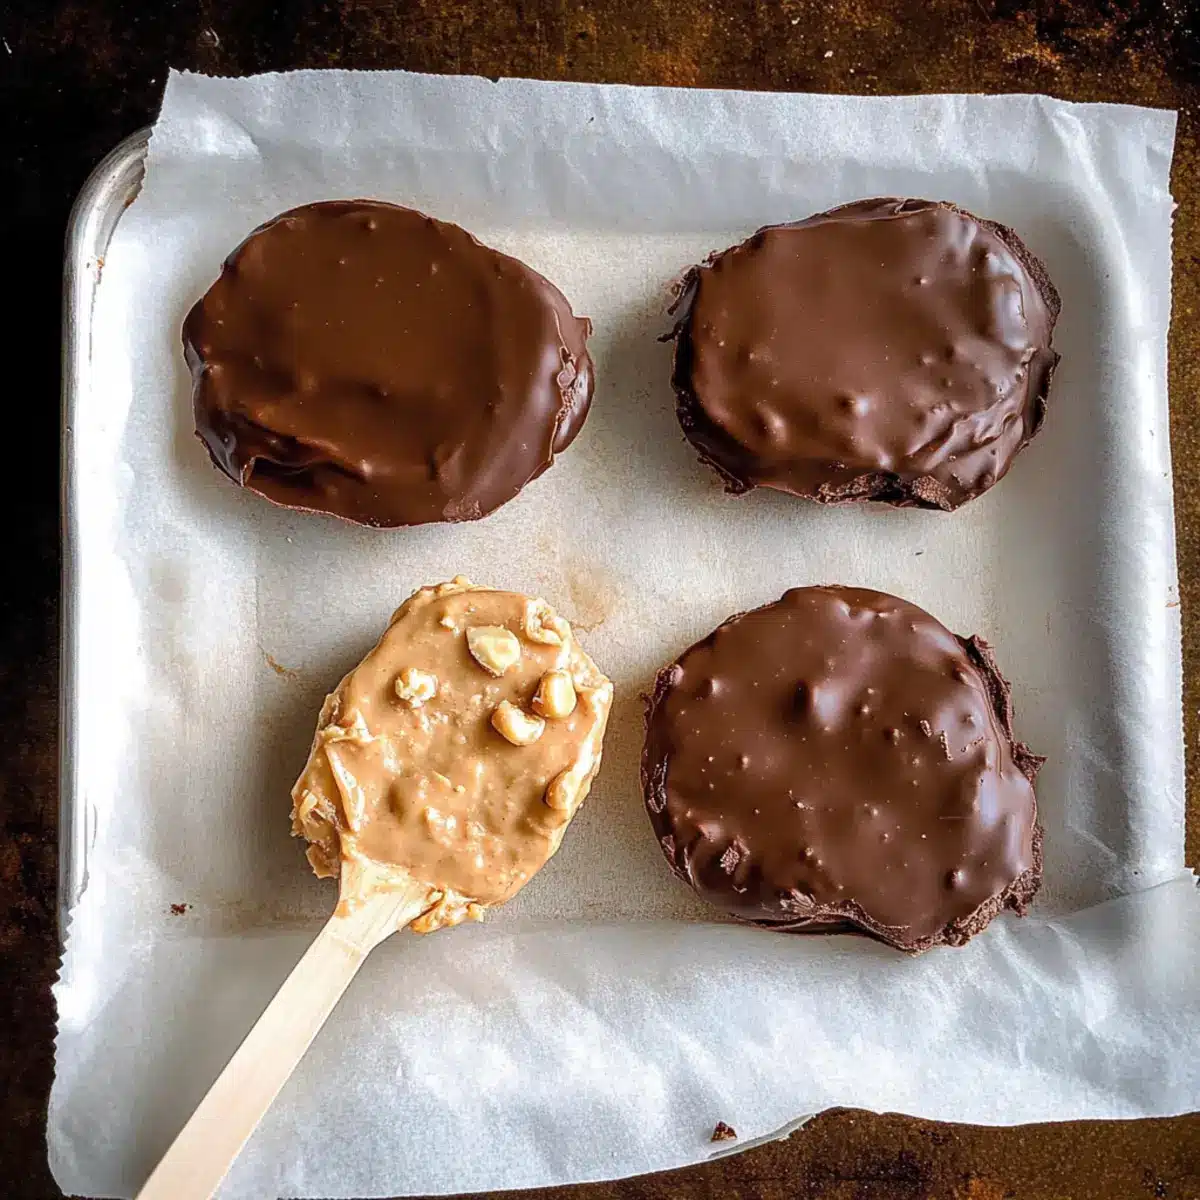
Carefully remove the firm bars from the freezer and dip each one into the melted chocolate, coating it completely. Allow any excess chocolate to drip off before placing the coated bars back onto the parchment-lined tray. This chocolate shell will provide a delightful contrast to the creamy filling of your Buster Bars.
Step 7: Freeze to Set the Coating
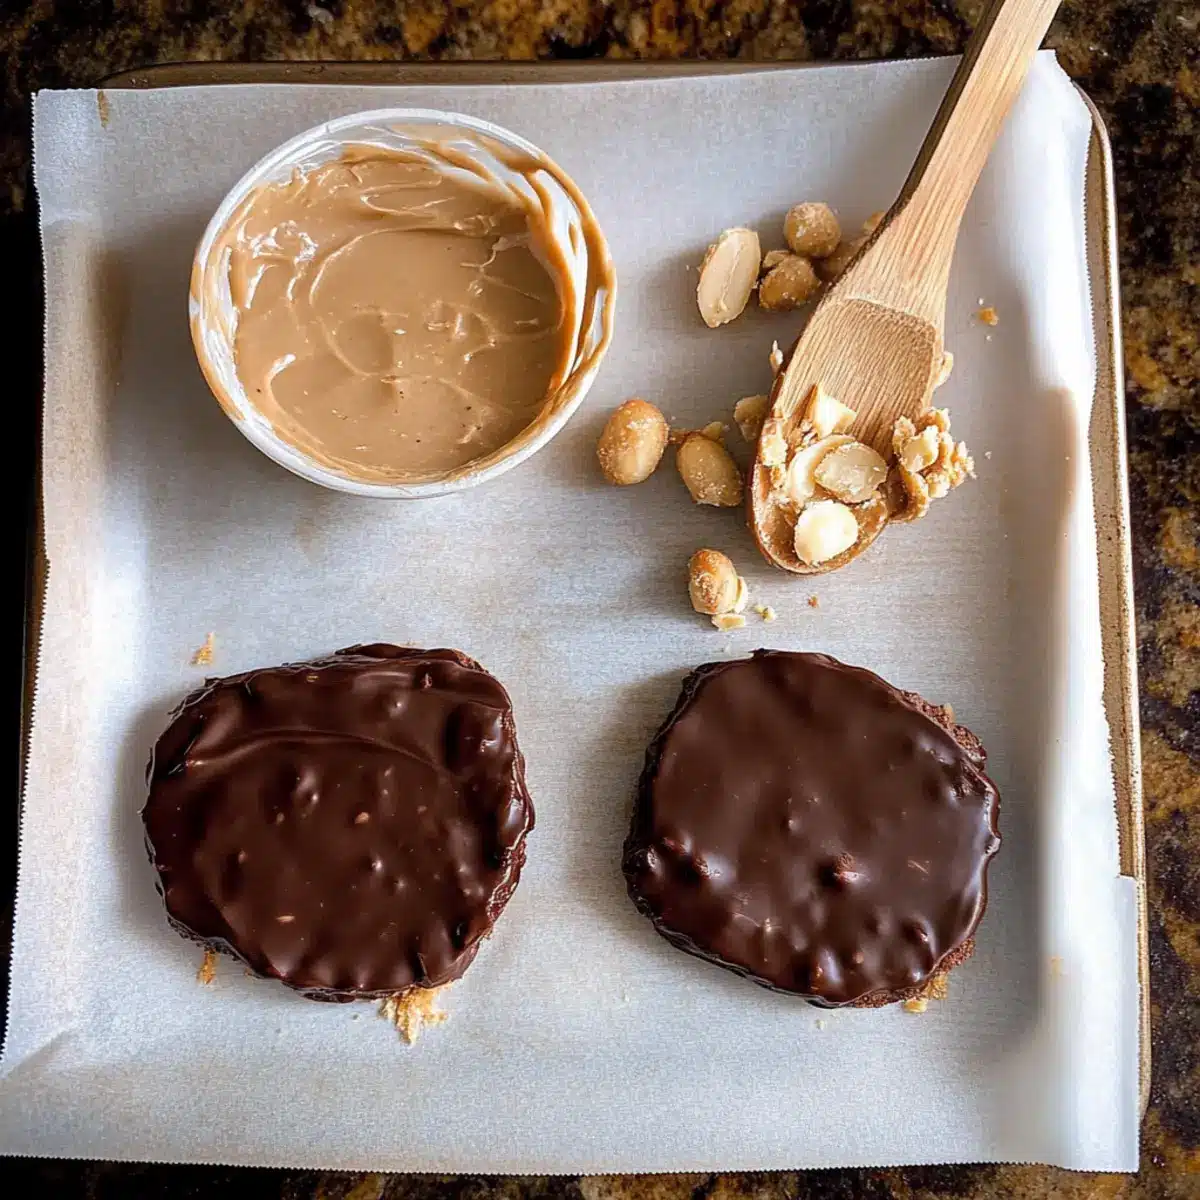
Return the chocolate-dipped bars to the freezer and let them chill for an additional 30 minutes to set the chocolate coating. Once fully firm, the Buster Bars will be ready to delight your taste buds and showcase that delectable crunch and smooth richness you crave.
Step 8: Serve and Enjoy
Your homemade Buster Bars are now ready to be served! Cut or break them into individual pieces if desired, and enjoy these guilt-free treats as a delightful snack or dessert. Store any leftovers in a covered container in the freezer for future enjoyment.
Make Ahead Options
These Healthy No-Bake Peanut Butter Buster Bars are perfect for meal prep enthusiasts! You can prepare the base mixture (yogurt, peanut butter, and sweetener) up to 24 hours in advance; just store it in an airtight container in the refrigerator to maintain its creamy texture. Additionally, once you’ve formed the bars and inserted the popsicle sticks, you can freeze them for up to 3 days before dipping them in chocolate. When ready to finish, simply melt your chocolate chips, dip the frozen bars, and return them to the freezer to set the coating. This way, you’ll have delicious Buster Bars ready to satisfy your sweet tooth with minimal effort!
Expert Tips for Perfect Buster Bars
-
Whip Well: Ensure your yogurt is fully whipped for a smooth texture. This step is key to achieving that luscious creaminess in your Buster Bars.
-
Adjust Sweetness: If using unsweetened yogurt, tweak the sweetener to prevent the bars from being too tangy. A little sweetness goes a long way!
-
Melt Carefully: When melting chocolate, use short bursts in the microwave to avoid overheating. Stir regularly for a smooth finish—your Buster Bars deserve it!
-
Cooling Time: Allow bars to cool slightly after chocolate dipping to prevent condensation and maintain that perfect chocolate shell.
-
Experiment Freely: Don’t hesitate to play with ingredients! A flavored yogurt or different nut butters can introduce exciting new flavors to your Buster Bars.
Storage Tips for Buster Bars
-
Room Temperature: Buster Bars are best stored in the freezer, but if left out briefly, enjoy them within an hour to keep their texture intact.
-
Fridge: If you prefer a softer texture, you can store Buster Bars in the fridge for up to 3 days; however, they may lose some firmness.
-
Freezer: Keep the bars in an airtight container in the freezer for up to a month, ensuring they remain fresh and ready for a sweet snack.
-
Reheating: There’s no need to reheat, but if you prefer a softer bite, let the bars sit at room temperature for a few minutes before enjoying!
What to Serve with Healthy No-Bake Peanut Butter Buster Bars
Elevate your dessert experience by pairing these delightful bars with a few complementary treats that enhance their rich flavors.
-
Fresh Berries: The tartness of strawberries, raspberries, or blueberries contrasts beautifully with the creamy sweetness of Buster Bars, adding a refreshing brightness to every bite.
-
Whipped Coconut Cream: A dollop of fluffy coconut cream brings a tropical flair, balancing the richness of the peanut butter for a luxurious finish.
-
Nutty Granola: Sprinkle some crunchy granola on top for added texture and earthiness; it provides a delightful contrast to the smooth Buster Bars while enhancing their wholesome appeal.
-
Iced Coffee: A chilled glass of iced coffee serves as a delightful pick-me-up alongside your treat. The coffee’s bitterness pairs excellently with the sweetness of the bars, making for a harmonious balance.
-
Chocolate-Dipped Fruits: Indulge further by pairing these bars with chocolate-dipped fruit like bananas or strawberries. The chocolate coating echoes the Buster Bars, creating a fun, cohesive dessert theme.
-
Nut Milk: Enjoy these bars with a glass of almond or cashew milk, gently emphasizing the nutty flavors while keeping the mood light and refreshing.
Each pairing enriches the experience, helping you relish the comforting essence of homemade treats amidst the bustling energy of each bite.
Buster Bars Variations & Substitutions
Feel free to customize your Buster Bars—let your creativity shine through your culinary choices!
-
Dairy-Free: Swap regular yogurt for your favorite non-dairy yogurt to create a deliciously creamy base without the dairy. Almond or coconut yogurt works perfectly!
-
Nut-Free: If allergies are a concern, use sunbutter or a similar seed butter in place of peanut butter for a safe and nut-free snack. It maintains that rich flavor while making it accessible.
-
Vegan Delight: Choose dairy-free chocolate chips and maple syrup as a sweetener to keep these bars completely vegan. It’s a cruelty-free treat that everyone can enjoy.
-
Keto-Friendly: For a keto version, opt for sugar-free chocolate chips and a suitable low-carb sweetener, like erythritol. You can still indulge without the carbs!
-
Flavored Yogurt: Experiment with flavored yogurt like vanilla, berry, or even coconut to add an unexpected twist. This readily transforms the flavor profile and can brighten up your bars.
-
Crunchy Add-Ins: Add a handful of crushed pretzels or graham cracker crumbs for a unique crunch. The salty-sweet combination brings an exciting dimension to your Buster Bars.
-
Spicy Kick: For a bit of heat, try mixing in a dash of cayenne pepper or chili powder—this unique twist surprises and tantalizes your taste buds in every bite.
-
Choco-Hazelnut Twist: Substitute peanut butter with Nutella or hazelnut spread for a deliciously rich flavor. It adds an indulgent chocolate touch that pairs beautifully with the yogurt base.
With these fun variations in mind, you can create a batch of Buster Bars that satisfies any palate! To explore more delicious options, don’t forget to check out our guide on healthy dessert ideas or dive into the world of quick no-bake recipes.
Buster Bars Recipe FAQs
What type of yogurt is best for Buster Bars?
I recommend using Greek yogurt for its higher protein content and creamy texture. However, you can also opt for regular yogurt or any non-dairy yogurt for a delightful vegan version.
How long can I store Buster Bars in the freezer?
You can keep your Buster Bars in an airtight container in the freezer for up to one month. This ensures they maintain their texture and freshness, ready for whenever your sweet tooth strikes!
Can I freeze Buster Bars after making them?
Absolutely! Once you have completed the steps and dipped your bars in chocolate, place them back on the parchment-lined tray and return them to the freezer for about 30 minutes. This will set the chocolate coating perfectly.
What should I do if my bars seem too soft?
If the bars are too soft after freezing, they might not have been frozen long enough. Make sure to freeze them for at least 2-3 hours initially. If they’re still soft, try refreezing them for an additional hour or so.
Are Buster Bars safe for my dog to eat?
I’d advise against letting your dog eat Buster Bars, especially since they contain ingredients like chocolate and peanut butter. Always check with your vet regarding safe human food for pets!
Can I substitute peanut butter with something else for allergies?
Certainly! Almond butter, cashew butter, sunflower seed butter, or even tahini can work well as alternatives. Just remember, if you’re dealing with nut allergies, sunflower seed butter is a fantastic nut-free option!
Guilt-Free Buster Bars That Satisfy Your Sweet Tooth
Ingredients
Equipment
Method
- Prepare the Base Mixture: Combine yogurt, peanut butter, and sweetener in a mixing bowl and whisk until smooth.
- Mix in Chocolate Chips: Fold in mini chocolate chips gently to keep them whole.
- Form the Bars: Line a baking tray with parchment paper and spoon the mixture onto the tray, inserting popsicle sticks.
- Freeze to Set: Place in the freezer for about 2 to 3 hours until firm.
- Melt the Chocolate Coating: Melt chocolate chips in intervals, mixing in coconut oil if desired.
- Dip the Frozen Bars: Coat each bar in melted chocolate, allowing excess to drip off.
- Freeze to Set the Coating: Return coated bars to freezer for another 30 minutes.
- Serve and Enjoy: Cut into pieces as desired and store leftovers in the freezer.
Leave a Reply