
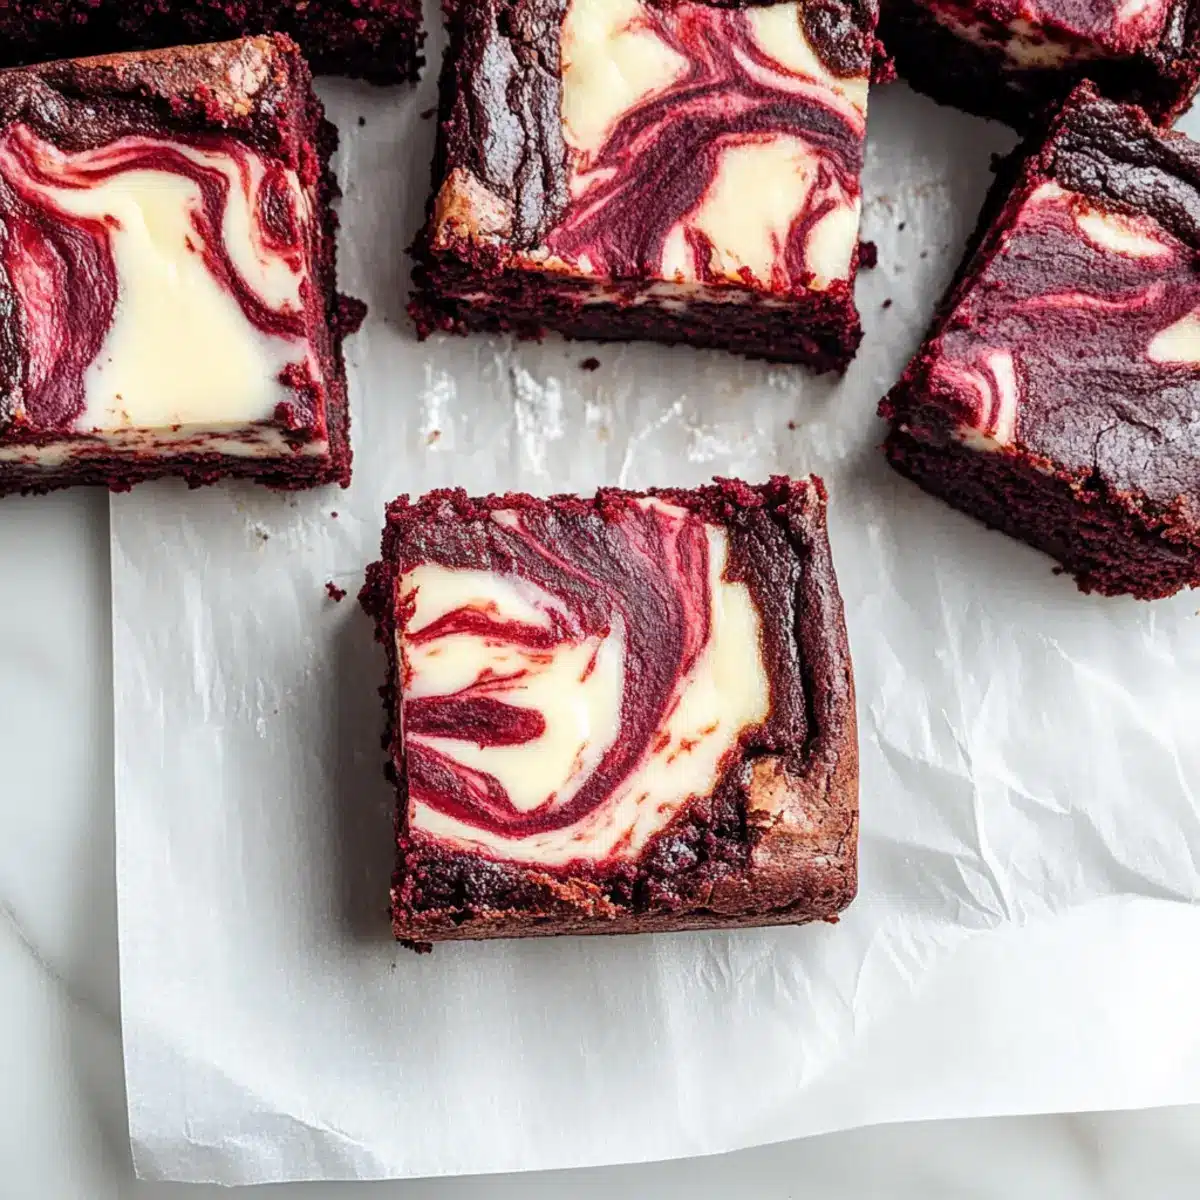
You know that moment when you taste something so delicious that it feels like you’re floating on a cloud? That’s exactly how I felt the first time I indulged in these Red Velvet Cheesecake Brownies. With a luscious red velvet base topped with a creamy cheesecake swirl, this dessert is a stunning showstopper that promises to brighten any occasion, especially Valentine’s Day. What I love most about this recipe is its simplicity—perfect for both seasoned bakers and those just getting started. Plus, they’re the kind of treat that win hearts and satisfy cravings without taking hours in the kitchen. Trust me, once you bring these brownies to the table, they’ll disappear in a flash! Ready to create a dessert that evokes joy and celebration? Let’s dive in!
Why Are These Brownies So Irresistible?
Decadent Delight: The rich red velvet base combines beautifully with a creamy cheesecake swirl, making every bite a heavenly experience.
Simple Steps: Even if you’re a beginner, the straightforward process encourages confidence in the kitchen!
Perfect for Occasions: These brownies shine at any gathering, particularly Valentine’s Day, ensuring smiles all around.
Endless Customization: Want to switch things up? Try adding chocolate chips or using beet juice for coloring!
Stays Fresh: Keep them in an airtight container for up to a week so you can savor that indulgence longer—just like my Sugar Cookie Cheesecake or Blueberry Cheesecake Cookie!
Red Velvet Cheesecake Brownies Ingredients
For the Brownie Base
• Unsalted Butter – Fats create richness and moisture. Substitution: Can use coconut oil for a dairy-free version.
• Granulated Sugar – Sweetener enhances flavor and caramelizes for a delightful crust. Note: Brown sugar can be used for a deeper flavor.
• Large Eggs (x2) – Binds ingredients and provides structure. Note: Use room temperature for better emulsification.
• Red Food Coloring – Adds vibrant color typical of red velvet. Substitution: Beet juice for a natural alternative.
• Vanilla Extract – Enhances the overall flavor profile. Note: Use pure extract for best results.
• Salt – Balances sweetness and enhances flavor. Note: Always include even a small amount.
• All-Purpose Flour – Provides structure to the brownies. Substitution: Use gluten-free flour blend if needed.
• Dutch Process Cocoa Powder – Adds chocolate flavor and dark color. Note: Unsweetened cocoa can substitute but will alter flavor slightly.
For the Cream Cheese Swirl
• Cream Cheese – Creates the rich, creamy filling. Note: Make sure it is at room temperature for smooth mixing.
• Large Egg (for cream cheese mixture) – Similar role as above; binds cream cheese mixture. Substitution: Can use half a banana for a vegan option, but texture might vary.
• Granulated Sugar (for cream cheese swirl) – Sweetens the cheesecake filling. Note: Can use powdered sugar for a smoother texture.
Now you’re equipped with everything you need to make the most delightful Red Velvet Cheesecake Brownies. Let’s put on that apron and get baking!
Step‑by‑Step Instructions for Red Velvet Cheesecake Brownies
Step 1: Preheat the Oven
Begin by preheating your oven to 350°F (175°C). Line an 8 x 8 inch baking pan with parchment paper, allowing some overhang for easy removal later. This will create a non-stick surface for your decadent Red Velvet Cheesecake Brownies. The smell of warm butter and chocolate will soon fill your kitchen!
Step 2: Prepare the Brownie Batter
In a medium bowl, whisk together melted unsalted butter and granulated sugar until the mixture is glossy and well combined. Next, add two large eggs at room temperature, whisking vigorously for about 2 minutes until the mixture becomes frothy. Stir in the vanilla extract and red food coloring until evenly distributed, creating that vibrant red hue typical of red velvet.
Step 3: Combine Dry Ingredients
In the same bowl, sift in the all-purpose flour, Dutch process cocoa powder, and a pinch of salt. Gently fold the dry ingredients into the wet ingredients using a spatula or wooden spoon. Be careful not to overmix; stop as soon as no streaks of flour remain. This will ensure your brownies are beautifully fudgy and moist.
Step 4: Transfer Batter to Pan
Pour the luscious brownie batter into your prepared pan, using a spatula to spread it evenly across the bottom. Make sure to create a smooth surface, which will provide the perfect base for your creamy cheesecake swirl. Your decadent Red Velvet Cheesecake Brownies are taking shape!
Step 5: Make the Cream Cheese Swirl
In a separate bowl, beat the room-temperature cream cheese with one large egg and granulated sugar until the mixture is creamy and smooth. This step is crucial as it creates that rich, tangy filling that pairs beautifully with the fudgy brownie base. Ensure that there are no lumps for a velvety texture.
Step 6: Layer Cream Cheese Mixture
Scoop dollops of the cream cheese mixture onto the brownie batter, evenly distributing it across the surface. Then, take a butter knife or a toothpick and gently swirl the two mixtures together, creating a marbled effect. Don’t overdo it—just a few gentle swirls will give your brownies a beautiful pattern.
Step 7: Bake
Carefully place the pan in your preheated oven and bake for 30 to 35 minutes. Keep an eye on them, and test for doneness by inserting a toothpick in the center; it should come out mostly clean with a few moist crumbs attached. This indicates that your Red Velvet Cheesecake Brownies are perfectly baked!
Step 8: Cool and Serve
Once baked, remove the brownies from the oven and let them cool in the pan for about 10 minutes. Then, lift them out using the parchment overhang and place them on a wire rack to cool completely. Once cooled, slice them into squares and serve them clean for an impressive treat that’s sure to delight!
Make Ahead Options
These Red Velvet Cheesecake Brownies are perfect for busy home cooks who want to indulge without the last-minute rush! You can prepare the brownie batter and cream cheese filling up to 24 hours in advance. Simply store the brownie batter in an airtight container in the refrigerator, and keep the cream cheese filling chilled in a separate bowl. When you’re ready to bake, allow the batter to sit at room temperature for about 30 minutes for easy spreading. Then, layer the cream cheese mixture as instructed and bake. This way, you’ll have mouthwatering brownies ready in no time, just as delicious as if they were made fresh!
Red Velvet Cheesecake Brownies Variations
Unlock the delicious potential of your Red Velvet Cheesecake Brownies and make them truly your own!
- Dairy-Free: Substitute cream cheese with a dairy-free alternative like almond cream for a similar texture without the dairy.
- Gluten-Free: Use a gluten-free flour blend instead of all-purpose flour to cater to gluten sensitivities, without compromising taste!
- Nutty Crunch: Add chopped walnuts or pecans into the brownie batter for delightful texture and nutty flavor.
- Chocolate Lovers: Stir in mini chocolate chips to the brownie mixture for an extra chocolatey surprise in every bite!
- Heat Up the Flavor: For a fun twist, sprinkle in a dash of cayenne pepper to introduce a subtle heat that complements the sweetness beautifully.
- Seasonal Touch: Swap red food coloring for green for St. Patrick’s Day, or even orange for Halloween—making these brownies festive for any occasion!
- Cream Cheese Variation: If you’re craving something lighter, replace cream cheese with ricotta for a fluffier cheesecake experience.
- Fruit Fusion: Consider swirling in fresh raspberry puree into the cream cheese mixture for a tart contrast that elevates the flavors.
Each of these variations allows you to explore and enjoy the delicious world of baking! And if you’re feeling adventurous, why not try a combination? Just like my Red Potato Salad complements classic BBQ flavors, these brownies will surely impress and satisfy your loved ones!
What to Serve with Red Velvet Cheesecake Brownies
Elevate your dessert experience by pairing these brownies with complementary flavors and textures that enchant the palate.
-
Vanilla Ice Cream: The creamy coldness of vanilla ice cream balances the rich warmth of the brownies perfectly, creating a delightful contrast in every bite.
-
Fresh Berries: Strawberries or raspberries add a refreshing tartness that nicely offsets the sweetness of the brownies, enhancing their rich flavor.
-
Chocolate Ganache: A drizzle of warm chocolate ganache intensifies the chocolatey goodness and adds a luscious silky texture that visitors will adore.
-
Whipped Cream: Light, airy whipped cream creates a heavenly topping that complements the decadent layers of the brownies, adding a touch of elegance to your presentation.
-
Mint Chocolate Chip Milkshake: This minty treat brings a fun twist, with the coolness refreshing your palette after each bite of those fudgy layers.
-
Coconut Macaroons: Their chewy texture and hints of sweetness are a delightful pairing, offering an exotic contrast to the rich cheesecake filling.
-
Red Wine: A glass of sweet red wine enhances the dessert experience, enriching the chocolate notes and adding depth to your celebration.
-
Espresso: Serve a shot of strong espresso alongside for a delightful pick-me-up—its bold flavors beautifully highlight both the chocolate and cream cheese elements.
-
Chocolate-Covered Strawberries: These create an inviting and indulgent snack that resonates with the flavors in the brownies, making for a beautiful, themed presentation at a gathering.
Expert Tips for Red Velvet Cheesecake Brownies
-
Room Temperature Ingredients: Make sure all dairy products, including cream cheese and eggs, are at room temperature for a smooth and creamy texture in your cheesecake swirl.
-
Don’t Overmix: When combining dry ingredients with the wet mixture, mix until just combined. Overmixing can lead to tough brownies instead of a fudgy texture.
-
Cool Completely: Allow the brownies to cool fully before slicing to maintain their shape and avoid a gooey mess. This ensures clean edges and a perfect presentation.
-
Swirling Technique: When creating the cream cheese swirl, use a light hand with the knife. A few gentle swirls create a beautiful marbled effect without completely mixing the two layers.
-
Storage Tips: Store your Red Velvet Cheesecake Brownies in an airtight container in the fridge for up to 7 days. This keeps them fresh and delicious, perfect for snacking throughout the week!
How to Store and Freeze Red Velvet Cheesecake Brownies
Fridge: Keep your brownies in an airtight container in the fridge for up to 7 days. Ensure they’re completely cooled to prevent condensation.
Freezer: For longer storage, wrap individual brownie squares in plastic wrap, then place them in a freezer-safe bag. They can be frozen for up to 3 months.
Reheating: To enjoy brownies from the freezer, thaw them in the fridge overnight. Reheat them in the microwave for about 15-20 seconds for a warm treat.
Serving Freshness: These Red Velvet Cheesecake Brownies taste best when freshly baked, but proper storage ensures you can savor that delightful flavor longer!
Red Velvet Cheesecake Brownies Recipe FAQs
What type of red food coloring should I use?
I recommend using gel food coloring for the richest hue in your Red Velvet Cheesecake Brownies. Liquid food color can work too, but it may alter the wet ingredient ratios, so you might need to slightly adjust the flour or make sure not to add too much.
How do I store my Red Velvet Cheesecake Brownies?
Store your brownies in an airtight container in the fridge for up to 7 days. Make sure they’re completely cooled before sealing them, as this prevents condensation that could make them soggy.
Can I freeze Red Velvet Cheesecake Brownies?
Absolutely! For freezing, wrap individual brownie squares tightly in plastic wrap, then place them in a freezer-safe bag or container. They’re good for up to 3 months in the freezer. When you’re ready to enjoy, simply thaw them in the fridge overnight and heat in the microwave for about 15-20 seconds if you want them warm.
What if my brownies are too dense?
If your Red Velvet Cheesecake Brownies turn out too dense, it may be due to overmixing the batter. Always mix just until the dry ingredients are combined. Additionally, ensure that your baking powder or baking soda is fresh, as expired leavening agents can affect the rise and texture.
Are these brownies safe for someone with allergies?
As with any recipe, check for common allergens like gluten or dairy. You can use a gluten-free flour blend for a gluten-sensitive option. For dairy-free, substitute cream cheese with a dairy-free cream cheese alternative and use coconut oil instead of butter. If someone has an egg allergy, you could try using flax eggs—1 tablespoon of ground flaxseed mixed with 2.5 tablespoons of water equals one egg.
What do I do if my cream cheese mixture is lumpy?
If your cream cheese mixture ends up lumpy, it’s usually because it wasn’t at room temperature. To fix this, you can beat it with a mixer until smooth and creamy. You can also warm it slightly in the microwave for just a few seconds before mixing to get it creamy.
Irresistible Red Velvet Cheesecake Brownies to Impress Your Love
Ingredients
Equipment
Method
- Preheat your oven to 350°F (175°C). Line an 8 x 8 inch baking pan with parchment paper.
- In a medium bowl, whisk together melted unsalted butter and granulated sugar until glossy. Add two large eggs, whisking for about 2 minutes until frothy. Stir in vanilla extract and red food coloring.
- Sift in all-purpose flour, Dutch process cocoa powder, and salt. Gently fold until no streaks of flour remain.
- Pour brownie batter into prepared pan, spreading it evenly.
- In a separate bowl, beat cream cheese with one large egg and granulated sugar until creamy and smooth.
- Scoop dollops of the cream cheese mixture onto the brownie batter and gently swirl with a butter knife.
- Bake for 30 to 35 minutes, testing for doneness with a toothpick.
- Once baked, let the brownies cool in the pan for about 10 minutes, then transfer to a wire rack to cool completely before slicing.
Leave a Reply