
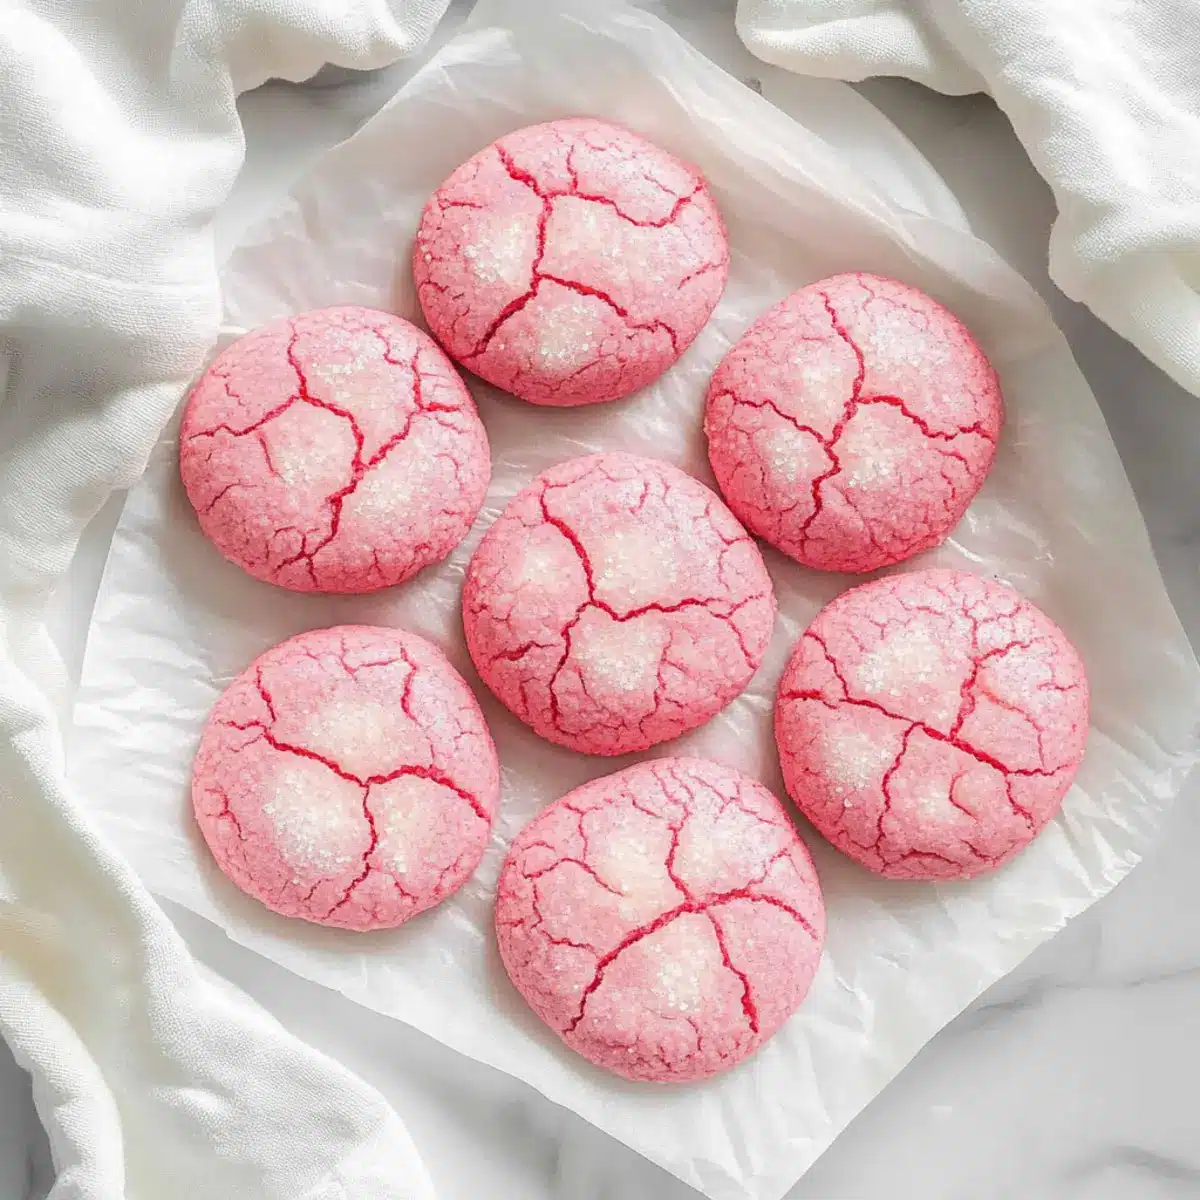
As I stood in my kitchen, a splash of vibrant pink caught my eye, instantly brightening my day. There’s something special about the Pink Velvet Cookie Recipe that evokes joy and whimsy, making it an ideal choice for celebrations like Valentine’s Day or even a cozy gathering. Not only do these cookies offer a stunning visual appeal, but their soft and chewy texture makes them a delightful treat for anyone with a sweet tooth. They’re versatile too, perfect for any occasion, and come together in no time—ideal for those who want to impress without the fuss. Ready to create some cookie magic and leave your guests swooning? Let’s dive into this delicious recipe together!
Why Are Pink Velvet Cookies So Adored?
Visually Stunning: These cookies boast a delightful pink hue that instantly captures attention and adds a festive touch to any gathering. Easy to Make: With simple ingredients and straightforward steps, even beginners can whip up these treats without breaking a sweat. Versatile Treat: Perfect for Valentine’s Day, baby showers, or any celebration, they can be customized with white chocolate chips or sprinkles for extra flair. Crowd Favorite: Their soft, chewy texture and sweet flavor ensure they will be a hit among family and friends. Plus, the joyful vibe they bring will brighten any occasion, making for a memorable dessert experience!
Pink Velvet Cookie Ingredients
• Let’s gather everything you need for these delightful treats!
For the Cookie Base
- Butter – Adds richness and moisture; substitute with margarine for a dairy-free option.
- Sugar – Sweetens the cookies and promotes tenderness; use brown sugar for a deeper flavor profile.
- Eggs – Binds ingredients together and helps with rise; make sure they’re room temperature for better mixing.
- Flour – Provides structure; stick with all-purpose flour or use a gluten-free blend for a gluten-free variant.
- Pink Food Coloring – Gives that signature pink hue; adjust based on your desired color intensity.
- Vanilla Extract – Enhances flavor depth; feel free to substitute with almond extract for a unique twist.
- Baking Powder – Aids in rising for a fluffy cookie; ensure it’s fresh for optimal results.
- Salt – Balances sweetness and enhances flavor; reduce or omit if using salted butter.
Optional Add-Ons
- White Chocolate Chips – Add for bursts of sweetness and creamy texture; they complement the pink velvet beautifully.
- Sprinkles – Perfect for an extra festive touch; go wild with colors to match your celebration theme!
These Pink Velvet Cookie ingredients will set the stage for your delightful baking experience—let the fun begin!
Step‑by‑Step Instructions for Pink Velvet Cookie
Step 1: Preheat the Oven
Begin by preheating your oven to 350°F (175°C). This temperature is essential for achieving that perfect bake! While the oven warms up, line a baking sheet with parchment paper or a silicone baking mat to prevent sticking and ensure easy clean-up later on.
Step 2: Cream the Butter and Sugar
In a large mixing bowl, cream together room temperature butter and sugar using an electric mixer on medium speed until the mixture is light and fluffy, about 2-3 minutes. The pale, airy texture you’re aiming for indicates that the sugar has fully incorporated into the butter—this step is crucial for your Pink Velvet Cookie’s tender consistency.
Step 3: Incorporate the Eggs and Vanilla
Add the eggs to the butter mixture one at a time, mixing well after each addition. Then, stir in the vanilla extract until fully combined. You’ll notice the mixture becoming smoother and slightly thicker, which prepares your cookie dough for its vibrant color!
Step 4: Combine Dry Ingredients
In a separate bowl, whisk together the flour, baking powder, and salt. This step helps to evenly distribute the leavening agent and ensures that your Pink Velvet Cookies rise perfectly. Take a moment to admire how these dry ingredients work in harmony before moving forward to the next step.
Step 5: Mix Dry and Wet Ingredients
Gradually add the dry ingredients to the wet mixture, mixing at low speed until just combined. Be careful not to over-mix! You want to see a thick, slightly sticky dough form—it should not be too dry or crumbly. This gentle blending allows the ingredients to meld without losing their tender texture.
Step 6: Add the Pink Food Coloring
Now, for the fun part! Add pink food coloring to the dough, mixing in until the desired shade is achieved. Start with a small amount and increase as necessary; the vibrant hue will make your cookies visually stunning. The dough should now showcase that signature pink color that’s perfect for any celebration!
Step 7: Shape the Cookies
Using a cookie scoop or rounded tablespoon, drop balls of dough onto the prepared baking sheet, spacing them about 2 inches apart. Remember that they will spread a bit while baking. The raw dough should appear soft and fluffy, ready to transform into beautiful Pink Velvet Cookies.
Step 8: Bake to Perfection
Place the baking sheet in the preheated oven and bake for 10-12 minutes. Keep an eye on them—the edges should be set while the tops might still appear slightly cracked and soft. This indicates that your cookies will be warm, chewy, and utterly delightful once they cool.
Step 9: Cool and Enjoy
Once baked, remove the cookies from the oven and let them cool on the baking sheet for 5 minutes. This allows them to firm up slightly before transferring to a wire rack. Allowing them to cool completely ensures a perfectly soft and chewy Pink Velvet Cookie that’s ready to impress your family and friends!
What to Serve with Pink Velvet Cookies
Picture the scene: you’ve just pulled a batch of fluffy, pink velvet cookies from the oven, and the aroma wafts through your home, promising sweet indulgence. What could be better than pairing these delightful treats with thoughtful side options?
-
Creamy Vanilla Ice Cream: The cold creaminess contrasts beautifully with the soft, chewy cookies, creating a delectable melt-in-your-mouth experience. Scoop it generously and watch your guests delight in each bite.
-
Fruity Fresh Strawberries: Bright, juicy strawberries add a burst of freshness that perfectly complements the sweetness of the cookies, making for a light and vibrant pairing. Dipped in chocolate, they create a delightful match!
-
Rich Chocolate Ganache: Drizzling warm ganache over your pink velvet cookies creates an indulgent twist, enhancing the flavors with deep chocolate richness. The combination is both decadent and visually appealing.
-
Sparkling Lemonade: A fizzy, citrusy drink like sparkling lemonade cuts through the sweetness of the cookies while adding a refreshing zing that awakens the palate—perfect for outdoor gatherings!
-
Light Coffee or Espresso: A warm cup of coffee or a shot of espresso balances the sweetness with its rich bitterness, creating a perfect harmony of flavors that delights the senses.
-
Festive Fruit Platter: Offer a colorful selection of seasonal fruits to balance the richness of the cookies. The natural sweetness and crunch from apples, grapes, and melons are a refreshing touch.
-
Chocolate-Covered Pretzels: Salty, crunchy pretzels coated in chocolate create a textural contrast to the cookies while enhancing their sweetness. They are an unexpected treat that will wow your guests!
-
Whipped Cream Dip: A light whipped cream-based dip flavored with vanilla or almond adds an extra layer of delight, inviting guests to dip and indulge, enhancing the fun of your cookie experience.
Pairing these delightful options with your pink velvet cookies guarantees an unforgettable treat for all occasions!
How to Store and Freeze Pink Velvet Cookies
Fridge: Store your pink velvet cookies in an airtight container at room temperature for up to 1 week. If you prefer them chilled, you can refrigerate them for a refreshing treat.
Freezer: For longer storage, freeze the cookies in a single layer on a baking sheet until solid. Once frozen, transfer them to an airtight container or a freezer bag for up to 3 months.
Thawing: To enjoy your frozen pink velvet cookies, simply let them thaw at room temperature for about 30 minutes. This will bring back their delightful soft texture.
Reheating: If you like them warm, pop the thawed cookies in the oven at 350°F (175°C) for 5-7 minutes for a fresh-out-of-the-oven taste!
Make Ahead Options
These Pink Velvet Cookies are perfect for meal prep enthusiasts! You can prepare the cookie dough up to 24 hours in advance, making them a fantastic option for busy weeknights or special occasions. Simply mix the dough according to the recipe instructions and then cover it tightly with plastic wrap or place it in an airtight container. This will help maintain the cookies’ delightful texture and vibrant color. When you’re ready to bake, drop the chilled dough onto a lined baking sheet and bake as directed. Trust me, they’ll come out just as delicious, allowing you to enjoy a scrumptious treat with minimal effort!
Pink Velvet Cookie Variations & Substitutions
Feel free to get creative and customize your Pink Velvet Cookies with these delightful twists!
-
Dairy-Free: Replace butter with margarine or coconut oil for a creamy vegan cookie.
-
Gluten-Free: Use a gluten-free flour blend instead of all-purpose flour for an equally delightful texture. You won’t even notice the difference!
-
Flavor Boost: Swap vanilla extract for almond or lemon zest to add a refreshing twist to the flavor profile. These subtle changes can really elevate your cookies!
-
Chocolate Lovers: Mix in dark or white chocolate chips for pockets of gooey sweetness that perfectly complement the pink velvet base. The combination is irresistible!
-
Sprinkle Party: Top the cookies with colorful sprinkles before baking for an extra festive look perfect for any celebration. Everyone loves a little added fun!
-
Savory Twist: Consider adding a pinch of sea salt or crushed pretzels to the dough for an unexpected savory edge. This contrast can excite your taste buds in a delightful way!
-
Nutty Add-In: Stir in chopped nuts, like pecans or walnuts, for an added crunch and nuttiness. They pair beautifully with the soft texture of the cookies.
If you’re looking for more fun cookie ideas, check out these other treats: Blueberry Cheesecake Cookie or Loaded Cookie Brittle. Enjoy baking everyone!
Tips for the Best Pink Velvet Cookies
• Room Temperature Ingredients: Ensure your butter and eggs are at room temperature. This helps them blend beautifully, creating a soft texture that’s key to a perfect Pink Velvet Cookie.
• Don’t Over-Mix: Mix the dough just until the dry ingredients are incorporated. Over-mixing will result in tough cookies instead of the tender, chewy bites we love.
• Watch Baking Time: Keep an eye on your cookies as they bake. They should look slightly underdone when you pull them from the oven—this ensures they stay soft and chewy.
• Customize Your Color: Adjust the amount of pink food coloring based on your desired hue. A little goes a long way, so start small!
• Chill Dough Option: For thicker cookies, consider chilling the dough for 30 minutes before baking. This helps maintain the shape and adds a delightful texture to your Pink Velvet Cookies.
Pink Velvet Cookie Recipe FAQs
What is the best way to select ripe ingredients for pink velvet cookies?
Absolutely! For the best results, choose room temperature eggs that are free from cracks and have a bright yellow yolk. Ensure your butter is soft and at room temperature for easy creaming; this aids in creating a tender texture. If you’re using flour, make sure it’s fresh and has no clumps for a smoother dough.
How should I store pink velvet cookies, and how long do they last?
Store your cookies in an airtight container at room temperature for up to 1 week. If you have a warm kitchen, you might want to refrigerate them for a refreshing treat; just be sure to keep them tightly sealed to prevent them from drying out!
Can pink velvet cookies be frozen, and what’s the best method?
Yes, you can definitely freeze your pink velvet cookies! To do this, first place the cookies in a single layer on a baking sheet and freeze until solid. Then, transfer them to an airtight container or freezer bag, where they can last for up to 3 months. This method helps maintain their soft, chewy texture.
What if my cookies come out too dry or crumbly?
If your cookies end up dry, it could be due to over-mixing the dough or measuring flour incorrectly. Make sure to spoon your flour into the measuring cup instead of scooping it directly from the bag. If your dough seems dry, you can add a tablespoon of milk to bring it back to the desired consistency.
Are pink velvet cookies safe for those with nut allergies?
Absolutely! This recipe does not include any nuts, making it a great option for those with nut allergies. However, always double-check the labels on your ingredients to avoid any potential cross-contamination with allergens. If you’re serving these cookies to guests, it’s a good idea to mention their nut-free status just to be safe!
How can I modify the recipe for dietary restrictions?
If you’re looking for a dairy-free option, substitute butter with margarine or coconut oil and use dairy-free chocolate chips if adding extras. For gluten-free needs, swap out all-purpose flour with a gluten-free blend—many work well for cookies! Just be sure to follow the specific ratios suggested by each blend to achieve the best results.
Pink Velvet Cookie Bliss: Sweet Treats for Every Celebration
Ingredients
Equipment
Method
- Preheat your oven to 350°F (175°C) and line a baking sheet with parchment paper.
- Cream together room temperature butter and sugar using an electric mixer until fluffy, about 2-3 minutes.
- Incorporate the eggs one at a time, mixing well after each addition, then stir in the vanilla extract.
- Combine flour, baking powder, and salt in a separate bowl.
- Gradually add dry ingredients to wet mixture, mixing at low speed until just combined.
- Add pink food coloring and mix until desired shade is achieved.
- Drop balls of dough onto prepared baking sheet, spacing them 2 inches apart.
- Bake for 10-12 minutes until edges are set and tops are slightly cracked.
- Cool on the baking sheet for 5 minutes before transferring to a wire rack.
Leave a Reply