
Just the other day, while flipping through my favorite cookbook, I stumbled upon a no-bake cheesecake recipe that stirred a sense of nostalgia. It instantly reminded me of those sweet summer afternoons spent with friends, sharing laughter and treats. Today, I’m thrilled to share my take on this delightful dessert: No-Bake Oreo Cheesecake. Not only is it incredibly easy to whip up in under 30 minutes, but it also makes for a stress-free, make-ahead option for gatherings or a cozy night in. The smooth, creamy texture and delightful crunch created by the Oreo crust are simply irresistible. And for those with dietary preferences, I’ve included gluten-free variations so everyone can enjoy this indulgent treat. Curious to see how to craft this dream dessert that’s sure to wow your guests? Let’s dive in!

Why Is No-Bake Oreo Cheesecake a Must-Try?
Simplicity: Each step of this recipe is straightforward, allowing you to create a stunning dessert without the stress of baking.
Crowd-Pleasing Delight: The creamy filling, paired with the iconic Oreo crust, makes this cheesecake irresistible for any occasion, whether it’s a party or a quiet night in.
Versatile Options: Feeling adventurous? You can easily adapt it with variations like peanut butter swirls or mini cheesecakes to cater to different tastes.
Time-Saving Treat: Ready in under 30 minutes, it’s the perfect last-minute dessert!
Make-Ahead Magic: Chill it overnight, and you’ve got a delicious dessert ready when you need it. For another delightful option, check out our Blueberry Cheesecake Cookie recipe for something different!
No-Bake Oreo Cheesecake Ingredients
For the Crust
- Oreo Cookies – Provides the crust and adds flavor, texture, and sweetness; you can substitute with Double Stuf or gluten-free Oreos.
- Unsalted Butter – Binds the crust together and adds richness; melt before mixing with crumbs.
For the Filling
- Brick-style Cream Cheese – The main filling component for a creamy texture; opt for lite cream cheese; avoid fat-free variants.
- Powdered Sugar – Sweetens the cheesecake; adjust quantity if using sweetened whipped topping.
- Vanilla Extract – Enhances the overall flavor profile of the cheesecake.
- Heavy Whipping Cream – Creates a light and airy texture; can replace with whipped topping but reduce powdered sugar accordingly.
- Chopped Oreos – Adds delightful texture to the filling; whole Oreos are best for maximum flavor.
Optional Toppings
- Mini Oreos – Adds visual appeal and more Oreo flavor on top of your cheesecake.
- Homemade Whipped Cream – For decoration and an extra layer of creaminess.
This No-Bake Oreo Cheesecake is a treat that brings joy to any table!
Step‑by‑Step Instructions for No-Bake Oreo Cheesecake
Step 1: Make the Crust
Begin by processing 24 Oreo cookies in a food processor until they become fine crumbs. Melt 5 tablespoons of unsalted butter and mix it thoroughly with the cookie crumbs. Press the crumb mixture firmly into the bottom of a 9-inch springform pan, making sure it’s evenly spread. Chill the crust in the refrigerator for about 15 minutes to firm up.
Step 2: Prepare the Filling
In a large mixing bowl, beat 16 ounces of room-temperature brick-style cream cheese with an electric mixer on medium speed until smooth, around 2-3 minutes. Gradually add 1 cup of powdered sugar and 1 teaspoon vanilla extract, mixing until well combined. The mixture should be creamy and free of lumps, creating the base for your No-Bake Oreo Cheesecake filling.
Step 3: Whip the Cream
In a separate bowl, pour 1 cup of heavy whipping cream. Using a hand mixer or stand mixer, beat the cream on high speed until stiff peaks form, which should take about 3-5 minutes. Be sure to stop when the cream is thickened and holds its shape, as this will give the cheesecake its light and airy texture.
Step 4: Combine Mixtures
Gently fold the whipped cream into the smooth cream cheese mixture using a spatula, being careful to maintain the airy consistency. Once combined, fold in 1 cup of chopped Oreos, which will add delightful chunks and enhance the creamy filling. This is the heart of your No-Bake Oreo Cheesecake!
Step 5: Assemble Cheesecake
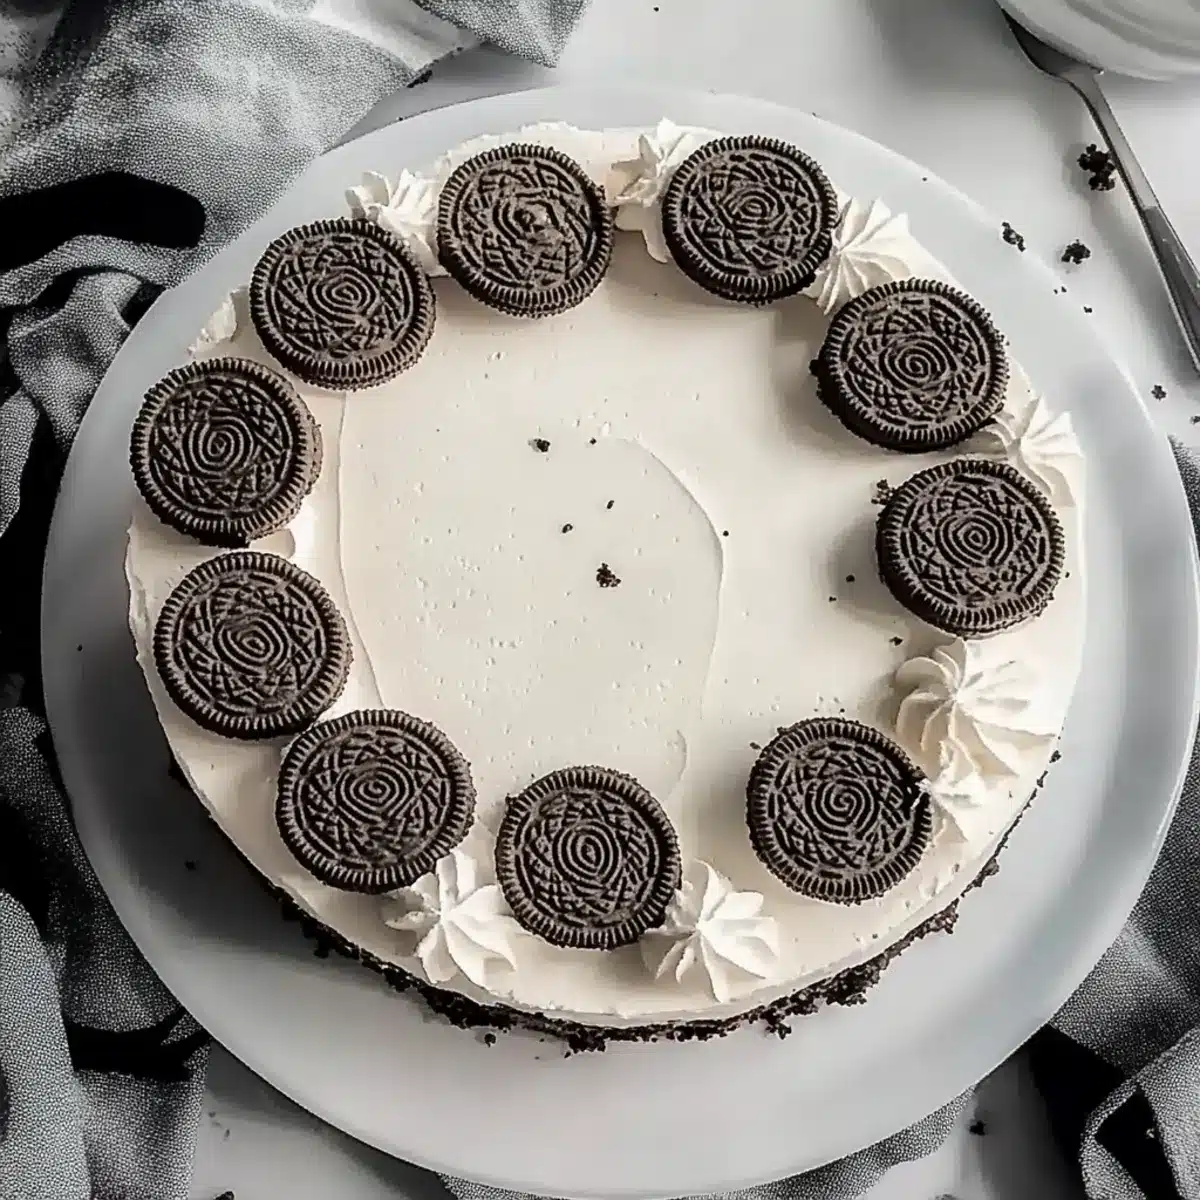
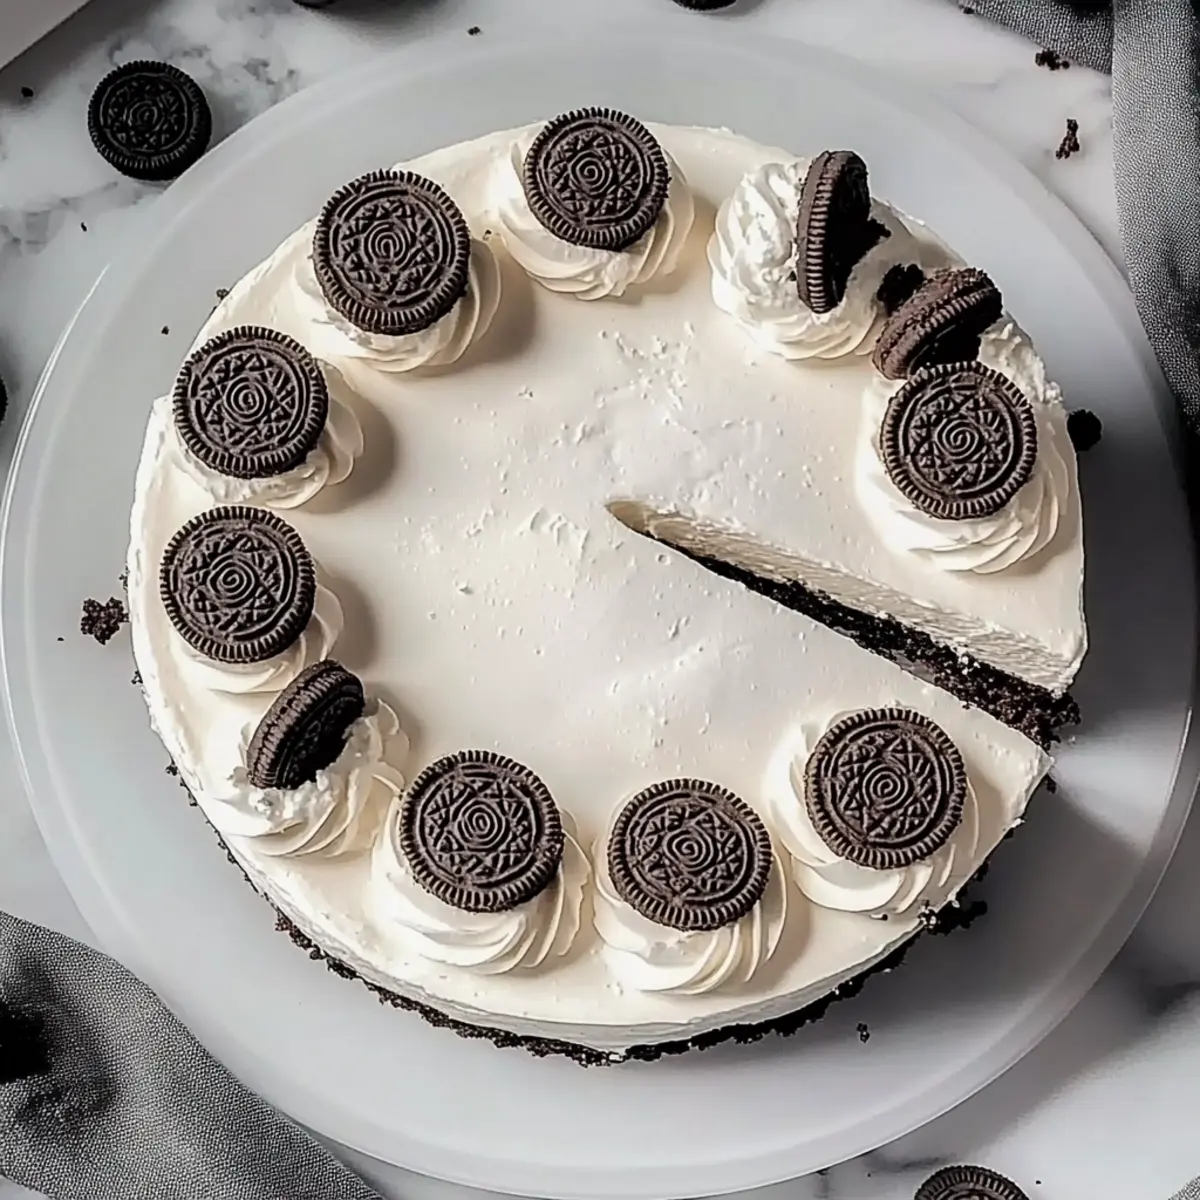
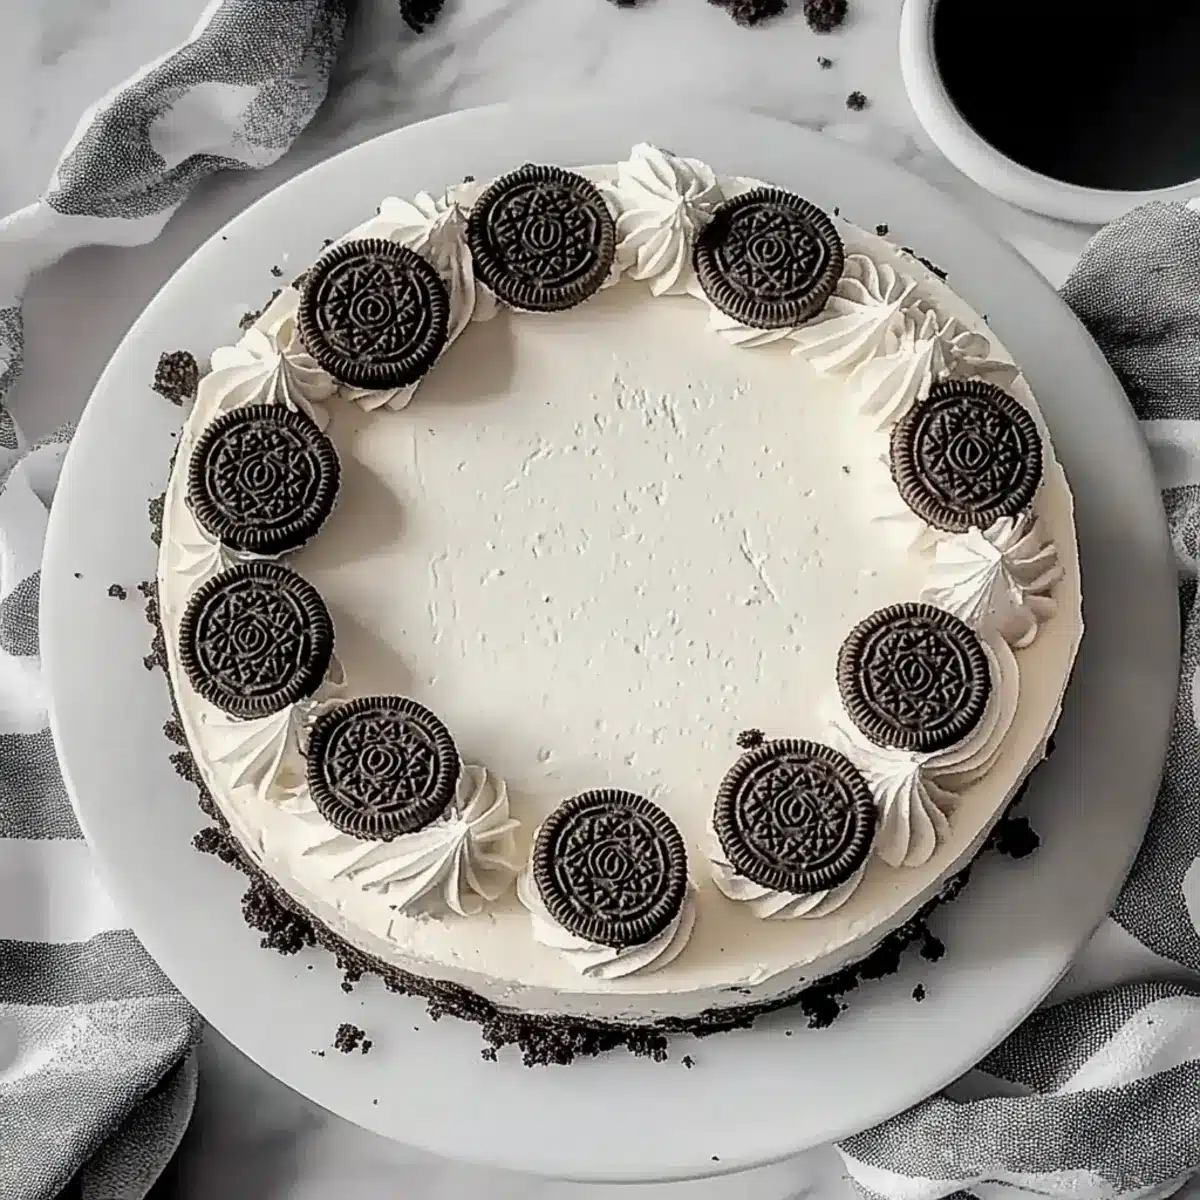
Take the chilled crust out of the refrigerator and spoon the creamy filling onto it. Spread the filling evenly across the crust, using a spatula to smooth the top. For an extra touch, you can optionally pipe some homemade whipped cream on top and sprinkle mini Oreos for garnish, making your cheesecake look stunning.
Step 6: Chill
Cover the cheesecake with plastic wrap or a lid and refrigerate for at least 4 hours, or preferably overnight. This chilling process is crucial for allowing the flavors to meld and the cheesecake to set properly. When ready, it will be firm but creamy, perfect for serving.
Make Ahead Options
These No-Bake Oreo Cheesecakes are perfect for meal prep enthusiasts! You can prepare the crust and filling up to 24 hours in advance to save valuable time during busy weeknights or gatherings. Start by making the crust and chilling it, then prepare the filling and store it separately in the refrigerator (in an airtight container) to maintain that delightful texture. When you’re ready to serve, simply spoon the filling onto the crust and let it chill for at least 4 hours—preferably overnight—for the best flavor. This way, you’ll have a decadent dessert that’s just as delicious and ready with minimal effort, ensuring you impress your guests without the last-minute rush!
What to Serve with No-Bake Oreo Cheesecake?
Take your indulgent dessert experience to the next level by pairing your No-Bake Oreo Cheesecake with delightful sides and sips.
-
Fresh Berries: The tartness of raspberries or strawberries contrasts beautifully with the rich cheesecake, adding a pop of color and freshness. The juiciness of these berries elevates the entire dessert experience.
-
Chocolate Sauce: Drizzle warm chocolate sauce over each slice for an extra layer of decadence. The rich, molten chocolate complements the creamy filling and crunchy crust.
-
Coffee: A robust cup of coffee provides a perfect balance to the sweetness of the cheesecake, enhancing the chocolatey flavors in a delightful way. Sipping this alongside your dessert creates a cozy, comforting experience.
-
Vanilla Ice Cream: Serve a scoop of creamy vanilla ice cream alongside for an ice-cold sensation that pairs wonderfully with the velvety cheesecake. The simplicity of the ice cream perfectly complements the richness of the dessert.
-
Mint Leaves: Garnish your cheesecake with fresh mint leaves for a refreshing herbal note that brightens each bite. Not only does it add a pop of color, but the mint’s coolness balances the dessert’s sweetness beautifully.
-
Caramel Drizzle: A light drizzle of caramel adds an inviting sweetness that harmonizes with the chocolate flavors. This golden syrup creates an elegant finish on each slice and leaves your guests wanting more.
-
Sparkling Water: For a refreshing drink, serve sparkling water with a twist of lemon or lime to cleanse the palate between bites. The effervescence makes the whole experience feel festive.
-
Whipped Cream: A classic topping, a dollop of homemade whipped cream on the cheesecake adds an airy, creamy element that accentuates the dessert’s luxurious texture. Pair this with mini Oreos for added flair.
-
Dark Chocolate Shavings: For a touch of sophistication, garnish with dark chocolate shavings. The bittersweet chocolate flavor beautifully contrasts the sweet cheesecake, adding depth and visual appeal.
No-Bake Oreo Cheesecake Variations & Substitutions
Feel free to add your personal touch to this delightful No-Bake Oreo Cheesecake and surprise your loved ones with new flavors!
-
Gluten-Free: Use gluten-free Oreo cookies for a deliciously inclusive dessert everyone can enjoy. The flavor remains intact while catering to dietary needs.
-
Peanut Butter Swirl: Fold in ½ cup of creamy peanut butter into the filling for a nutty twist. This variation will give your cheesecake a delightful richness and an extra layer of flavor.
-
Mini Cheesecakes: Pour the filling into cupcake liners instead of a springform pan for individual servings. These mini delights are perfect for parties or lunchboxes!
-
Minty Fresh: Add ½ teaspoon of peppermint extract to the filling for a refreshing mint chocolate cheesecake. This variation breathes new life into the classic flavor combo.
-
Chocolate Ganache Layer: Top your cheesecake with a layer of smooth chocolate ganache for added decadence. Simply melt chocolate with heavy cream and pour it over the set cheesecake for an irresistible finish.
-
Berry Topping: Add a layer of mixed fresh berries like strawberries, raspberries, and blueberries on top before serving to brighten up the dish and add a fruity contrast.
For more sweet inspiration, don’t forget to check out our Sugar Cookie Cheesecake recipe, or try the flavorful Blueberry Cheesecake Cookie for a fun twist!
-
Coconut Cream: Substitute heavy whipping cream with coconut cream for a tropical flair. This will evoke a light, airy cheesecake with a hint of coconut that pairs lovely with the chocolate.
-
Spicy Kick: For those who enjoy a bit of heat, add a pinch of cayenne pepper or crushed red pepper flakes to the filling. It’s a bold twist that will surprise and delight adventurous taste buds!
How to Store and Freeze No-Bake Oreo Cheesecake
Fridge: Refrigerate leftovers in an airtight container for up to 4 days, ensuring it stays fresh and creamy for your enjoyment.
Freezer: For longer storage, wrap individual slices in plastic wrap and then foil, freezing for up to 2 months.
Thawing: To serve, simply thaw the desired portion overnight in the fridge, allowing the flavors to revive beautifully.
Reheating: There’s no need to reheat this cheesecake; just enjoy it chilled, paired with your favorite toppings for an indulgent dessert.
Expert Tips for the Best No-Bake Oreo Cheesecake
-
Room Temperature Cream Cheese: Ensure your cream cheese is at room temperature for a smooth filling that blends easily without lumps.
-
Whipping Cream Mastery: Whip your cream until stiff peaks form, keeping it cold and whisking on high speed to achieve the perfect airy texture.
-
Chill It Right: Don’t skip the chill time! Allowing the cheesecake to set for at least 4 hours enhances both the flavors and stability of your No-Bake Oreo Cheesecake.
-
Choose a Good Pan: Use a sturdy springform pan for easy removal. A flimsy pan can lead to mess, ruining your beautiful cheesecake.
-
Customize with Care: Experiment with variations like gluten-free Oreos or peanut butter swirls, but remember to keep the balance of ingredients for the best results.
No-Bake Oreo Cheesecake Recipe FAQs
What type of Oreo cookies should I use for the crust?
Absolutely! For the crust, you can use regular Oreo cookies for that classic flavor, or opt for Double Stuf if you prefer extra creaminess. If you’re looking for a gluten-free option, gluten-free Oreos work wonderfully too!
How should I store leftovers from my No-Bake Oreo Cheesecake?
You can refrigerate leftovers in an airtight container for up to 4 days. Just ensure it’s well-covered to maintain its creamy texture and delicious flavor. I often find chilling it for a day enhances the taste!
Can I freeze the No-Bake Oreo Cheesecake?
Yes, indeed! For longer storage, wrap individual slices in plastic wrap and then in foil. It keeps well for up to 2 months in the freezer. When you’re ready to enjoy, simply thaw overnight in the fridge before serving – it’s like fresh all over again!
What can I do if my whipped cream didn’t form stiff peaks?
If your whipped cream hasn’t reached stiff peaks, don’t worry; just try chilling the bowl and beaters in the fridge before mixing again. This helps incorporate more air. If all else fails, you can fold in a bit of store-bought whipped topping to achieve a similar texture.
Are there any dietary concerns with the ingredients?
Definitely! If you have lactose intolerance, consider using lactose-free cream cheese and whipped cream. Additionally, for allergies, double-check the ingredients on gluten-free Oreos, as some may vary. Anyone with nut allergies should avoid adding peanut butter variations. It’s all about making this No-Bake Oreo Cheesecake accessible to everyone!
How do I know when my cheesecake is set?
The cheesecake should be firm to the touch yet slightly springy in the center after chilling for at least 4 hours, preferably overnight. When you slice into it, it should hold its shape beautifully without being too runny. Remember, patience pays off for that perfect creamy delight!
Delight in No-Bake Oreo Cheesecake: Creamy Bliss Awaits
Ingredients
Equipment
Method
- Process 24 Oreo cookies in a food processor until fine crumbs form. Melt 5 tablespoons of unsalted butter and mix thoroughly with the crumbs. Press mixture into a 9-inch springform pan and chill for 15 minutes.
- Beat 16 ounces of cream cheese with an electric mixer until smooth. Gradually add 1 cup of powdered sugar and 1 teaspoon vanilla extract, mixing until creamy.
- In a separate bowl, beat 1 cup of heavy whipping cream on high speed until stiff peaks form.
- Gently fold the whipped cream into the cream cheese mixture, and then fold in 1 cup of chopped Oreos.
- Spoon the filling onto the chilled crust and spread evenly. Optionally pipe whipped cream and sprinkle mini Oreos on top.
- Cover with plastic wrap and refrigerate for at least 4 hours or overnight.
Leave a Reply