
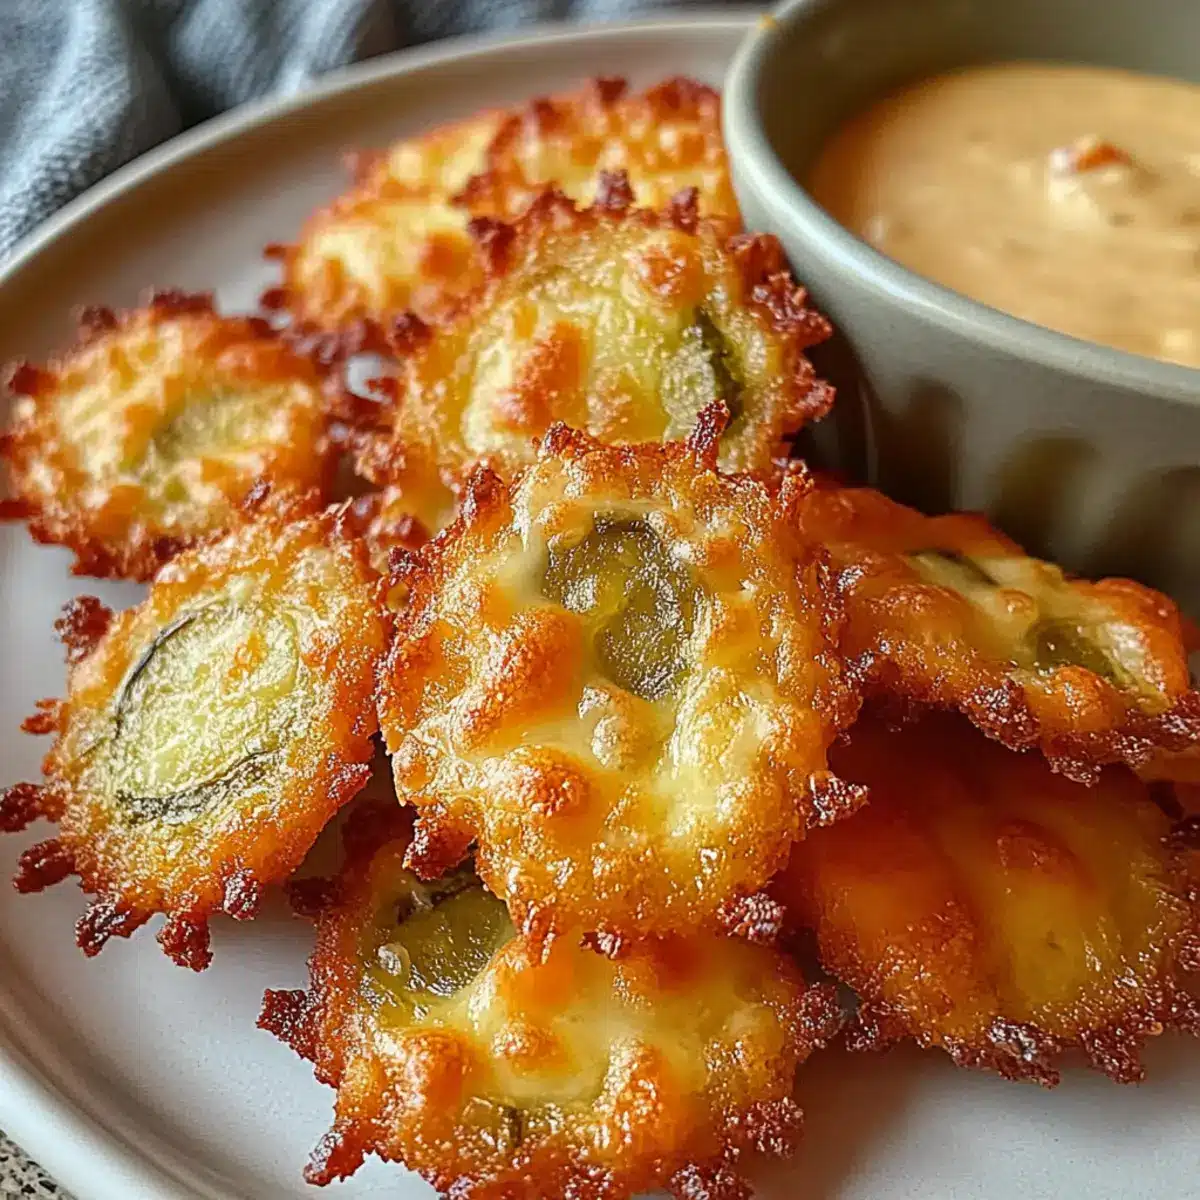
As I sat down to enjoy a snack, my eyes landed on the jar of dill pickles. Suddenly, inspiration struck—what if I could turn those tangy tastes into something crispy and cheesy? Enter Crispy Pickle Cheese Bites! This gluten-friendly recipe is not only a breeze to whip up, taking just 12 minutes, but it also transforms ordinary cheese into an extraordinary snack. Baked or air-fried, these bites deliver a satisfying crunch with every bite, making them perfect for kids and adults alike. Whether you’re gearing up for a game night or just searching for a quick pick-me-up, these cheesy morsels are sure to become a new favorite. Curious about how to make these addictive snacks? Let’s dive into the details!

Why are Crispy Pickle Cheese Bites a Must-Try?
Quick Preparation: You’ll be amazed at how fast these bites come together, ready to enjoy in just 12 minutes!
Irresistible Flavor: The blend of sharp cheddar and creamy mozzarella pairs beautifully with tangy dill pickles, delivering a flavor explosion.
Versatile Snacking: Whether enjoyed during game night or as a midday treat, they cater to all occasions.
Healthy Alternative: Gluten-friendly and lower in calories, they’re a satisfying snack without the guilt, especially if you’re tired of fast food.
Family-Friendly: Kids love them, and adults can’t resist, making these bites a sure hit for gatherings. For more delightful snacks, consider trying Sweet Little Bites or Dill Pickle Tuna!
Crispy Pickle Cheese Bites Ingredients
• For the Cheese Mixture
- Shredded Cheddar Cheese – lends a sharp and rich flavor to these Crispy Pickle Cheese Bites; feel free to substitute with sharp white cheddar for a slightly different taste.
- Shredded Mozzarella Cheese – provides the essential stretch and creaminess; for a twist, you can use Monterey Jack cheese for a sweeter flavor.
• For the Dill Flavor
- Finely Chopped Dill Pickles – infuses each bite with that tangy pickle goodness; remember to pat them dry to minimize moisture before mixing.
- Garlic Powder – enhances the overall flavor profile; if you love garlic, consider increasing the amount for an extra kick.
• For Crunchiness
- Breadcrumbs (optional) – gives the bites that extra crunch; omit for a gluten-friendly version or substitute with crushed cornflakes for a similar texture.
• Baking Necessities
- Nonstick Spray or Parchment Paper – essential for preventing sticking and ensuring even browning; don’t forget to line your baking sheet for best results!
Step‑by‑Step Instructions for Crispy Pickle Cheese Bites
Step 1: Preheat the Air Fryer or Oven
Begin by preheating your air fryer or oven to 400°F (200°C). This ensures that your Crispy Pickle Cheese Bites start cooking immediately and achieve that perfectly golden, crunchy exterior. If you’re using an oven, line a baking sheet with parchment paper or a silicone mat to prevent sticking and ensure even browning.
Step 2: Mix the Cheese and Pickles
In a mixing bowl, combine the shredded cheddar cheese, mozzarella cheese, finely chopped dill pickles, and garlic powder. Use your hands or a spatula to mix until all ingredients are evenly distributed. You should observe a cohesive mixture that holds together without excess moisture. This step is crucial for achieving the right texture in your crispy bites.
Step 3: Form the Cheese Bites
Using a tablespoon, scoop out the mixture and form it into small mounds on the prepared baking sheet. Aim for tablespoon-sized portions and gently press each mound down slightly to ensure they cook evenly. Leave some space between each mound to allow for air circulation. Visualize a tray full of enticing, uniform piles ready to become delectable Crispy Pickle Cheese Bites.
Step 4: Bake or Air Fry
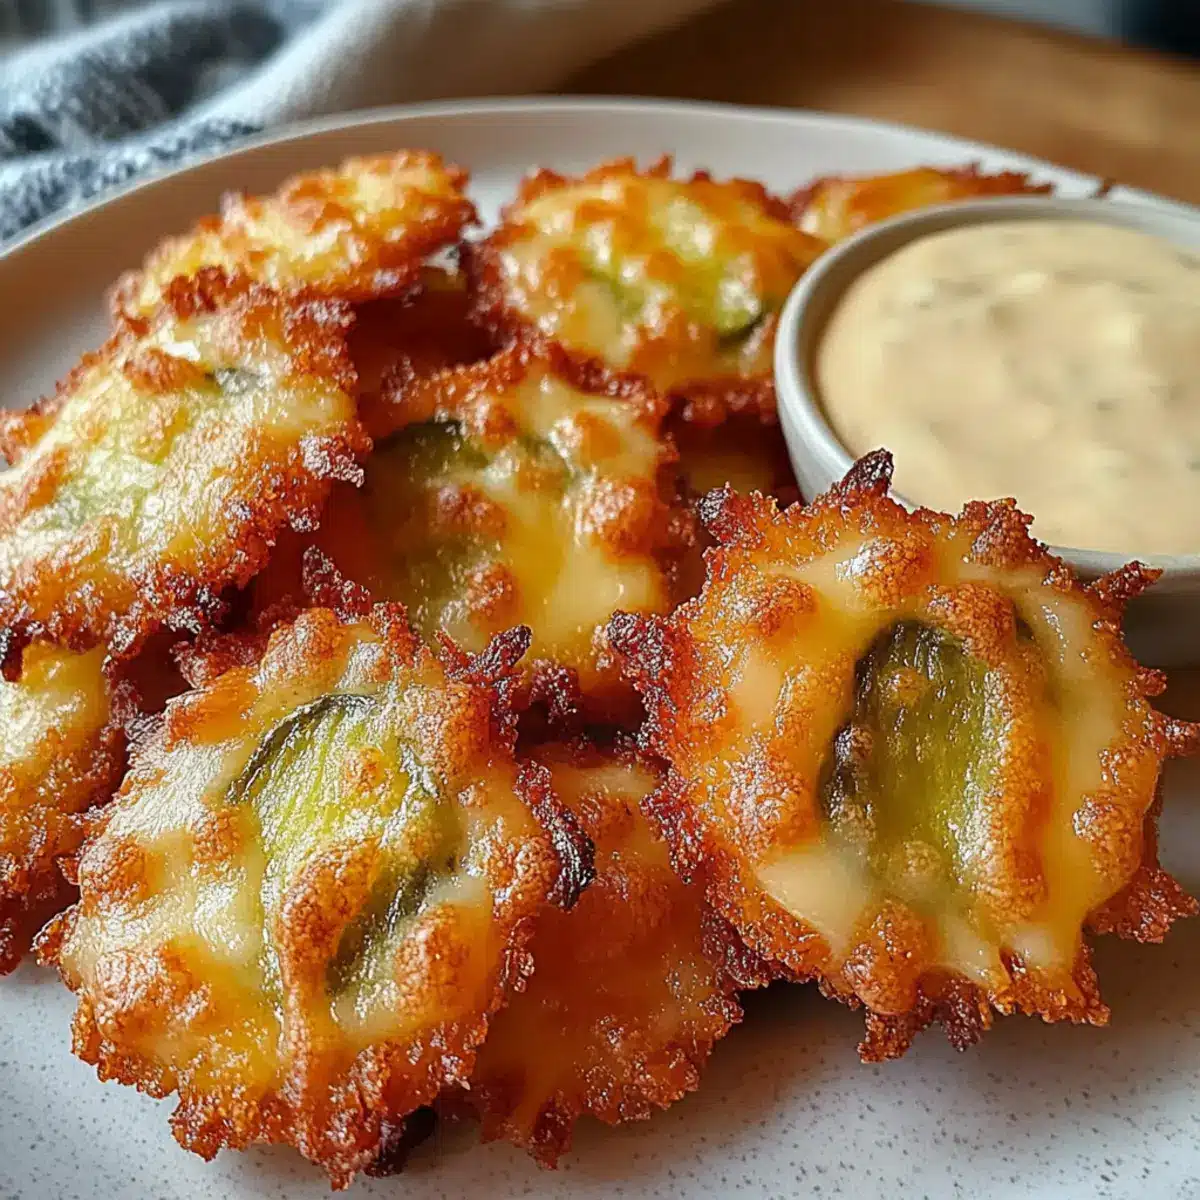
Place the baking sheet in the preheated air fryer or oven. Bake for 6 to 8 minutes in the air fryer or about the same time in the oven, until the bites are golden brown and bubbly. Keep an eye on them—look for a crispy, lace-like edge that indicates they are ready. Your kitchen will soon be filled with a tantalizing aroma!
Step 5: Cool for Perfect Crispiness
Once baked, remove the tray from the oven or air fryer and let the Crispy Pickle Cheese Bites cool for about 2 to 3 minutes. This cooling time is essential, as it enhances their crispiness. Take a moment to admire their beautiful golden color while resisting the urge to dive in immediately!
Step 6: Serve and Enjoy
Serve your hot, crunchy Crispy Pickle Cheese Bites immediately, paired with dipping sauces like ranch or spicy mayo for an additional burst of flavor. They make for an irresistible snack, perfect for sharing during game nights or as a quick treat. Enjoy the fabulous blend of cheesy goodness and tangy pickles!
What to Serve with Crispy Pickle Cheese Bites
Elevate your snack experience with delightful pairings that complement the crunchy goodness of these cheesy treats.
- Creamy Ranch Dip: A classic pairing, it’s cool and tangy, balancing the savory flavors of cheese and pickles perfectly.
- Spicy Mayo: Adds a zesty kick that enhances the crunchiness while offering a contrasting creamy texture.
- Fresh Cucumber Salad: Crisp slices of cucumber tossed in a light vinaigrette bring a refreshing burst of flavor.
- Sweet Potato Fries: Their natural sweetness and crispy texture create a delicious contrast to the savory bites.
- Mixed Veggie Platter: Serve colorful veggies for a healthy crunch that adds freshness and color to your spread.
- Classic Sliders: These cheesy bites make for a fun side to mini burgers, adding a delightful twist to your meal.
- Fruit Skewers: For a sweet note, consider fruit skewers that balance the savory cheese flavors with refreshing sweetness.
- Iced Tea or Lemonade: A chilled drink offers a refreshing counterbalance to the warm, cheesy bites.
- Chocolate Chip Cookies: For dessert, indulge in warm, gooey cookies that provide a sweet finish to your snack spread.
Make Ahead Options
Crispy Pickle Cheese Bites are perfect for meal prep enthusiasts! You can prepare the cheese and pickle mixture up to 24 hours in advance, storing it in an airtight container in the refrigerator to maintain its freshness. Just remember to pat the pickles dry thoroughly to prevent excess moisture. When you’re ready to enjoy, simply scoop out the mixture, form it into mounds on a parchment-lined baking sheet, and bake or air fry as directed. For longer storage, you can freeze the uncooked mounds for up to 1 month; just cook them directly from frozen while adding an extra minute to the baking time. This way, you’ll have delicious crispy snacks ready in no time!
How to Store and Freeze Crispy Pickle Cheese Bites
Fridge: Store leftover Crispy Pickle Cheese Bites in an airtight container for up to 3 days. Reheat in the oven for a few minutes to regain crispiness.
Freezer: For long-term storage, freeze uncooked mounds of the mixture on a baking sheet. Once frozen solid, transfer to a freezer-safe bag and store for up to a month.
Reheating: To reheat frozen bites, bake directly from the freezer at 400°F (200°C) for 8–10 minutes until golden and heated through.
Variations & Substitutions for Crispy Pickle Cheese Bites
Feel free to unleash your culinary creativity and give these Crispy Pickle Cheese Bites a personal twist!
-
Spicy Kick: Mix in crushed red pepper flakes or diced jalapeños for a fiery heat that tantalizes the taste buds. The added warmth elevates your cheesy bites to a whole new level of excitement.
-
Herb Garden: Add freshly chopped dill, parsley, or chives post-baking to enhance the freshness and bring a burst of color to your dish. These vibrant herbs not only add nutrition but also pair beautifully with the tangy pickles.
-
Cheese Variety: Swap in different cheeses like gouda for a sweet, smoky flavor or pepper jack for an extra punch! Experimenting with cheese opens a world of flavor possibilities and keeps each bite exciting.
-
Nutty Crunch: For an earthy flavor, replace regular breadcrumbs with crushed nuts or seeds for added nutrition and texture. Almonds or sunflower seeds offer a lovely crunch that complements the cheese beautifully.
-
Vegetable Boost: Incorporate finely chopped spinach or bell peppers into the cheese mixture for a veggie-packed version that adds color and vitamins. Every bite becomes a little more virtuous while still satisfying your cravings.
-
Tangy Twist: Replace dill pickles with banana peppers or olives for a briny kick that’s equally delightful. This variation will surprise your taste buds and keep everyone guessing at the flavor combination!
-
Cheesy Inspirations: Try mixing in some cream cheese or ricotta for a thicker texture that melts beautifully. The creaminess enhances the richness, making each bite an irresistible treat.
For more delightful experiences, consider pairing these bites with a crunchy side salad to bring extra freshness, or indulge in the sweetness of Sweet Little Bites to satisfy your sweet tooth after these savory snacks! Whether you’re looking to change it up a bit or stick to the classic version, these variations ensure everyone can enjoy a taste of Crispy Pickle Cheese Bites just the way they love it.
Expert Tips for Crispy Pickle Cheese Bites
• Pat Pickles Dry: Ensure your dill pickles are well-drained and patted dry to avoid excess moisture, which can make the bites soggy.
• Use Freshly Shredded Cheese: Freshly shredding your cheese improves melting and texture, giving you the best results for your Crispy Pickle Cheese Bites.
• Space for Success: Avoid overcrowding the baking sheet to guarantee even cooking and perfectly crispy edges on every bite.
• Chill for Firmness: If your mixture feels too soft, consider chilling it for about 15 minutes before forming mounds; this helps maintain shape while baking.
• Serve Immediately: For the best flavor and texture, serve these delicious bites right away—warm from the oven or air fryer.

Crispy Pickle Cheese Bites Recipe FAQs
What type of pickles should I use for this recipe?
I recommend using dill pickles as they provide the perfect tangy flavor for these Crispy Pickle Cheese Bites. Look for pickles that are firm and not overly soft or mushy, as this will ensure the best texture. If you can’t find dill pickles, you could also use bread and butter pickles for a sweeter taste, but they will alter the overall flavor profile.
How should I store leftover Crispy Pickle Cheese Bites?
To keep your leftover Crispy Pickle Cheese Bites fresh, store them in an airtight container in the fridge for up to 3 days. When you’re ready to enjoy them again, simply reheat in the oven at 350°F (175°C) for about 5–7 minutes until they regain their crunch. This method will help maintain their crispy texture.
Can I freeze the cheese bites before cooking?
Absolutely! For easy meal prep, scoop the cheese mixture into mounds and place them on a parchment-lined baking sheet. Freeze until solid, then transfer the mounds to a freezer-safe bag for up to a month. When you’re ready to bake them, simply place them directly in a preheated oven or air fryer, and add an extra minute or two to the cooking time for the best results.
What should I do if my cheese bites are soggy?
If your Crispy Pickle Cheese Bites turn out soggy, it’s likely due to excess moisture from the pickles or overcrowding on the baking sheet. Always make sure to pat the chopped pickles dry before mixing them in the cheese, and give each mound enough space on the baking sheet for air circulation. Additionally, baking or air-frying in smaller batches can improve the texture significantly.
Are these bites gluten-free?
Yes! These Crispy Pickle Cheese Bites can easily be made gluten-friendly by omitting the breadcrumbs. If you prefer some crunch, you can substitute with crushed cornflakes, which work wonderfully without introducing gluten. Always check labels for any pre-packaged ingredients to ensure they align with your dietary needs.
Crispy Pickle Cheese Bites: Quick, Cheesy Bliss Awaits
Ingredients
Equipment
Method
- Preheat your air fryer or oven to 400°F (200°C). Line a baking sheet with parchment paper to prevent sticking.
- In a mixing bowl, combine the shredded cheddar, mozzarella, dill pickles, and garlic powder. Mix until cohesive.
- Form small mounds on the baking sheet with a tablespoon, leaving space between each mound.
- Bake in the air fryer or oven for 6 to 8 minutes until golden and bubbly.
- Let the bites cool for 2 to 3 minutes to enhance their crispiness.
- Serve immediately with dipping sauces like ranch or spicy mayo.
Leave a Reply