
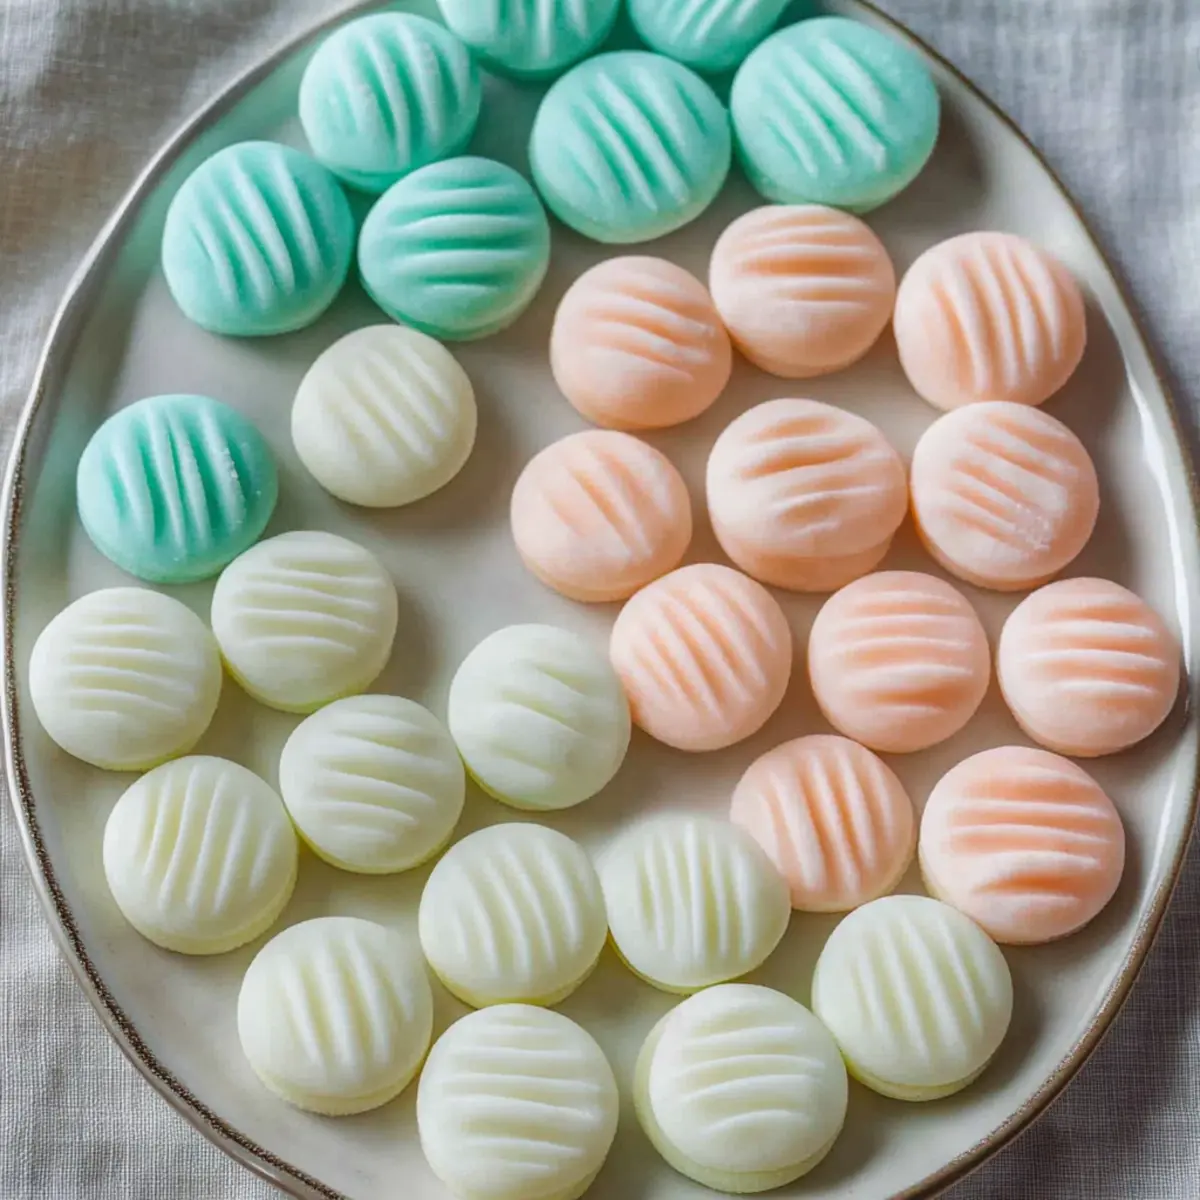
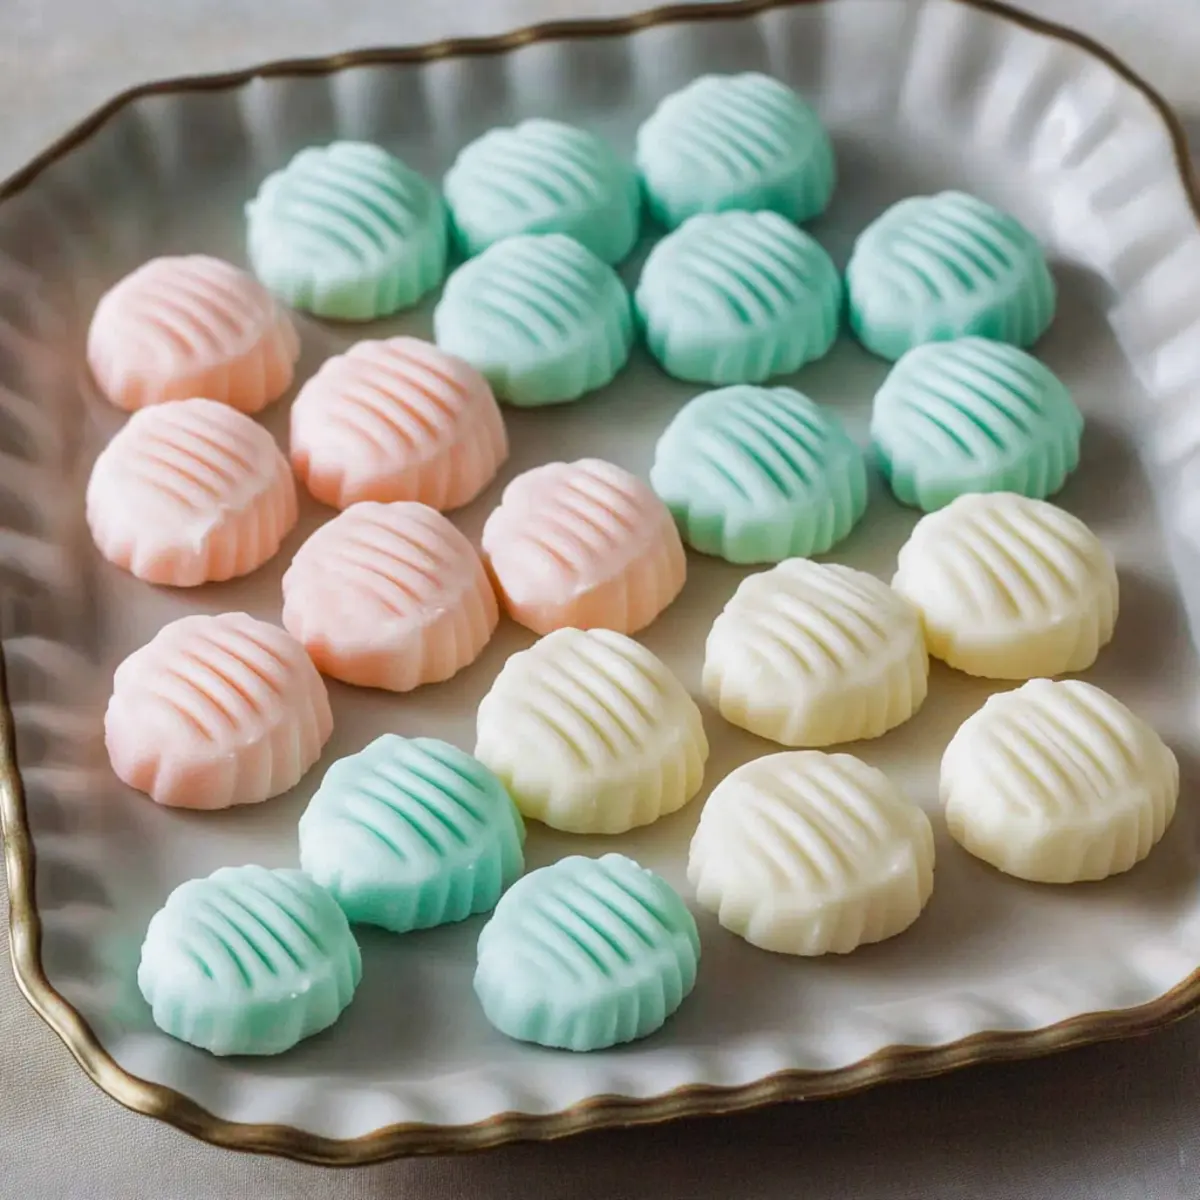
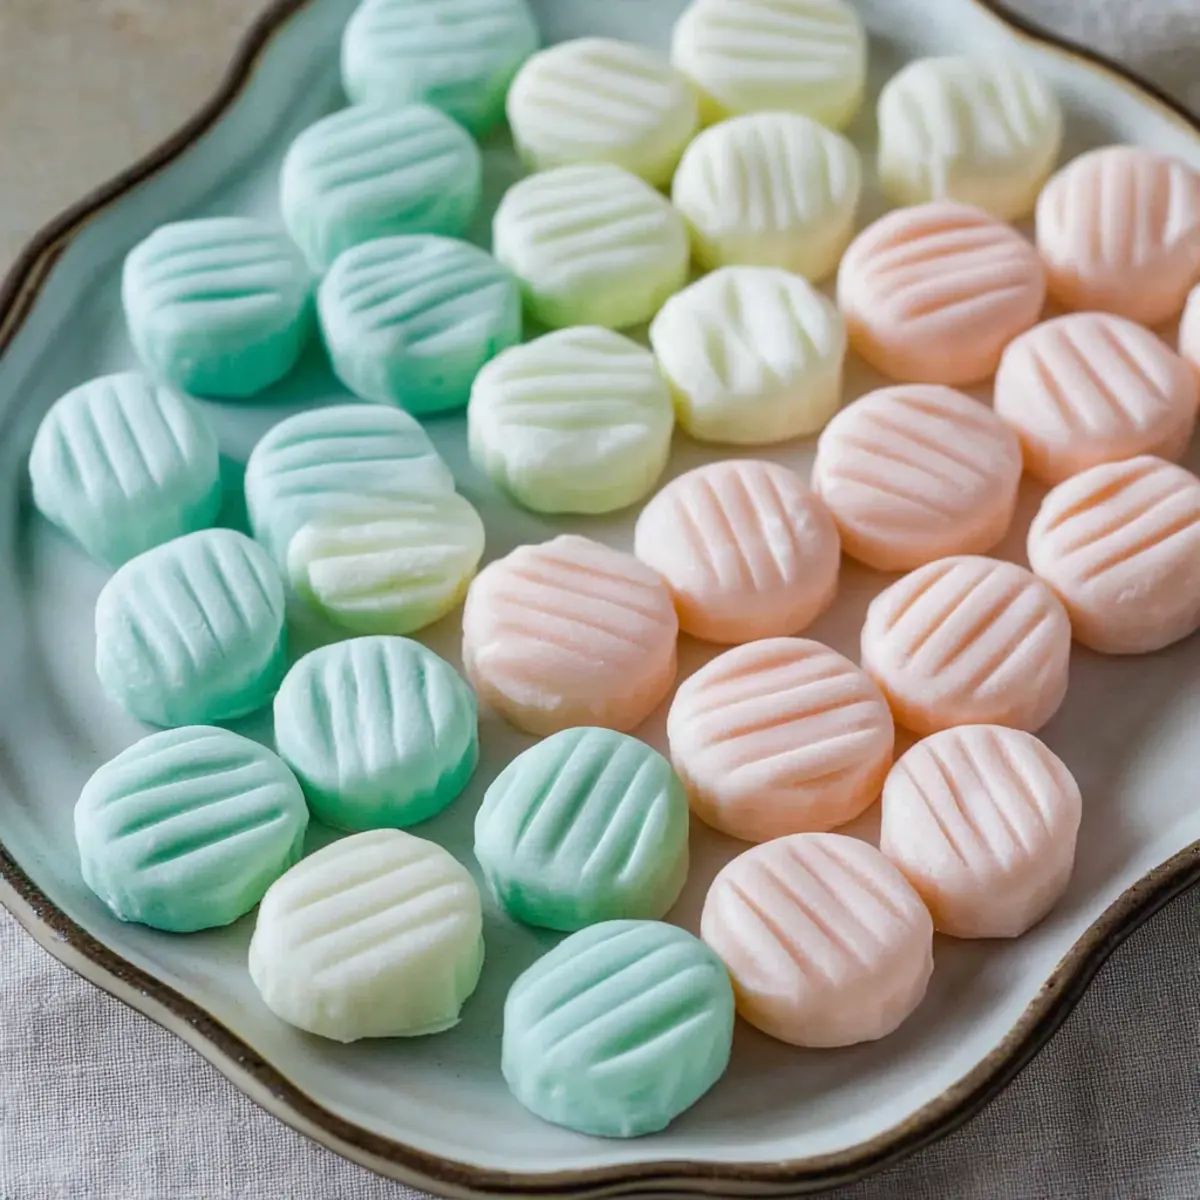
As I unwrapped the soft, pastel-colored mints, a wave of nostalgia washed over me, bringing back memories of joyous celebrations and cherished family gatherings. These delightful Cream Cheese Mints are not just candies; they are an easy homemade treat that melts in your mouth and makes every occasion feel extra special. With only five simple ingredients and no stovetop fuss, preparing these gluten-free morsels is a breeze, making them perfect for holiday gifting or adding a charming touch to dessert tables. Each mint offers a light, creamy texture and a refreshing hint of peppermint that’s simply irresistible. Curious about how to whip up this delightful indulgence? Let’s get started on creating your own sweet batch!
Why are Cream Cheese Mints a Must-Try?
Nostalgic Charm: These mints bring back sweet memories from family get-togethers and festive celebrations, adding a personal touch to your holiday treats.
Effortless Preparation: With only five simple ingredients, making these delights is easy—no complex techniques required!
Gluten-Free Goodness: Enjoy these delicious mints knowing they are gluten-free, perfect for everyone at your gathering.
Versatile Creativity: Explore flavor variations by using different extracts, from spearmint to vanilla, and customize their colors for any occasion! You might also enjoy trying other sweets like Lemon Cream Puffs for variety.
Crowd-pleaser: These creamy, melt-in-your-mouth mints are a hit with kids and adults alike—perfect for dessert trays or as thoughtful gifts!
Cream Cheese Mints Ingredients
• Discover the delightful ingredients to make your Cream Cheese Mints!
For the Mints
- Cream Cheese – Adds creaminess and flavor; use full-fat for the best texture.
- Unsalted Butter – Provides a rich mouthfeel; ensure it’s softened for easy mixing.
- Powdered Sugar – Crucial for sweetness and structure; about 2 lbs needed, plus extra for dusting.
- Fine Sea Salt – Enhances flavors and balances sweetness; used sparingly, no substitutes needed.
- Peppermint Extract – Offers refreshing mint flavor; adjust to taste or replace with other extracts like spearmint.
For Color (Optional)
- Gel Food Coloring – Use for aesthetic appeal; gel-based colors won’t alter dough texture.
Step‑by‑Step Instructions for Cream Cheese Mints
Step 1: Mix Cream Cheese and Butter
Begin by placing softened cream cheese and unsalted butter in a stand mixer bowl. Beat on medium speed until the mixture is smooth and well combined, approximately 2-3 minutes. The goal is a creamy texture with no lumps. This step is crucial for the base of your Cream Cheese Mints, so ensure both ingredients are at room temperature for the best results.
Step 2: Incorporate Sugar and Salt
Gradually add in the fine sea salt, followed by the powdered sugar in heaping tablespoons. Continue mixing the ingredients on low speed until fully incorporated, which should take around 4-5 minutes. As you mix, the dough will begin to thicken and take on a soft consistency, indicating it’s coming together nicely for your delightful mints.
Step 3: Add Flavoring
Next, pour in the peppermint extract and mix on low until everything is well blended, scraping down the sides of the bowl as needed. This should only take another 1-2 minutes. You want to ensure that the refreshing mint flavor is evenly distributed throughout your Cream Cheese Mints for a delightful taste in every bite.
Step 4: Color the Dough (Optional)
If you wish to add color, split the dough into smaller portions according to how many different shades you desire. Add a drop or two of gel food coloring to each portion, mixing thoroughly to combine. Continue until you achieve the desired hues, making sure to keep the texture smooth and cohesive in your mints.
Step 5: Shape the Mints
Using your hands, roll the colored dough into small balls, about 1 teaspoon each, and set them on a parchment-lined baking sheet. Be sure to leave approximately 2 inches between each mint to avoid sticking as they expand slightly. This step creates the whimsical shape of your Cream Cheese Mints, adding to their festive charm.
Step 6: Flatten with a Fork
Dust a fork with powdered sugar to prevent sticking, then gently press down on each mint ball to flatten them slightly. This should leave a lovely pattern on top while maintaining the mint’s tenderness. The flattened shape allows for better drying and an appealing presentation when serving your delightful treats.
Step 7: Dry the Mints
Allow the mints to dry at room temperature for at least 2 hours. This time ensures they firm up and develop that signature melt-in-your-mouth texture. You’ll know they’re ready when they feel set and slightly dry to the touch. This crucial step will elevate your Cream Cheese Mints to perfection, making them easy to serve later.
Step 8: Store Properly
Once dried, transfer the Cream Cheese Mints to an airtight container. You can refrigerate them for up to a month or freeze for six months if you prefer to make them ahead of time. Proper storage will help maintain their delightful taste and texture, allowing you to indulge in these charming treats whenever you wish!
Expert Tips for Cream Cheese Mints
-
Room Temperature Ingredients: Ensure that your cream cheese and butter are at room temperature to achieve a smooth and creamy texture. Cold ingredients can lead to lumps.
-
Avoid Overmixing: Mix the dough just until combined. Overmixing can create tougher mints rather than the desired melt-in-your-mouth texture.
-
Dust for Easy Rolling: To prevent the dough from sticking, dust your hands with powdered sugar while rolling the mints. This helps maintain their lovely shape without mess.
-
Use Molds for Consistency: For perfectly shaped mints, consider using silicone molds instead of hand-rolling. This technique ensures uniformity and an appealing look.
-
Proper Drying Time: Allow the mints to dry at room temperature for at least 2 hours. This is essential for them to firm up and develop their delightful texture.
-
Experiment with Colors: Feel free to mix and match colors for different occasions, and use gel food coloring for vibrant results without altering the texture of the mints.
What to Serve with Cream Cheese Mints
When it comes to creating a delightful dessert spread, these creamy, melt-in-your-mouth mints can effortlessly enhance any occasion.
- Chocolate-Dipped Strawberries: The sweet, rich chocolate contrasts perfectly with the refreshing mint, creating a deliciously indulgent pairing.
- Light Fruit Salad: Featuring seasonal fruits, this fresh medley offers a refreshing burst of flavor that complements the sweetness of the mints beautifully. Try a hint of lime juice for extra zing!
- Decadent Brownies: Rich and fudgy, brownies provide a satisfying texture contrast to the lightness of your Cream Cheese Mints, making for a balanced dessert table.
- Mini Cheesecakes: Creamy and smooth, cheesecake has a similar texture that harmonizes with the mints’ creaminess, making for a luxurious duo. Garnish with a mint leaf for a beautiful presentation!
- Herbal Iced Tea: A chilled herbal tea, like mint or chamomile, refreshes the palate between bites of sweets, enhancing your overall experience of the dessert table.
- Sipping Chocolate: The rich, velvety nature of sipping chocolate pairs perfectly with the freshness of the mints, creating a heavenly combination for chocolate lovers.
- Vanilla Ice Cream: The simple creaminess of vanilla ice cream beautifully contrasts the texture of mints, allowing for a sweet cooling effect—perfect on warm days.
Cream Cheese Mints Variations
Feel free to explore these delightful variations and make this recipe your own with just a few simple swaps!
-
Dairy-Free: Substitute cream cheese and butter with dairy-free alternatives like coconut cream and vegan butter for a lactose-free treat.
-
Nutty Twist: Add finely chopped walnuts or pecans to the mint mixture for an exciting crunch that complements the creamy texture.
-
Chocolate Drizzle: Melt dark or white chocolate and drizzle it over the finished mints for a decadent touch that takes them to the next level.
-
Spicy Mint: Enhance the flavor by adding a pinch of cayenne pepper or crushed red pepper flakes for a surprising heat that balances the sweetness.
-
Seasonal Spice: Incorporate a dash of cinnamon or nutmeg to give the mints a warm, holiday-inspired flavor that’s perfect for winter gatherings.
-
Fruit Flavor: Experiment by replacing peppermint extract with other extracts like orange or almond for a fruity twist that brightens the taste profile.
-
Festive Shapes: Use holiday-themed cookie cutters instead of rolling into balls for a fun twist; top with edible glitter to match the occasion!
-
Color Variety: Try layering different colors in one mint! Simply divide the dough, color each portion differently, and layer when molding for a stunning visual treat.
For more delightful variations, you might also enjoy trying Jalapeno Pineapple Cream as a creative dip or to spice up your next gathering!
Make Ahead Options
These Cream Cheese Mints are perfect for busy home cooks looking to simplify their holiday preparations! You can mix the dough up to 24 hours in advance and refrigerate it until ready to shape. Simply roll the mints and flatten them before serving; they’ll be just as delicious after spending some time in the fridge. For those looking to prep even further ahead, the mints can be shaped and allowed to dry, then stored in an airtight container in the refrigerator for up to 3 days. Just ensure they are completely dry before transferring them to prevent any sticking. When you’re ready to serve, there’s no need to thaw—simply present these charming treats as delightful morsels at your next gathering!
How to Store and Freeze Cream Cheese Mints
Fridge: Store mints in an airtight container in the refrigerator for up to 1 month, ensuring they stay fresh and creamy.
Freezer: For longer storage, freeze the mints in a single layer on a parchment-lined baking sheet. Once frozen, transfer them to a freezer-safe bag or container for up to 6 months.
Reheating: If desired, let the mints sit at room temperature for about 15 minutes before enjoying them again. They’re best served cool and refreshing!
Room Temperature: If serving immediately, keep the mints in a cool place for a few hours as they tend to soften in warmer conditions.

Cream Cheese Mints Recipe FAQs
What type of cream cheese should I use?
It’s best to use full-fat cream cheese for the richest flavor and creamiest texture. Look for plain cream cheese, avoiding flavored varieties, which could alter the taste of your mints.
How should I store leftovers?
Store your Cream Cheese Mints in an airtight container in the refrigerator for up to 1 month. If you want to keep them longer, you can freeze them for up to 6 months. Just make sure they are in single layers, separated by parchment paper to prevent sticking.
Can I freeze Cream Cheese Mints?
Absolutely! To freeze, place the mints in a single layer on a parchment-lined baking sheet until they are fully frozen. Then, transfer them to a freezer-safe bag or container. When ready to enjoy, let them sit at room temperature for about 15 minutes to soften slightly.
Why did my cream cheese mints turn out tough?
If you find your mints are tougher than expected, it may be due to overmixing. To maintain that delightful melt-in-your-mouth texture, mix just until the ingredients are combined. Remember, gentle handling is key!
Are these mints pet-friendly?
No, these Cream Cheese Mints are not safe for pets. The cream cheese and sugar can upset their stomachs, and certain flavorings may be harmful too. Always keep homemade goodies away from your furry friends!
Can I use different extracts for flavor?
Very! You can substitute peppermint extract with other flavors, such as spearmint, vanilla, or almond. Just adjust the amount according to your taste preferences. It’s a fun way to create unique variations on this classic treat!
Cream Cheese Mints: Your Easy Melt-in-Your-Mouth Treat
Ingredients
Equipment
Method
- Mix softened cream cheese and unsalted butter in a stand mixer bowl on medium speed for 2-3 minutes until smooth.
- Gradually add fine sea salt and powdered sugar, mixing on low for 4-5 minutes until fully incorporated.
- Pour in peppermint extract and mix on low for 1-2 minutes until well blended.
- For color, split dough and add gel food coloring to each portion, mixing to combine.
- Roll dough into 1 teaspoon balls and place them on a parchment-lined baking sheet.
- Dust a fork with powdered sugar and gently press down each ball to flatten.
- Allow the mints to dry at room temperature for at least 2 hours.
- Transfer dried mints to an airtight container for storage.
Leave a Reply