
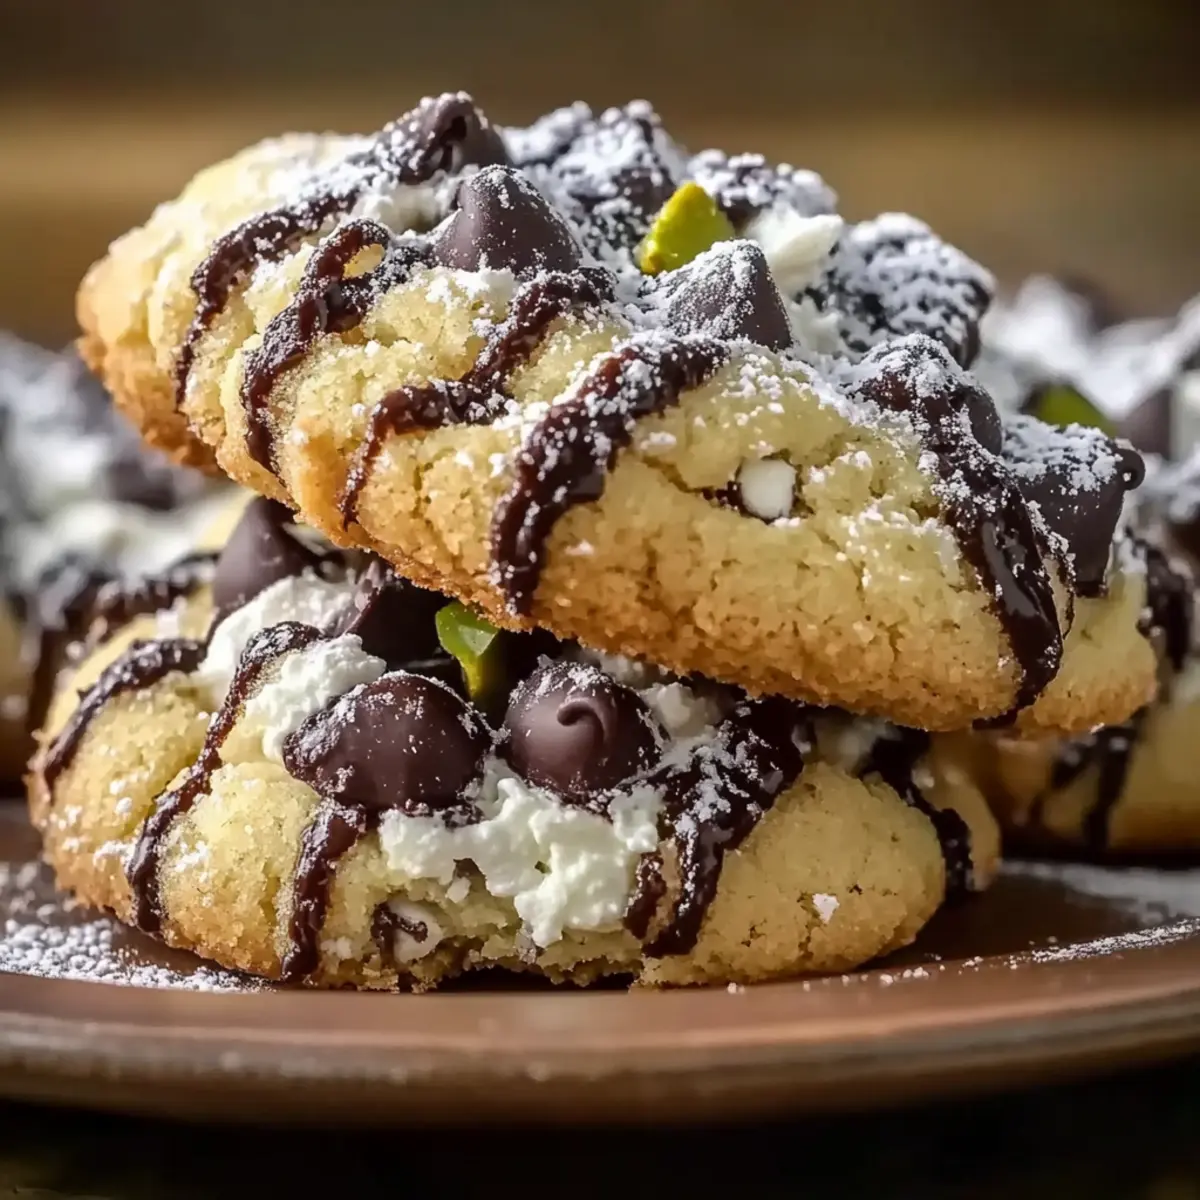
The kitchen was alive with laughter and the enticing aroma of baking cookies, reminding me of cherished family gatherings. Today, I’m excited to share my authentic Cannoli Cookies, a delightful twist on the classic Italian dessert. With only a handful of ingredients and no butter in sight, these cookies pack a punch of flavor and nostalgia while keeping things simple. Imagine tangy ricotta, a hint of citrus, and a satisfying crunch from pistachios, all wrapped in a delicate shell. Plus, they’re a crowd-pleaser that can be prepped in just six easy steps. Whether you’re hosting a gathering or craving a sweet treat for yourself, these cookies bridge the gap between homemade comfort and festive celebration. What’s your favorite memory involving delicious treats? Let’s dive into this recipe together!

Why are Cannoli Cookies a must-try?
Irresistible Flavor: These Cannoli Cookies combine the classic taste of Italy with a unique twist, infusing your kitchen with the enticing aromas of sweet ricotta and citrus.
Easy & Quick: The straightforward six-step process makes baking worry-free, whether you’re a seasoned chef or a cooking novice.
No Butter Required: You can indulge guilt-free; these cookies are made without butter, using ricotta to maintain moisture and flavor.
Crowd-Pleasing Treat: Perfect for gatherings, these cookies are bound to impress friends and family alike.
Versatile Options: Don’t stop at the classic! Explore variations like Cinnamon Sweet Potato Breakfast Cookies for breakfast or Strawberry Crunch Cookies for a fruity dessert twist.
Cannoli Cookies Ingredients
For the Cookie Dough
• All-Purpose Flour – Provides structure for the cookies; can be sifted for a lighter texture.
• Granulated Sugar – Adds sweetness; consider using less for a less sweet cookie.
• Ricotta Cheese (¼ cup for dough) – Adds moisture and tenderness; ensure it’s at room temperature for easy mixing.
• Large Egg – Binds the ingredients and helps in leavening; room temperature eggs mix better.
• Vanilla Extract – Adds depth of flavor; use pure vanilla extract for the best taste.
• Lemon Zest – Imparts brightness; always use fresh zests for optimal flavor.
For the Filling
• Ricotta Cheese (¼ cup for filling) – Maintains moisture in the filling; blend until silky smooth to avoid graininess.
• Mini Chocolate Chips – Provides sweetness and texture; substitute with white chocolate chips or omit for a less sweet filling.
• Chopped Pistachios – Adds a nutty flavor and crunch; can replace with walnuts or almonds for different flavor profiles.
For Topping
• Powdered Sugar – Used for dusting; can be flavored with lemon zest for an added twist.
Remember, these Cannoli Cookies are sure to bring a slice of Italy right into your home!
Step‑by‑Step Instructions for Cannoli Cookies
Step 1: Preheat the Oven
Start by preheating your oven to 350°F (175°C). This ensures that your Cannoli Cookies will bake evenly and achieve that desired golden-brown finish. While the oven heats, gather your baking sheets and line them with parchment paper, ready for the cookie dough.
Step 2: Mix Dry Ingredients
In a large mixing bowl, whisk together the all-purpose flour and granulated sugar until thoroughly blended. This step is crucial for ensuring that the sugar is evenly distributed through the dough, which contributes to the overall sweetness and texture of the Cannoli Cookies.
Step 3: Combine Wet Ingredients
In a separate bowl, mix together ¼ cup of ricotta cheese, the large egg, pure vanilla extract, and lemon zest. Whisk these ingredients until the mixture is smooth and creamy. This wet mixture will bring moisture and flavor to your cookie dough, so make sure everything is well combined.
Step 4: Create the Dough
Gradually add the flour and sugar mixture to the wet ingredients, stirring gently until a soft dough forms. Be careful not to overmix, as this could lead to tough cookies. The dough should be slightly sticky but manageable, offering a delightful hint of sweetness from the ricotta.
Step 5: Rest the Dough
Cover the dough with a clean kitchen towel and let it rest for 30 minutes at room temperature. This resting period will allow the gluten to relax, making the dough easier to roll out. While you wait, prepare your baking sheets by ensuring the parchment is smooth and ready.
Step 6: Roll and Cut Dough
After the rest period, turn the dough out onto a lightly floured surface. Roll it out to about ¼ inch thickness and then, using a sharp knife or pizza cutter, cut the dough into 2×3 inch rectangles. These pieces will form the base of your delicious Cannoli Cookies.
Step 7: Prepare the Filling
In a clean bowl, combine the remaining ¼ cup of ricotta, mini chocolate chips, and chopped pistachios. Mix until the filling is well integrated. This creamy filling will elevate your Cannoli Cookies, providing a sweet and nutty experience that mirrors traditional cannoli.
Step 8: Assemble the Cookies
Place a spoonful of the filling onto the center of each rectangle of dough. Carefully fold the dough over to create a pocket, then pinch the edges to seal them tightly. This step is key to keeping the filling secure during baking, ensuring a delightful surprise in each bite.
Step 9: Bake the Cookies
Transfer the assembled cookies to the preheated oven and bake for 15-18 minutes. Keep an eye on them; they should turn golden brown on the outside. The aroma of freshly baked Cannoli Cookies will fill your kitchen, creating an irresistible atmosphere.
Step 10: Cool and Dust
Once baked, allow the cookies to cool on the baking sheets for a few minutes before transferring them to a wire rack. After they have cooled completely, dust them generously with powdered sugar. This final touch adds a beautiful presentation and a hint of sweetness to your delicious Cannoli Cookies.

Make Ahead Options
These Cannoli Cookies are absolutely perfect for meal prep, allowing you to save time during busy weeks! You can prepare the cookie dough up to 24 hours in advance; simply cover it tightly with plastic wrap and refrigerate. The filling can be made up to 3 days ahead—just store it in an airtight container in the fridge to keep it fresh. When you’re ready to bake, let the dough sit at room temperature for about 10 minutes to soften, then roll, assemble, and bake as instructed. By making these components ahead, you’ll enjoy delicious, fresh Cannoli Cookies with minimal effort, bringing a sweet taste of Italy right to your home!
Cannoli Cookies Variations & Substitutions
Feel free to get creative with these Cannoli Cookies and customize them to match your taste preferences!
-
Dairy-Free: Substitute ricotta with dairy-free cream cheese or cashew cream for a delightful alternative that still brings creamy texture.
-
Gluten-Free: Use a gluten-free flour blend instead of all-purpose flour to cater to gluten sensitivities without sacrificing flavor.
-
Cinnamon Twist: Add a teaspoon of ground cinnamon to the dough for a warm spice note that complements the sweetness beautifully.
-
Chocolate-Pistachio Duo: Mix mini chocolate chips and finely chopped pistachios directly into the dough for an extra crunchy and nutty flavor.
-
Fruity Filling: Try adding fresh fruit, like diced cherries or blueberries, to the filling for a burst of natural sweetness and color.
-
Nut-Free: Omit the pistachios and replace them with sunflower seeds for a nut-free version that still offers a nice crunch.
-
Zesty Lime: Swap lemon zest for lime zest or even orange zest for a refreshing citrus twist that brightens the overall flavor profile.
These variations can enhance your Cannoli Cookies and suit a range of dietary needs, creating a delightful treat for any occasion. For more delicious options, don’t forget to check out these Cinnamon Sweet Potato Breakfast Cookies or indulge in the fruity flavors of Strawberry Crunch Cookies. Enjoy experimenting!
What to Serve with Cannoli Cookies
Indulge in the delightful experience of pairing these sweet treats with complementary flavors and textures.
- Rich Espresso: The boldness of espresso cuts through the sweetness of the cookies, creating a wonderfully balanced treat.
- Vanilla Ice Cream: A scoop of creamy vanilla ice cream adds a luscious contrast to the crispy cookies, making each bite a dreamy delight.
- Fresh Berries: A vibrant medley of tart strawberries or raspberries brightens the palate, enhancing the subtle citrus notes in the cookies.
- Whipped Cream: Light and fluffy whipped cream adds a luxurious touch, perfect for dipping or dolloping on top.
- Limoncello: This zesty Italian liqueur echoes the lemon zest in the cookies, enhancing their flavor while adding a festive flair.
- Savory Cheese Platter: Pair with a selection of sweet and savory cheeses for an upscale touch, creating a delightful contrast with the cookies’ sweetness.
- Dark Chocolate Sauce: Drizzle dark chocolate sauce over the cookies for an indulgent treat that satisfies chocolate lovers and complements the ricotta.
- Almond Biscotti: These crunchy cookies provide a textural contrast and a hint of nuttiness that pairs beautifully with Cannoli Cookies.
- Iced Tea: Refreshing herbal iced tea, sweetened lightly with honey, pairs well with the richness of the cookies, making for a perfect afternoon snack.
- Nutty Granola: Sprinkle over yogurt with Cannoli Cookies for added crunch, creating a delightful breakfast or brunch option that merges sweet and wholesome.
How to Store and Freeze Cannoli Cookies
Room Temperature: Store your Cannoli Cookies in an airtight container at room temperature for up to 3 days. Layer them with parchment paper to prevent sticking.
Fridge: For extended freshness, keep the cookies in the fridge for up to 5 days, ensuring they’re sealed well to maintain moisture.
Freezer: Freeze Cannoli Cookies for up to 1 month. Wrap them tightly in plastic wrap or foil, then place in an airtight container to avoid freezer burn.
Reheating: To enjoy them warm, simply reheat the cookies in a 350°F (175°C) oven for 5-7 minutes, ensuring they’re heated through but not overbaked.
Expert Tips for Cannoli Cookies
-
Ricotta Quality: Use good-quality ricotta cheese for the best flavor and texture. A grainy ricotta can affect the smoothness of your filling.
-
Temperature Matters: Ensure all ingredients, especially the ricotta and egg, are at room temperature. This helps achieve a well-mixed dough that’s easier to work with.
-
Watch Baking Time: Keep a close eye on the cookies as they bake. They should be golden brown, but not dark, to prevent an overcooked flavor and texture.
-
Sealing Technique: Pinch the edges of the dough firmly to secure the filling. This helps prevent it from leaking during baking, ensuring each cookie holds its delightful surprise.
-
Serving Fresh: Dust the Cannoli Cookies with powdered sugar right before serving. This keeps the sugar from absorbing moisture and maintains a beautiful presentation.
-
Flavor Variations: Don’t hesitate to experiment! Try different fillings, like swapping pistachios for almonds, to create your unique twist on these Cannoli Cookies.
Cannoli Cookies Recipe FAQs
How do I select ripe ingredients for Cannoli Cookies?
Absolutely! For your Cannoli Cookies, it’s essential to use high-quality ricotta cheese that’s smooth and creamy. Look for brands that offer whole milk ricotta for extra richness. Always ensure the lemons are fresh, as the zest will impart a bright flavor—avoid bottled options for the best results!
What is the best way to store leftover Cannoli Cookies?
For optimal freshness, store your Cannoli Cookies in an airtight container at room temperature for up to 3 days, placing parchment paper between layers to prevent sticking. If you find they’re not being eaten quickly enough, they can be refrigerated for up to 5 days.
Can I freeze Cannoli Cookies, and how do I do it properly?
Yes, you can definitely freeze Cannoli Cookies! To do this, wrap each cookie individually in plastic wrap or foil, ensuring they are tightly sealed. Place these wrapped cookies into an airtight container or freezer bag. They can be frozen for up to 1 month. When you’re ready to enjoy them, thaw in the fridge overnight, then reheat in a 350°F oven for 5-7 minutes.
What should I do if my cookie filling is too runny?
If your filling ends up being too runny, don’t worry! You can fix this by chilling the mixture in the refrigerator for about 30 minutes, which will help it firm up. Alternatively, consider adding a bit of additional ricotta or even a small amount of powdered sugar to thicken it without compromising the flavor.
Are Cannoli Cookies suitable for those with dietary restrictions?
These delightful Cannoli Cookies can be adjusted quite easily! For a gluten-free option, substitute all-purpose flour with almond flour. Always check the ingredients in chocolate chips, as some brands may contain allergens. Additionally, ensure your ricotta and other ingredients are safe for any specific allergies or dietary needs.
How long do Cannoli Cookies typically last?
When stored properly, Cannoli Cookies can last at room temperature for about 3 days, but their deliciousness is best enjoyed fresh! If you opt to refrigerate them, they should hold up nicely for up to 5 days without losing too much flavor.

Heavenly Cannoli Cookies That Bring Italy Home
Ingredients
Equipment
Method
- Preheat your oven to 350°F (175°C) and line baking sheets with parchment paper.
- Whisk together the all-purpose flour and granulated sugar in a large bowl.
- In a separate bowl, mix ricotta cheese, egg, vanilla extract, and lemon zest until smooth.
- Gradually add the flour and sugar mixture to the wet ingredients, stirring until a soft dough forms.
- Cover the dough with a towel and let it rest for 30 minutes.
- Roll out the dough to about ¼ inch thickness and cut into 2x3 inch rectangles.
- In a bowl, combine remaining ricotta, mini chocolate chips, and chopped pistachios until well mixed.
- Place a spoonful of filling onto each dough rectangle, fold, and seal the edges tightly.
- Bake for 15-18 minutes until golden brown.
- Allow to cool and dust with powdered sugar before serving.
Leave a Reply