
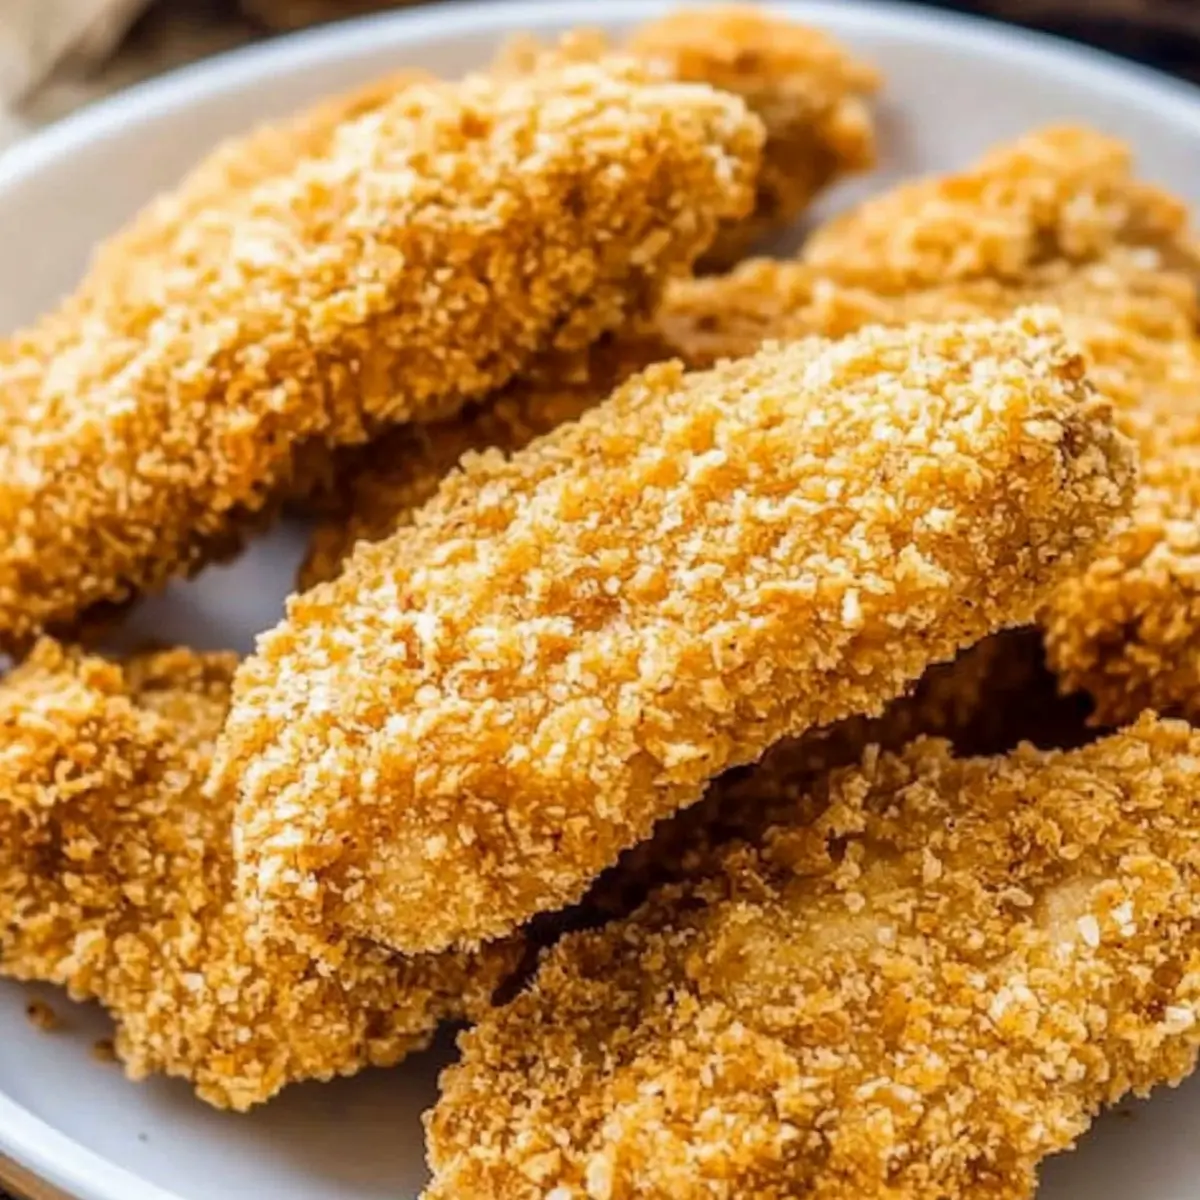
As I shuffled through my kitchen, the tantalizing aroma of crispy chicken wafted through the air—instant nostalgia! There’s something incredibly comforting about those golden, crunchy chicken tenders. My recipe for Crunchy Oven-Baked Chicken Tenders is not only a healthier alternative to fried versions, but they also offer an easy solution for weeknight meals or last-minute gatherings. Kitchen prep time is a breeze, making this dish a favorite for busy days while keeping your family happy. Plus, the secret brining technique ensures they remain juicy and flavorful—perfect for satisfying even the pickiest eaters. Are you ready to transform your dinner routine with this deliciously simple recipe?
Why Are These Chicken Tenders a Must-Try?
Versatile Option: Whether it’s a family dinner or a gathering with friends, these Crunchy Chicken Tenders adapt seamlessly to any occasion.
Healthier Choice: Oven-baked and devoid of frying, they give you that juicy satisfaction with fewer calories—guilt-free indulgence!
Kid-Approved: Kids love the crunchy coating, making it easier to satisfy picky eaters and ensuring they get excited about mealtime.
Easy Preparation: With just a handful of ingredients and straightforward steps, you can whip up a delicious batch in no time. Feel free to pair these tenders with a dip like sweet chili sauce or explore other chicken recipes like Garlic Parmesan Chicken for more variety!
Crowd-Pleaser: Whether served as an appetizer or a main dish, they’re sure to impress your guests and leave them asking for seconds!
Crunchy Chicken Tenders Ingredients
For the Chicken Tenders
• Chicken Tenderloins – The star of the dish; select high-quality tenderloins for tenderness and flavor.
• Salt – Essential for flavor enhancement; consider optional dry brining for juicy results.
For the Crunchy Coating
• Panko Breadcrumbs – Provides an irresistibly crunchy texture; toasting before use amplifies the crispiness.
• Oil – Aids in browning the breadcrumbs and sustaining crispness; olive or vegetable oil works well.
• Eggs – Binds the coating; crucial for ensuring the breadcrumbs stick properly.
• Water – Thins the egg mixture for smooth and even coverage during breading.
• Plain Flour (All-Purpose) – Acts as a base for the batter, contributing to a delicious crust.
For Additional Flavor
• Onion Powder – Adds savory depth; swap with increased garlic powder for a bolder taste.
• Garlic Powder – Offers a delightful savory note; adjust the quantity for a milder or stronger flavor.
These Crunchy Chicken Tenders are bound to be a hit with your family, perfect for easy meals or as a party snack!
Step‑by‑Step Instructions for Crunchy Chicken Tenders
Step 1: Brine the Chicken (Optional)
To start off making your Crunchy Chicken Tenders, brine the chicken tenderloins by mixing them with salt and refrigerating for 30-40 minutes. This process helps to lock in moisture and flavor. After brining, rinse the chicken under cold water and pat dry with paper towels to remove excess moisture.
Step 2: Toast Breadcrumbs
Preheat your oven to 350°F (175°C) to toast the panko breadcrumbs, adding a delightful crunch to your tenders. Spread the breadcrumbs on a baking sheet and drizzle with a little oil. Bake for 8-10 minutes, stirring halfway through, until they turn golden brown and fragrant, then set aside to cool.
Step 3: Prepare the Batter
In a mixing bowl, beat a couple of eggs and add a splash of water to thin the mixture. Gradually mix in flour, onion powder, and garlic powder to create a smooth batter for your Crunchy Chicken Tenders. Ensure everything is well combined, adjusting the salt according to your brining choice for optimal flavor.
Step 4: Coating the Chicken
Now it’s time to coat the chicken! Take each tenderloin and dip it first into the batter, allowing the excess to drip off. Immediately roll the chicken in the toasted panko breadcrumbs, pressing down gently to ensure an even coating per tenderloin. This step is key to achieving that perfect crunch.
Step 5: Bake the Chicken Tenders
Line a baking sheet with parchment paper and arrange the coated chicken tenders in a single layer. Bake them in your preheated oven at 400°F (200°C) for 10-12 minutes, or until they are golden brown and the internal temperature reaches 165°F (74°C). Keep an eye on them for that enticing crispy look!
Step 6: Optional Air Frying for Extra Crispiness
For an even crunchier finish, you can air fry your Crunchy Chicken Tenders. Set your air fryer to 400°F (200°C) and cook for about 8-10 minutes. This method gives a delightful crisp without additional oil, perfect for those craving an even healthier option.
Step 7: Serve and Enjoy
Once baked or air-fried, allow the chicken tenders to rest for a few minutes before serving. This way, they maintain their juiciness. Pair them with your favorite dipping sauces like ranch or sweet chili sauce for an extra flavor boost, making them a hit at any meal or gathering!
How to Store and Freeze Crunchy Chicken Tenders
Fridge: Store pre-baked chicken tenders in an airtight container for up to 3-4 days. This keeps them fresh and ready for quick meals.
Freezer: Uncooked tenders can be placed in airtight containers or freezer bags and stored for up to 3 months. Make sure they are well-wrapped to prevent freezer burn.
Reheating: For the best results, reheat baked tenders in the oven or air fryer at 350°F (175°C) for about 10 minutes. This helps restore their crunch.
Thawing: When you’re ready to cook frozen tenders, thaw them in the fridge overnight for optimal texture. Enjoy your delicious Crunchy Chicken Tenders!
Crunchy Chicken Tenders Variations
Feel free to put your spin on this recipe and make it truly your own—it’ll be a flavor explosion!
- Spice it Up: Add cayenne pepper to the breadcrumbs for a spicier kick. This will warm up those taste buds, making every bite a delightful adventure!
- Alternative Meats: Substitute chicken with turkey tenderloins for a leaner yet equally satisfying option that’s still packed with flavor.
- Gluten-Free: Use gluten-free breadcrumbs and flour so gluten-sensitive friends can enjoy these delicious tenders worry-free. Yum and safe for everyone!
- Herb-Infused: Mix dried herbs like oregano or thyme into the breadcrumbs for an extra flavor layer; it’s a simple way to elevate your tenders.
- Cheesy Crunch: Blend grated cheese into the breadcrumb mixture for a cheesy, savory twist that will have everyone coming back for seconds.
- BBQ Glaze: Brush the cooked tenders with your favorite BBQ sauce for a sweet and smoky finish that pairs beautifully with the crispy coating.
- Crispy Oven Fries: Serve these tenders alongside homemade crispy oven fries for a complete comfort meal that is always a crowd-pleaser!
- Dippin’ Sauces: Explore different sauce pairings like sweet chili or ranch to bring a refreshing zip to each bite, inviting even more flavors to the party!
For more delicious chicken inspiration, check out these recipes for Firecracker Chicken Bliss or try Pretzel Chicken Mustard for a tasty twist! Enjoy your culinary adventure!
Make Ahead Options
These Crunchy Chicken Tenders are a fantastic meal prep option that can save you valuable time during busy weeknights! You can brine and coat the chicken in advance—just refrigerate the prepared tenders in an airtight container for up to 3 days before baking. For longer storage, uncooked tenders can be frozen for up to 3 months; just be sure to layer parchment paper between them to prevent sticking. When you’re ready to serve, bake directly from the fridge or freezer (adding a few extra minutes to the cooking time), and enjoy that same crispy deliciousness! This way, you can have a satisfying and healthy dinner on the table with minimal stress.
Expert Tips for Crunchy Chicken Tenders
-
Brining Timing: Limit brining to 40 minutes max; exceeding this can make your chicken overly salty and less enjoyable.
-
Even Coating: For maximum crunch, apply the batter directly to the wet chicken without shaking off excess. This ensures the breadcrumbs adhere well.
-
Storage Solutions: Uncooked tenders can be frozen in airtight containers for up to 3 months; cooked tenders will stay fresh for 3-4 days in the fridge.
-
Reheating Hacks: When reheating your baked tenders, use the oven or air fryer to keep that delightful crunch intact—no sogginess here!
-
Breadcrumb Choice: Use fresh panko breadcrumbs for the best texture; stale crumbs won’t provide the desired crunch for your chicken tenders.
What to Serve with Crunchy Chicken Tenders
Brighten up your mealtime with delightful sides that perfectly accompany these crispy morsels!
-
Creamy Mashed Potatoes: The smooth texture and buttery flavor provide a comforting contrast to the crispy chicken tenders, making every bite a harmonious delight.
-
Fresh Garden Salad: A crisp salad adds a refreshing crunch and vibrant colors to your plate, balancing the richness of the chicken with a burst of freshness.
-
Honey Mustard Dip: This sweet and tangy dip complements the crunchy coating beautifully, adding an extra layer of flavor that will have everyone reaching for more.
-
Sweet Potato Fries: Slightly sweet and plentiful in spices, these fries echo the beloved crispy texture while adding a nutritional boost and colorful aspect to your meal.
-
Coleslaw: The crunchy cabbage and zesty dressing lend a cool crunch that contrasts wonderfully with your warm chicken, enhancing your dining experience through varied textures.
-
Corn on the Cob: Grill or boil a few ears of corn for a classic, hearty pairing; its natural sweetness and juiciness play well with the savory tenders.
-
Sparkling Lemonade: A refreshing drink like sparkling lemonade is the perfect thirst-quencher, with its citrus zing cutting through the richness of the tenders and enlivening the palate.
-
Chocolate Chip Cookies: Cap off the meal with warm, gooey cookies, providing a delightful balance to the savory chicken tenders—an indulgent treat for both kids and adults!
Crunchy Oven-Baked Chicken Tenders Recipe FAQs
What are the best chicken tenderloins to use for this recipe?
Absolutely! When selecting chicken tenderloins, I recommend choosing fresh, high-quality ones from a trusted source. Look for tenderloins that are pinkish in color with a firm texture. Avoid any pieces that have dark spots or an unusual odor, as these can indicate spoilage. Fresh tenderloins ensure the best flavor and texture in your crunchy chicken tenders.
How should I store the chicken tenders after cooking?
Very easy! After baking your crunchy chicken tenders, allow them to cool completely to room temperature. Then, place them in an airtight container in the fridge. They should last for about 3-4 days. This makes for quick, on-the-go meals during the week, as you can enjoy them cold or reheated!
Can I freeze the chicken tenders, and what’s the best way to do it?
You can definitely freeze uncooked chicken tenders! To avoid freezer burn, wrap them tightly in plastic wrap or store them in an airtight container, labeling them with the date. They can be frozen for up to 3 months. When you’re ready to enjoy them, simply thaw them in the fridge overnight before following the cooking instructions.
What should I do if my chicken tenders aren’t getting crispy?
If your crunchy chicken tenders aren’t as crispy as you’d like, it may be due to excess moisture. Ensure the chicken tenderloins are dried thoroughly after brining. Also, check your breadcrumb coating—if it’s not toasted beforehand, it won’t achieve that crispy texture. For future batches, you might try increasing the temperature by 25°F (about 15°C) or air-frying them to enhance that crispiness.
Can I make these tenders gluten-free?
Absolutely! For a gluten-free version of these crunchy chicken tenders, simply substitute regular panko breadcrumbs and all-purpose flour with gluten-free alternatives. Many brands offer gluten-free panko that results in a delightful crunch. Be sure to double-check any seasoning mixes or sauces to ensure they’re also gluten-free!
How can I reheat the leftover chicken tenders to maintain their crunch?
To keep your chicken tenders crispy during reheating, I suggest using an oven or air fryer. Preheat your oven to 350°F (175°C) and place the tenders on a baking sheet, baking them for about 10 minutes. If you’re using an air fryer, preheat it to 350°F (175°C) and heat the tenders for approximately 5-7 minutes, checking frequently until warmed through and crispy. This helps restore their crunchy texture, ensuring they taste fresh!
Crispy Crunchy Chicken Tenders Your Family Will Love
Ingredients
Equipment
Method
- Brine the chicken tenderloins with salt and refrigerate for 30-40 minutes. Rinse and pat dry.
- Preheat oven to 350°F (175°C). Toast the panko breadcrumbs on a baking sheet for 8-10 minutes until golden brown.
- In a mixing bowl, beat eggs and add water. Gradually mix in flour, onion powder, and garlic powder to create a batter.
- Dip each tenderloin into the batter, allowing excess to drip off, then coat with toasted breadcrumbs.
- Bake the coated chicken tenders in a single layer at 400°F (200°C) for 10-12 minutes until golden and cooked through.
- For extra crispiness, air fry at 400°F (200°C) for 8-10 minutes.
- Let the chicken tenders rest for a few minutes before serving with your favorite dips.
Leave a Reply