
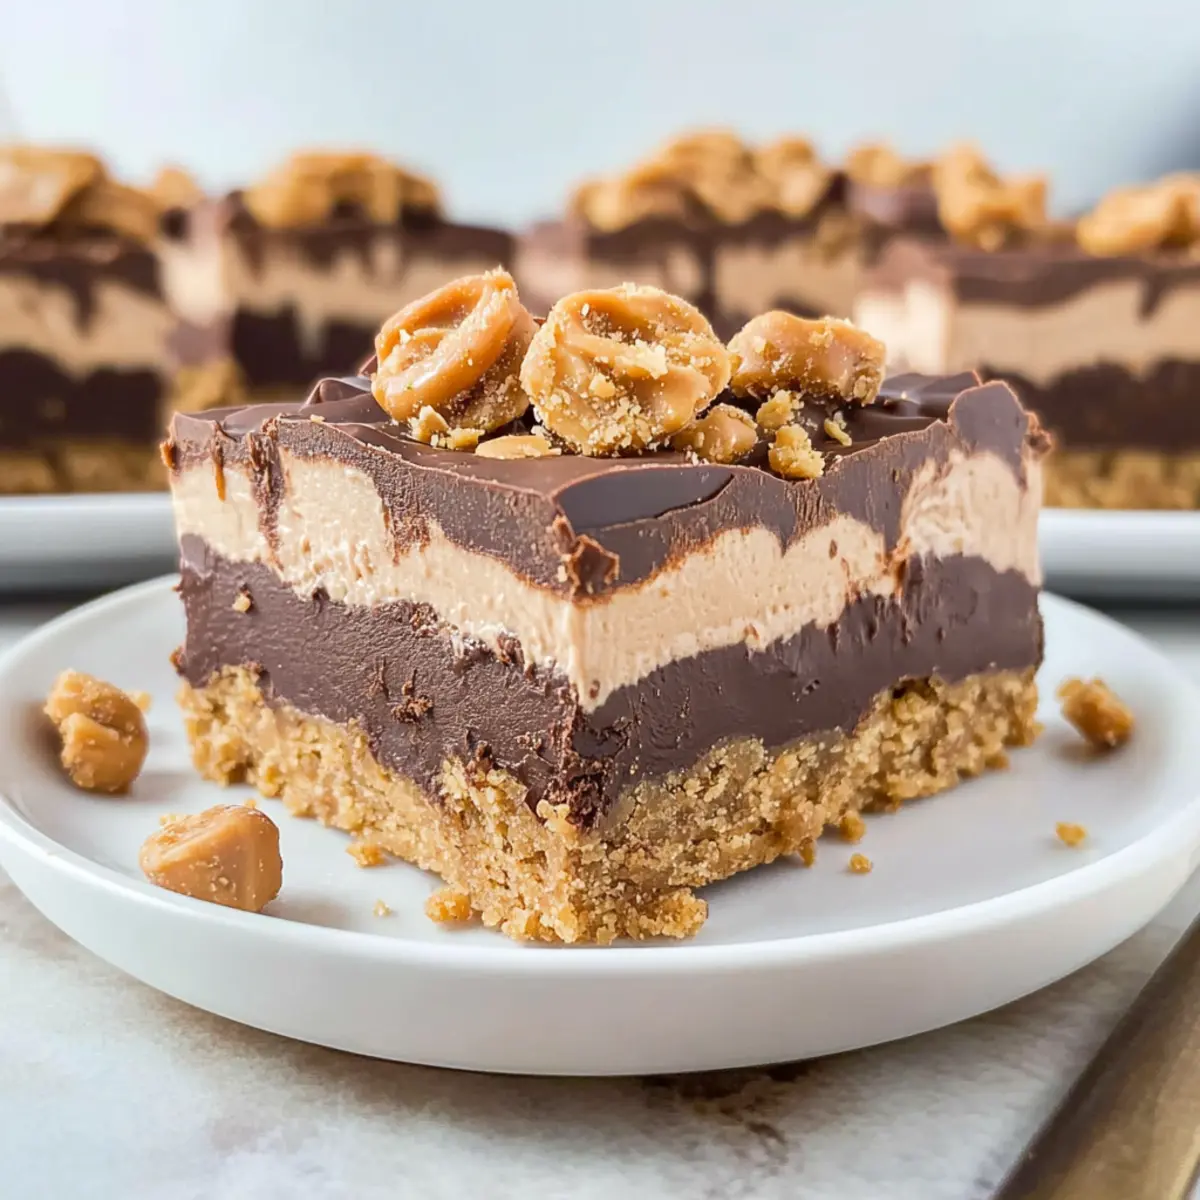
With a smooth, creamy texture and an explosion of sweet, nutty flavor, these No-Bake Chocolate Peanut Butter Dream Bars are the ultimate indulgence. The moment you dive in, you’ll experience the delightful crunch of a cookie crust layered beneath a rich chocolate pudding, topped off with a fluffy peanut butter cream cheese layer. What’s even better? This dessert is incredibly easy to prepare—perfect for those busy weeknights when you crave something special without spending hours in the kitchen. Plus, it’s a sure-fire crowd-pleaser for parties or family gatherings. Ready to create a treat that will leave everyone asking for seconds? Let’s get started!
Why Are These Bars a Must-Try?
Irresistible Combination: The blend of chocolate and peanut butter creates a timeless flavor that you won’t be able to resist!
No-Bake Ease: Perfect for those hot days when you want to whip up something delicious without turning on the oven.
Quick Prep Time: Ready in just minutes, making it ideal even for last-minute gatherings.
Versatile Ingredients: Use simple components you likely already have at home, or switch them up with suggestions like Chocolate Chip Peanut for a fun twist!
Crowd-Pleasing Appeal: These bars are loved by kids and adults alike, ensuring seconds—if not thirds!
Treat yourself to this delightful dessert that offers the perfect combination of simplicity and indulgence.
Chocolate Peanut Butter Dream Bars Ingredients
For the Crust
- Peanut Butter Sandwich Cookies – These provide both structure and a delicious peanut buttery flavor for the crust.
- Butter – This ingredient binds the cookie crust together, enhancing richness.
For the Filling
- Cream Cheese – Adds a creamy texture and a hint of tanginess.
- Confectioners’ Sugar – Sweetens the cream cheese layer, balancing the flavors perfectly.
- Creamy Peanut Butter – Introduces flavor and a rich, smooth consistency to the filling.
- Pure Vanilla Extract – Enhances the overall flavor; a must for a depth of taste!
For the Chocolate Layer
- Instant Chocolate Pudding – Provides the decadent chocolate layer; remember to mix with milk before adding.
- Milk – Activates the pudding and ensures a smooth texture; any milk alternative works too.
For the Topping
- Cool Whip – Adds lightness to the dessert’s texture. For a more homemade version, whipped cream is a great substitute.
- Milk Chocolate Chips & Peanut Butter Chips – These optional toppings add extra flavor and delightful texture; feel free to experiment with dark chocolate chips for a twist!
Indulge in these Chocolate Peanut Butter Dream Bars that everyone will be raving about!
Step‑by‑Step Instructions for Chocolate Peanut Butter Dream Bars
Step 1: Prepare the Crust
Begin by finely crushing about 20 peanut butter sandwich cookies in a food processor until you have a fine crumb. Melt 4 tablespoons of butter and combine it with the cookie crumbs until fully mixed. Press this mixture firmly into the bottom of an 8×8-inch baking dish, creating an even layer. Place the dish in the freezer for 30 minutes to set the crust.
Step 2: Make the Pudding
While the crust is chilling, prepare the chocolate pudding layer. In a mixing bowl, combine one package of instant chocolate pudding with 1½ cups of milk. Using a whisk, mix thoroughly for about 2 minutes until the mixture begins to thicken. Once combined, cover the bowl and refrigerate it for 10-15 minutes to ensure a consistent texture.
Step 3: Prepare the Cream Cheese Mixture
In a separate mixing bowl, beat together 8 ounces of softened cream cheese and 1 cup of confectioners’ sugar using an electric mixer until smooth and creamy. Add ½ cup of creamy peanut butter and 1 teaspoon of pure vanilla extract, mixing until fully blended. This rich cream cheese mixture will form the second layer for your Chocolate Peanut Butter Dream Bars.
Step 4: Assemble Layers
The next step is to assemble your delightful layers. Remove the crust from the freezer and spread the creamy peanut butter mixture evenly over the cookie base. Follow this with the chilled chocolate pudding, smoothing it out carefully to form an even layer. Finally, spread 1 cup of Cool Whip on top, creating a beautifully fluffy finish.
Step 5: Chill
To allow the layers to firm and meld together, cover the baking dish with plastic wrap and refrigerate for at least 2 hours. For a quicker option, you can freeze the assembled bars for 30 minutes, which will make slicing much easier later on.
Step 6: Garnish and Serve
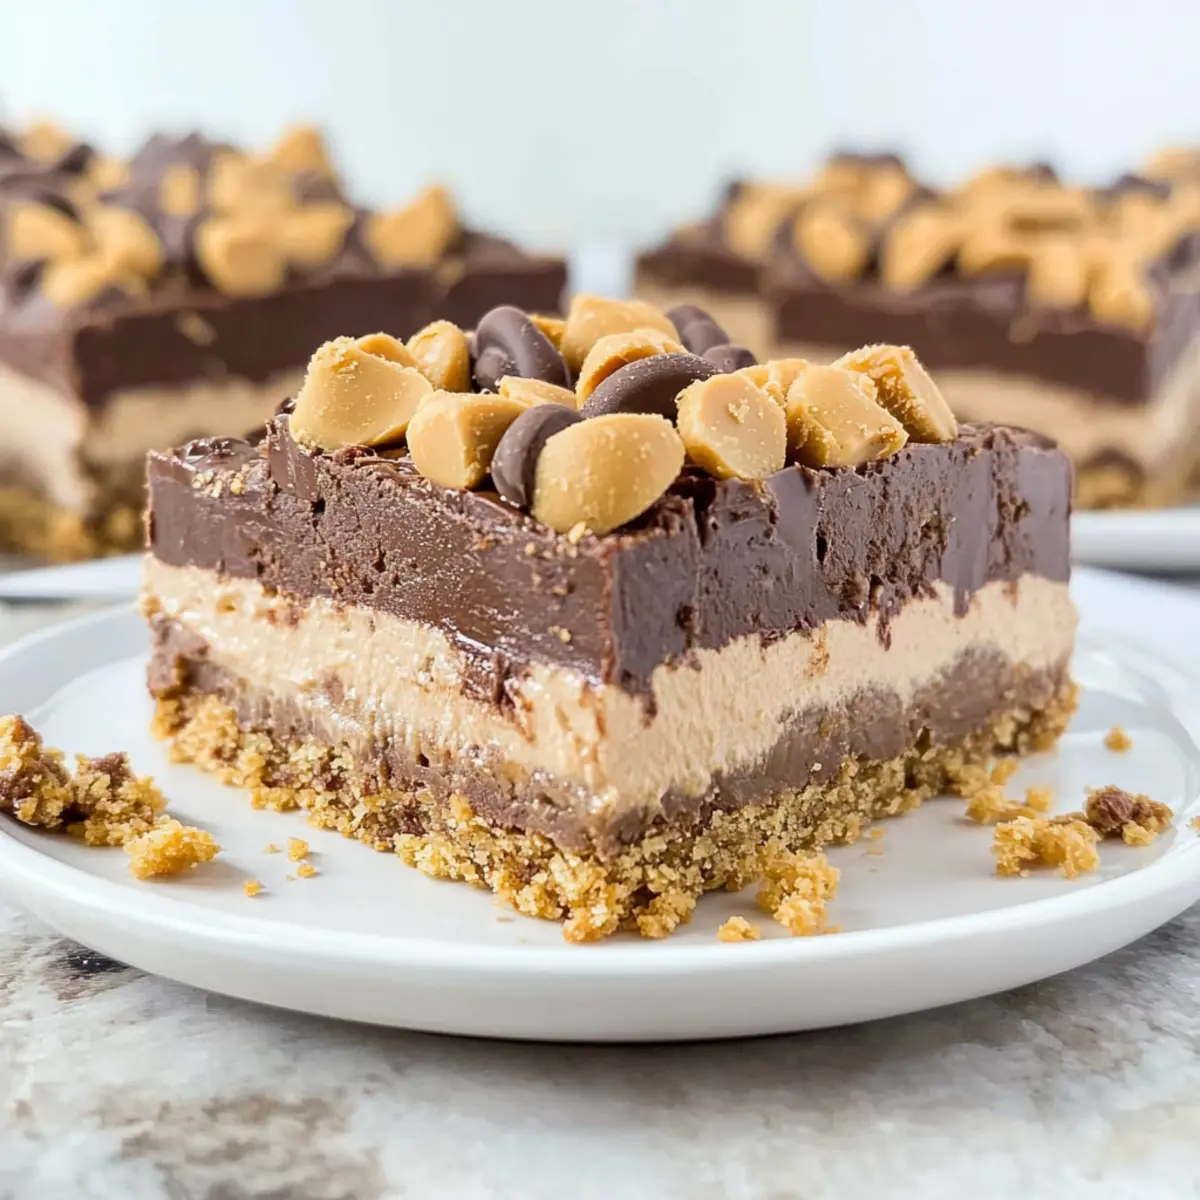
Just before serving your Chocolate Peanut Butter Dream Bars, sprinkle some crushed peanut butter sandwich cookies and milk chocolate or peanut butter chips on top for an attractive finish. Using a warm knife, cut the bars into squares for neat edges, making them perfect for sharing at gatherings or enjoying at home!
How to Store and Freeze Chocolate Peanut Butter Dream Bars
Fridge: Store the bars in an airtight container in the refrigerator for up to 1 week. This keeps them fresh and ready for indulgence at a moment’s notice.
Freezer: For longer storage, freeze the bars wrapped tightly in plastic wrap and then aluminum foil for up to 3 months. Thaw in the fridge before serving.
Reheating: If you’ve stored these chocolate peanut butter dream bars in the fridge, they can be enjoyed cold as is. If you prefer a softer texture, you may let them sit at room temperature for about 15-20 minutes before serving.
Serving Tips: When ready to serve, slice the bars with a warm knife for cleaner edges, making them visually appealing for gatherings or simple home enjoyment!
What to Serve with No-Bake Chocolate Peanut Butter Dream Bars
With their luscious layers and rich flavors, these dream bars create the perfect sweet ending to any meal or gathering.
- Fresh Fruit Salad: A mix of vibrant berries and citrus cuts through the richness, adding a refreshing contrast that enhances the enjoyment of the bars.
- Coffee or Espresso: The bold, robust flavor of coffee beautifully complements the chocolate and peanut butter, making each bite more indulgent.
- Creamy Vanilla Ice Cream: The cold creaminess balances the texture of the bars, turning your dessert into an unforgettable experience!
- Chocolate Dipped Strawberries: Elevate your dessert table with these simple treats, as their slight tartness pairs wonderfully with the sweetness of the bars.
- Milkshake: A smooth, creamy milkshake brings an extra layer of nostalgia and makes for a delightful pairing with the rich dessert.
- Nutty Granola: Sprinkle some crunchy granola on the side for a delightful contrast in texture, enhancing the overall flavor profile.
Whether you are sharing with friends or savoring solo, these pairings will elevate your experience with Chocolate Peanut Butter Dream Bars!
Chocolate Peanut Butter Dream Bars Variations
Get creative and make these bars your own with these delightful twists!
-
Dairy-Free: Substitute butter with coconut oil and use homemade vegan whipped cream for a luscious dairy-free version.
Try my Homemade Vegan Butter for an easy swap! -
Nut-Free: Swap creamy peanut butter for sun butter or don’t use any nut butters—great for a school-friendly treat!
Adding sunflower seeds gives a sweet crunch reminiscent of the original flavors. -
Sugar-Free: Use a sugar substitute like erythritol or monk fruit sweetener in place of confectioners’ sugar for a healthier option.
A little creativity can still give you the same sweetness without the extra calories. -
Flavored Pudding: Experiment with different pudding flavors like vanilla, butterscotch, or even a fun banana twist!
Each variation offers a new character and sweetness that excites the taste buds! -
Crunchy Add-Ins: Mix in crushed nuts or cookie pieces into the cream cheese layer for added texture.
A little crunch can unexpectedly elevate the experience of each bite! -
Spicy Kick: Add a pinch of cayenne pepper or chili powder to the chocolate pudding for a surprising kick.
Chocolate and heat combine beautifully, bringing a vibrant contrast to the smooth peanut butter! -
Layered Presentation: For a more elaborate dessert, alternate layers of different flavors of pudding.
The visual effect will be as stunning as it is delicious! -
Gourmet Toppings: Top with gourmet chocolate or seasonal sprinkles instead of standard chocolate chips for that extra special touch.
A small change can make your dessert a showstopper at any gathering!
No matter how you choose to customize these Chocolate Peanut Butter Dream Bars, they’re sure to bring delight and satisfaction to all!
Make Ahead Options
These Chocolate Peanut Butter Dream Bars are perfect for meal prep enthusiasts! You can prepare the crust and the cream cheese layer up to 24 hours in advance. Simply crush the cookies and mix with melted butter to create the crust, then press it into your baking dish and refrigerate. For the cream cheese layer, combine the softened cream cheese, peanut butter, and sugar, then store it in an airtight container in the fridge. When ready to serve, quickly mix the chocolate pudding and layer it over the crust, followed by the cream cheese mixture and Cool Whip. This way, you’ll have delicious Chocolate Peanut Butter Dream Bars ready to impress with minimal last-minute effort!
Expert Tips for Chocolate Peanut Butter Dream Bars
- Crust Perfection: Make sure your cookie crumbs are finely crushed for a better texture. Any larger pieces may disrupt the crust’s firmness.
- Chill Time Matters: Allowing the assembled bars to chill for at least 2 hours helps all the flavors meld beautifully, enhancing the overall taste.
- Slicing Technique: Use a warm, damp knife to cut the bars for cleaner edges and an elegant presentation.
- Customizable Layers: Feel free to experiment with different pudding flavors or nut butters in your Chocolate Peanut Butter Dream Bars for a personal touch.
- Storage Tips: Keep the bars tightly covered in the refrigerator to maintain freshness; they’re best enjoyed fresh but can last up to a week!
Chocolate Peanut Butter Dream Bars Recipe FAQs
What type of peanut butter sandwich cookies should I use?
Absolutely! I recommend using peanut butter sandwich cookies for the crust, as they provide the best flavor and texture. If you can’t find those, try using Oreos or any other chocolate sandwich cookies. Just be sure they fit the flavor profile you’re going for.
How long can I store the Chocolate Peanut Butter Dream Bars in the fridge?
These delicious bars can be stored in an airtight container in the refrigerator for up to 1 week. Make sure they’re well-covered to maintain their fresh taste and texture!
Can I freeze the Chocolate Peanut Butter Dream Bars?
Very! To freeze, wrap the bars tightly in plastic wrap and then in aluminum foil to prevent freezer burn. They can be stored for up to 3 months. When you’re ready to enjoy them, simply thaw in the refrigerator for several hours or overnight.
Why is my chocolate pudding layer not thickening properly?
If your pudding isn’t thickening, ensure you mixed it with the right amount of milk—1½ cups is crucial for the right consistency. Additionally, try refrigerating it a little longer or whisking it more vigorously to activate the thickeners.
Are these bars suitable for people with nut allergies?
Not quite! Because the recipe includes peanut butter and peanut butter sandwich cookies, they may not be suitable for those with peanut allergies. If you’re looking to accommodate such dietary needs, I suggest substituting the peanut butter for sunflower seed butter and using nut-free cookies for the crust.
How should I slice the bars for serving?
For the best presentation, use a warm knife to slice the bars. Run the knife under hot water, wipe it dry, and then cut the bars for clean, neat edges. You’ll be pleased with how visually appealing the slices turn out, perfect for impressing guests!
Delicious No-Bake Chocolate Peanut Butter Dream Bars to Savor
Ingredients
Equipment
Method
- Begin by finely crushing about 20 peanut butter sandwich cookies in a food processor until you have a fine crumb. Melt 4 tablespoons of butter and combine it with the cookie crumbs until fully mixed. Press this mixture firmly into the bottom of an 8x8-inch baking dish, creating an even layer. Place the dish in the freezer for 30 minutes to set the crust.
- While the crust is chilling, prepare the chocolate pudding layer. In a mixing bowl, combine one package of instant chocolate pudding with 1½ cups of milk. Using a whisk, mix thoroughly for about 2 minutes until the mixture begins to thicken. Once combined, cover the bowl and refrigerate it for 10-15 minutes to ensure a consistent texture.
- In a separate mixing bowl, beat together 8 ounces of softened cream cheese and 1 cup of confectioners' sugar using an electric mixer until smooth and creamy. Add ½ cup of creamy peanut butter and 1 teaspoon of pure vanilla extract, mixing until fully blended.
- Remove the crust from the freezer and spread the creamy peanut butter mixture evenly over the cookie base. Follow this with the chilled chocolate pudding, smoothing it out carefully to form an even layer. Finally, spread 1 cup of Cool Whip on top.
- To allow the layers to firm, cover the baking dish with plastic wrap and refrigerate for at least 2 hours. For a quicker option, you can freeze the assembled bars for 30 minutes.
- Just before serving, sprinkle some crushed peanut butter sandwich cookies and milk chocolate or peanut butter chips on top. Using a warm knife, cut the bars into squares.
Leave a Reply