
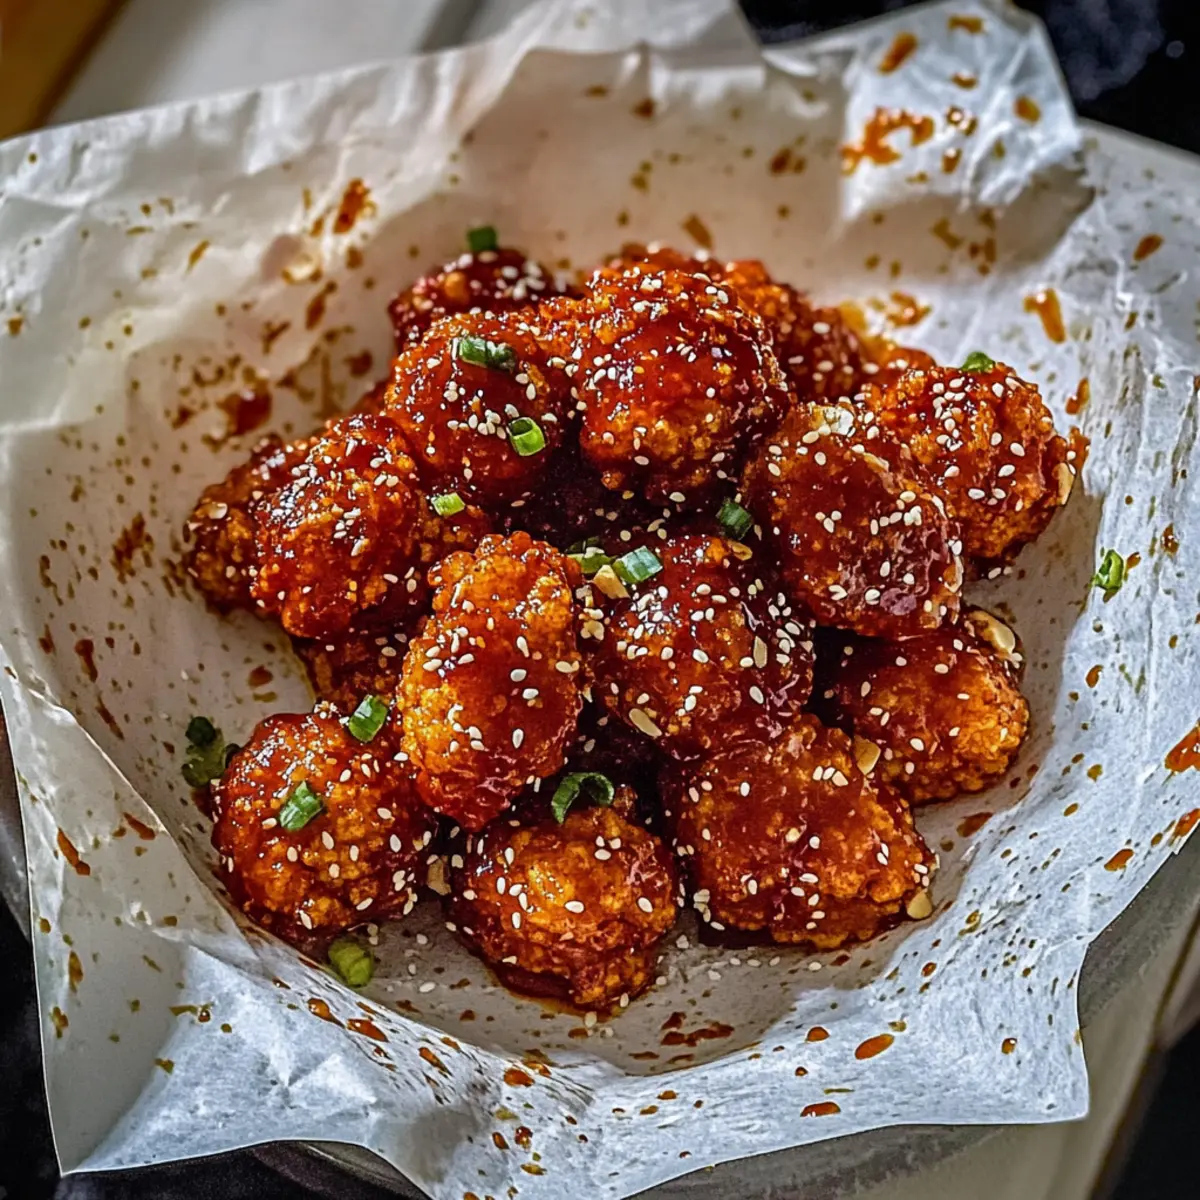
The aroma of sizzling flavors wafted through the air as I recently dove into the world of plant-based snacks. My adventure led me to create Korean Baked Cauliflower, a crispy, sweet, and spicy delight that captivates the senses without the guilt of traditional fried treats. Inspired by the unforgettable taste of Korean fried chicken, this recipe beautifully transforms humble cauliflower into a finger-licking snack that’s perfect for everyone, whether you’re a seasoned chef or just starting your culinary journey. Not only does it deliver that satisfying crunch we all crave, but it’s also a healthier alternative that’s gluten-free and bursting with delightful textures. Ready to elevate your snacking game with this scrumptious twist? Let’s dive into the recipe that will leave your taste buds dancing!
Why is Korean Baked Cauliflower a Must-Try?
Exciting, Korean Baked Cauliflower offers a unique take on snacking, combining the crunch you crave with a rich, sweet and spicy flavor. Healthier alternative: This is a guilt-free option perfect for plant-based diets that doesn’t skimp on taste! Quick and easy: You can whip this up in no time, making it ideal for busy weeknights or entertaining guests. Versatile: Serve it as an appetizer, snack, or even a side dish alongside other favorites like Baked King Salmon for a delightful meal. Adaptable: Customize the spice level to suit your palate or experiment with different sauces for a fresh twist. Trust me, once you try this, you’ll be hooked!
Korean Baked Cauliflower Ingredients
• Get ready to create your new favorite snack!
For the Batter
- Cauliflower florets – The star of the dish; cut them evenly for even cooking.
- All-purpose flour – Provides a crispy coating; swap for gluten-free flour if needed.
- Potato starch (or corn starch) – Enhances crispiness; essential for that crunchy exterior.
- Non-dairy milk (almond milk) – Adds moisture to the batter; feel free to use any plant milk.
- Lemon juice – Balances flavors with a hint of acidity.
- Cayenne pepper – Gives a spicy kick; adjust to your spice preference.
- White pepper – Adds a subtle depth; can be replaced with black pepper if desired.
- Ginger powder – Boosts the flavor profile; warm and aromatic.
- Garlic powder – Essential for flavor; enhances the overall taste.
For the Coating
- Raw almonds – Adds a delightful crunch; can be substituted with cashews.
- Panko breadcrumbs – Ensures extra crispiness; check for gluten-free options.
- White sesame seeds – Optional but adds a nutty flavor; sprinkle for crunch.
For the Sauce
- Ketchup – The base of the sauce that brings sweetness and umami.
- Mirin – Adds sweetness and depth; rice vinegar can be a quick substitute.
- Sriracha – Brings heat to the sauce; adjust the amount based on your preference.
- Tamari soy sauce – For that essential umami flavor; opt for gluten-free if necessary.
- Maple syrup – A natural sweetener to balance the spice; agave syrup is a good alternative.
- Rice wine vinegar – Introduces acidity; apple cider vinegar works in a pinch.
- Gochujang (Korean chili paste) – The heart of the flavor; provides sweetness and spice depth.
- Gochugaru (Korean chili flakes) – Adds heat; customize based on your taste.
Now that you have all the ingredients for your Korean Baked Cauliflower, you’re one step closer to whipping up this delectable dish that all of your family and friends will rave about!
Step‑by‑Step Instructions for Korean Baked Cauliflower
Step 1: Prepare Cauliflower
Preheat your oven to 425°F (220°C). While it heats, wash and cut the cauliflower into uniform florets, ensuring they are about the same size for even baking. This will help achieve that perfect crispy texture in your Korean Baked Cauliflower. Line a baking sheet with parchment paper to prevent sticking and make cleanup a breeze.
Step 2: Make Batter
In a large mixing bowl, whisk together all-purpose flour, potato starch, non-dairy milk, and lemon juice until a smooth batter forms. Add cayenne pepper, white pepper, ginger powder, garlic powder, and a pinch of salt for flavor. This batter will coat the cauliflower florets and create an irresistible crunch. Ensure it’s well combined before moving to the next step.
Step 3: Coat Cauliflower
Dip each cauliflower floret into the batter, allowing any excess to drip off. Next, roll the floret in a mixture of crushed almonds and Panko breadcrumbs mixed with sesame seeds. This combination will give the cauliflower a delightful crunchy coating, essential for the delicious Korean Baked Cauliflower. Make sure each floret is evenly coated for best results.
Step 4: Bake
Place the coated cauliflower florets on the prepared baking sheet in a single layer, leaving space between each piece for airflow. Bake in the preheated oven for about 25–30 minutes, flipping them halfway through for even browning. You’ll know they’re done when they turn golden brown and crispy on the outside, giving you that delectable texture.
Step 5: Prepare Sauce
While the cauliflower bakes, it’s time to make the sauce. In a saucepan over medium heat, combine ketchup, mirin, sriracha, tamari, maple syrup, rice wine vinegar, gochujang, minced garlic, and ginger. Stir the mixture until heated through and well combined, allowing the flavors to meld together beautifully. Keep it warm while you finish the cauliflower.
Step 6: Toss & Serve
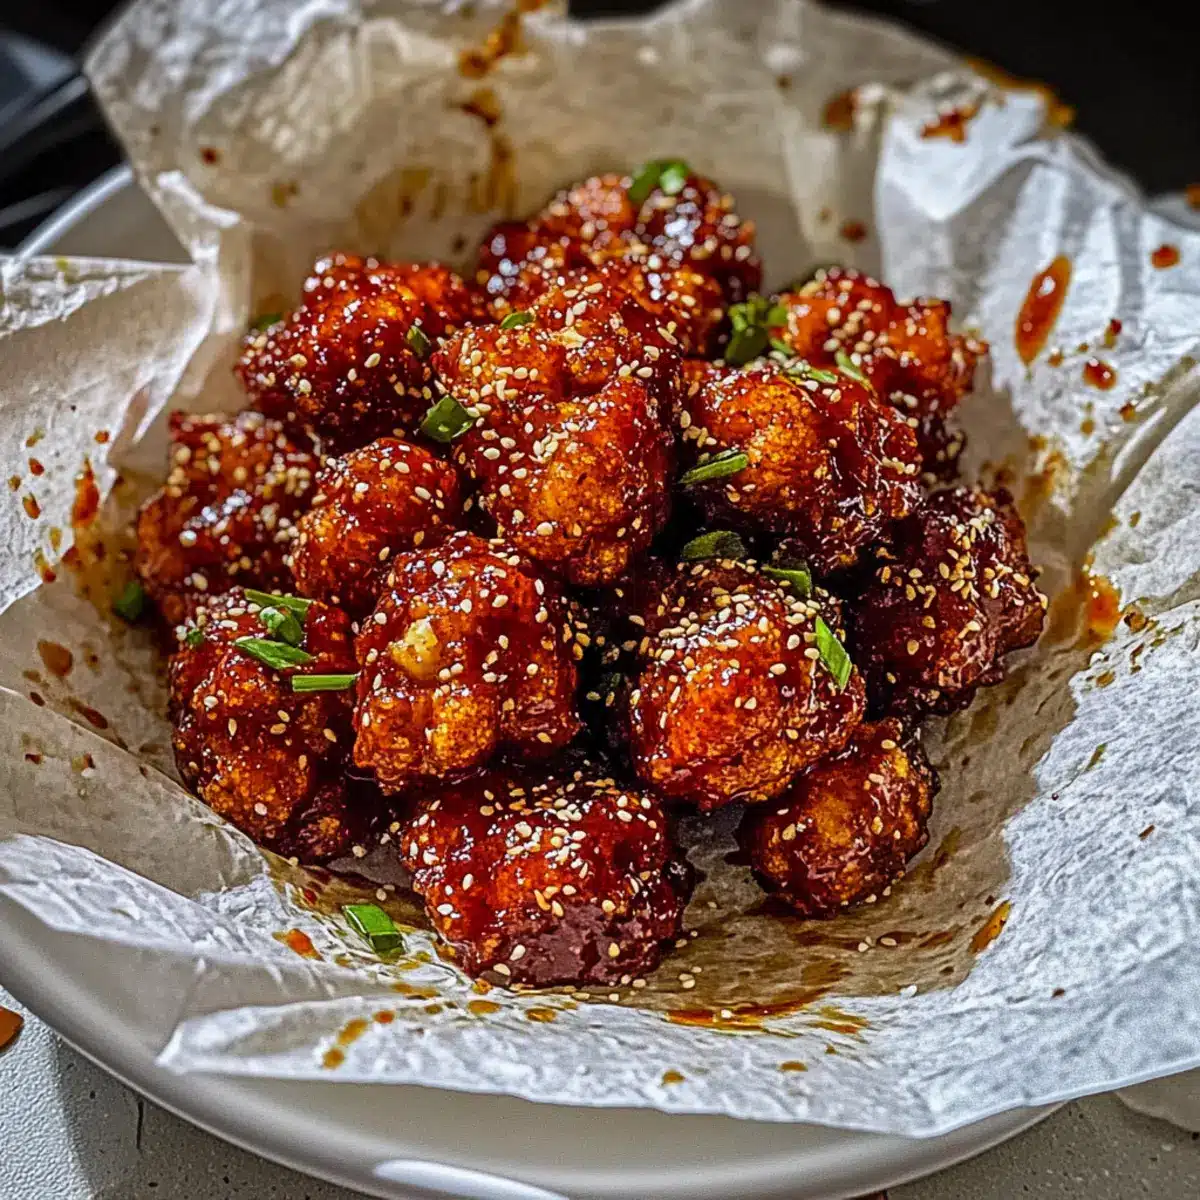
Once the cauliflower is golden and crispy, remove it from the oven and transfer it to a large mixing bowl. Pour the prepared sauce over the florets and toss gently until they are all well coated. Serve your Korean Baked Cauliflower hot, garnished with additional sesame seeds if desired, and enjoy this scrumptious snack or appetizer that everyone will love!
Make Ahead Options
These Korean Baked Cauliflower florets are perfect for meal prep enthusiasts! You can prepare the batter, coat the florets, and even bake them up to 24 hours in advance. Simply store the coated cauliflower in an airtight container in the refrigerator to maintain their crispiness. When ready to enjoy, reheat them in the oven at 425°F (220°C) for about 5–10 minutes until they’re hot and crispy again. If you prefer, you can also prepare the sauce up to 3 days ahead and store it in the fridge—just reheat it gently before tossing it with the baked cauliflower. This way, you’ll have a delicious snack ready with minimal effort, making busy weeknights a breeze!
What to Serve with Korean Baked Cauliflower
Elevate your Korean Baked Cauliflower experience by pairing it with delicious sides and drinks that harmonize perfectly.
- Steamed Jasmine Rice: This fragrant rice absorbs the delicious sticky sauce, making every bite a savory delight. It’s a classic complement to any spicy dish.
- Crispy Asian Slaw: Refreshing and crunchy, this slaw adds a zesty contrast, balancing the sweet and spicy flavors of the cauliflower with its lightness.
- Roasted Sweet Potatoes: Their natural sweetness pairs beautifully with the spicy notes of the cauliflower, creating a delightful mix of flavors and textures on your plate.
- Garlic Edamame: Simple yet packed with flavor, this protein-rich side enhances the meal while still keeping it light and healthy.
- Homemade Kimchi: An essential in Korean cuisine, this fermented side adds an extra punch of flavor, bringing out the depth in the baked cauliflower.
- Green Salad with Sesame Dressing: A light salad topped with a sesame dressing provides freshness to your meal, complementing the richness of the cauliflower perfectly.
- Miso Soup: Warm and comforting, this soup adds a savory touch, rounding out the meal while embracing the Asian flavor profile.
For a satisfying finish, a scoop of green tea ice cream would be the perfect sweet treat, cooling off the heat from the dish beautifully.
Korean Baked Cauliflower Variations
Feel free to unleash your creativity and customize this delightful recipe to suit your taste!
-
Spice Level: Adjust the amount of cayenne and sriracha for milder or hotter flavors to suit your palate. If you enjoy a fiery kick, don’t hesitate to amp it up!
-
Nuts: Swap crushed almonds with walnuts, pecans, or simply omit them for a nut-free version. The choice is up to you, and the crunchy textures will still delight!
-
Type of Sauce: Why not experiment with a tangy peanut sauce or zesty sweet chili sauce? Each twist brings a unique flavor profile to the table!
-
Veggie Boost: Toss in some colorful bell peppers or broccoli florets with the cauliflower for added nutrients and flavor. The more veggies, the merrier!
-
Herb Infusion: Sprinkle in some fresh herbs like cilantro or green onions after tossing with the sauce for a fresh pop of flavor. They add a lovely aromatic touch!
-
Baked Elements: Try using a blend of Panko and crushed cornflakes for an even crunchier exterior that’s just bursting with texture.
-
Asian Twist: Drizzle sesame oil over the baked cauliflower before serving to elevate the dish with a toasted, nutty flavor that pairs beautifully with the sauce.
-
Sauce Variation: For a sweeter sauce, mix in a bit of hoisin sauce or honey, enhancing both the sweetness and complexity of flavors.
With these variations, you can keep your snacking experience fresh and exciting, just like the flavors of Korean Baked Cauliflower! And if you’d like to explore more delightful dishes, consider trying out my easy recipes like Baked Eggs Florentine or savory Baked Feta Eggs. Enjoy creating your culinary masterpiece!
How to Store and Freeze Korean Baked Cauliflower
Fridge: Store leftovers in an airtight container in the fridge for up to 2 days to maintain freshness and flavor.
Freezer: For longer storage, freeze the baked cauliflower in a single layer on a baking sheet. Once frozen, transfer to a freezer bag for up to 3 months.
Reheating: When ready to enjoy, reheat in the oven at 375°F (190°C) for about 10-15 minutes, or until hot and crispy again.
Avoiding Sogginess: If reheating from frozen, do not thaw first; this helps preserve the crispiness of your Korean Baked Cauliflower.
Expert Tips for Korean Baked Cauliflower
-
Uniform Size: Make sure to cut the cauliflower florets evenly. This ensures they cook at the same rate, leading to a perfectly crispy texture in your Korean Baked Cauliflower.
-
Batter Consistency: The batter should be smooth and thick enough to coat the florets. If it’s too runny, add a bit more flour; too thick? A splash of non-dairy milk can help.
-
Space on Baking Sheet: Avoid overcrowding the baking sheet when placing florets. Leave enough space between them to allow hot air to circulate, preventing sogginess and enhancing crispiness.
-
Soaking Time: For more robust flavor, let the coated cauliflower rest in the batter for about 15–30 minutes before baking. This soaking allows the flavors to penetrate deeper.
-
Adjusting Spice: Balance the heat in your sauce by adjusting the sriracha and cayenne. If it gets too spicy, add a touch more maple syrup to calm it down without losing flavor.
Korean Baked Cauliflower Recipe FAQs
How do I choose the right cauliflower?
Absolutely! When selecting cauliflower, look for heads that are firm and tightly packed with no dark spots or blemishes. The florets should be white to creamy in color, and the leaves should be fresh and green. Avoid any cauliflower with brown or yellow spots, as that indicates overripeness.
How can I store leftovers?
Very easy! Store your Korean Baked Cauliflower in an airtight container in the fridge for up to 2 days. To reheat and restore some of that crispy texture, pop them back in the oven at 375°F (190°C) for about 10-15 minutes. It’s a delicious way to enjoy the snack again!
Can I freeze Korean Baked Cauliflower?
Absolutely! To freeze, arrange the baked cauliflower florets in a single layer on a baking sheet. Once frozen, transfer them to a freezer-safe bag or container. They can last for up to 3 months in the freezer. When you’re ready to eat, reheat directly from frozen without thawing—this helps maintain that delightful crunch!
What if my cauliflower isn’t crispy enough?
If you find that your Korean Baked Cauliflower isn’t as crispy as you’d like, it might be due to overcrowding on the baking sheet. Ensure there’s ample space between the florets for air to circulate. Additionally, you can raise the oven temperature slightly or bake them longer, checking for that lovely golden-brown color to achieve the desired crunch.
Are there any allergy considerations with the ingredients?
Very good question! This recipe contains several common allergens, such as nuts (almonds) and gluten (all-purpose flour if not substituted). To make it allergy-friendly, you can use gluten-free flour and substitute almonds with seeds like pumpkin or sunflower seeds, or simply omit them. Always ensure that any substitutes are suitable for the specific dietary needs of you or your guests.
Can pets consume any of the ingredients used?
Caution is always advisable! While cauliflower is safe for pets in small amounts, the other ingredients in Korean Baked Cauliflower—like garlic and onion (found in garlic powder)—are toxic to dogs and cats. It’s best to keep this irresistible snack strictly for human enjoyment, ensuring your furry friends stay safe.
Korean Baked Cauliflower: Crispy Comfort with a Kick
Ingredients
Equipment
Method
- Preheat your oven to 425°F (220°C). Wash and cut the cauliflower into uniform florets.
- In a large mixing bowl, whisk together all-purpose flour, potato starch, non-dairy milk, and lemon juice until a smooth batter forms.
- Dip each cauliflower floret into the batter, then roll in the mixture of crushed almonds and Panko breadcrumbs mixed with sesame seeds.
- Place the coated cauliflower florets on the prepared baking sheet in a single layer and bake for 25-30 minutes, flipping halfway.
- In a saucepan over medium heat, combine ketchup, mirin, sriracha, tamari, maple syrup, rice wine vinegar, gochujang, minced garlic, and ginger.
- Once the cauliflower is golden and crispy, remove it from the oven and toss with the prepared sauce.
Leave a Reply