
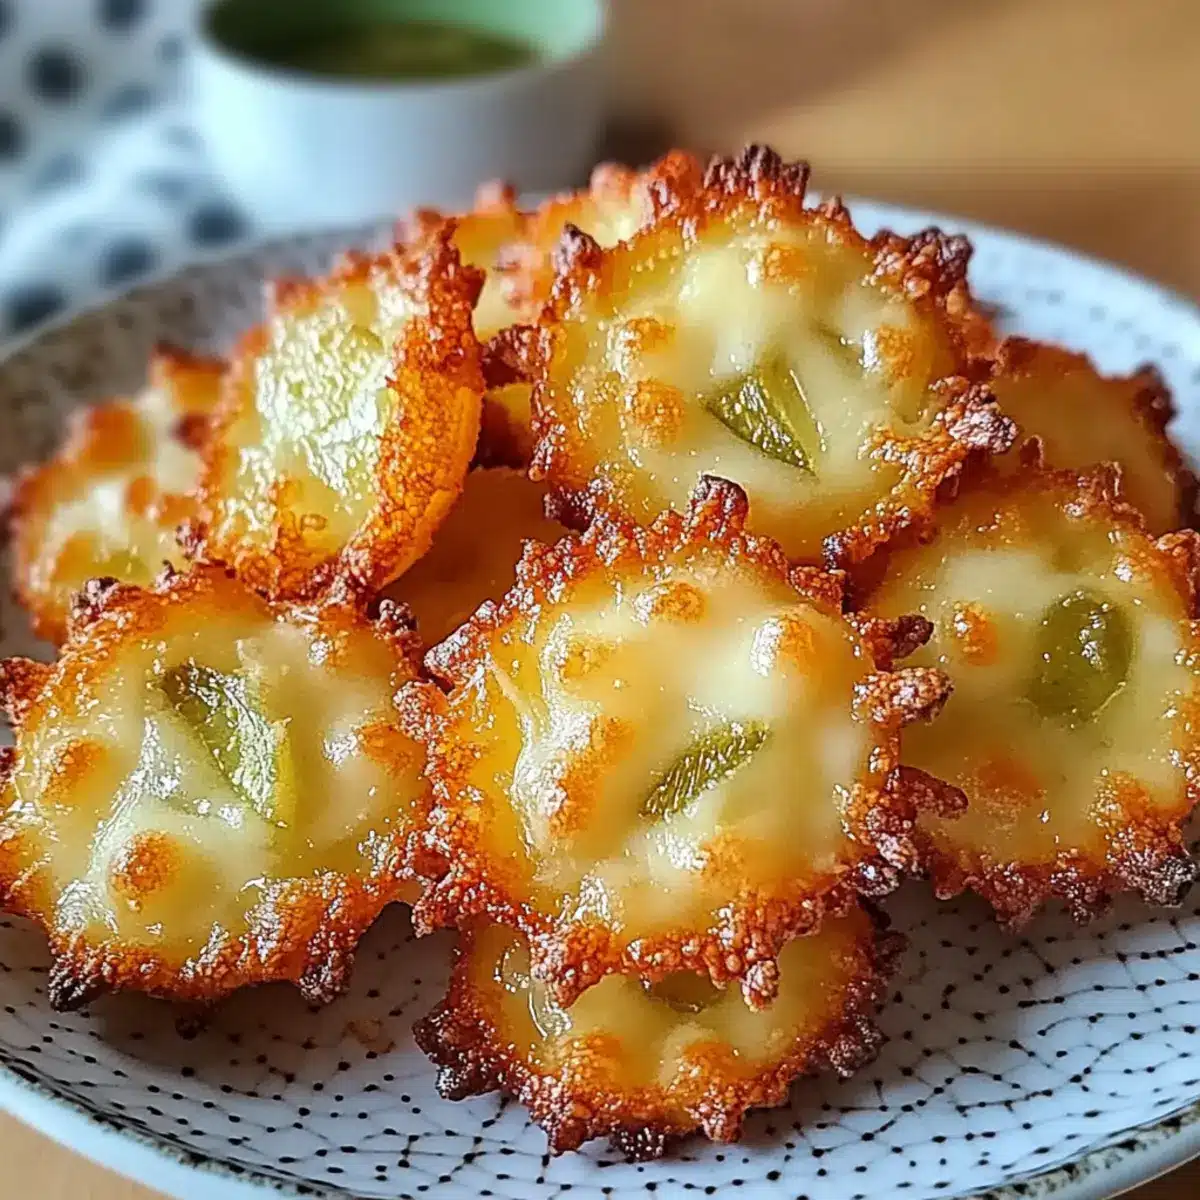
“Wait, these are made with pickles?” I heard a friend exclaim, utterly surprised by the newest addition to our snack table. The moment I unveiled my Crispy Dill Pickle Cheese Bites, I knew I had hit a home run. These gluten-friendly morsels are not only quick to whip up, but they also pack a flavorful punch that appeals to both kids and adults alike. The delightful combination of tangy dill pickles and gooey cheese creates a crunchy snack that’s perfect for movie nights or casual get-togethers. Plus, they can be customized with fun variations to suit any palate. Curious about how to create this crispy sensation that everyone will rave about? Let’s dive into the recipe!

Why Will You Love These Pickle Cheese Bites?
Unique Flavor Fusion: The blend of tangy dill pickles and gooey cheese creates a snack that delights the senses.
Gluten-Friendly: Perfect for those avoiding gluten, these bites are a hit at any gathering, allowing everyone to enjoy.
Quick to Make: Ready in just minutes, you can whip these up effortlessly for unexpected guests or movie marathons.
Kid-Approved: Kids love the fun taste and crispy texture, making them ideal for both playdates and family gatherings.
Versatile Variations: Feel free to experiment with spices or cheese types – add crushed red pepper flakes for heat or incorporate herbs for an aromatic twist.
Crowd-Pleasing Snack: Whether served at parties or as an after-school treat, these bites are sure to be a favorite among all ages. Don’t forget to pair them with your favorite dipping sauce, like creamy ranch dressing!
Pickle Cheese Bites Ingredients
• To create these irresistible Crispy Dill Pickle Cheese Bites, gather the following ingredients:
For the Cheese Mixture
- Shredded Cheddar Cheese – Provides sharpness and depth of flavor; freshly shredded is preferred for better melting.
- Shredded Mozzarella Cheese – Adds stretch and creaminess; opt for fresh mozzarella for an optimal melt.
For the Pickle Base
- Finely Chopped Dill Pickles – Offers tangy flavor and moisture; pat them dry to reduce moisture for a crunchier texture.
For the Seasoning
- Garlic Powder – Provides savory depth and aroma; you can substitute with onion powder for a different flavor profile.
For the Crunch
- Breadcrumbs – Contributes extra crunch; gluten-free breadcrumbs can be used to cater to dietary needs.
For Baking
- Nonstick Spray or Parchment Paper – Prevents sticking during baking; parchment paper is preferred for easy cleanup.
Gather these ingredients, and get ready to indulge in the crispy goodness of homemade pickle cheese bites!
Step‑by‑Step Instructions for Crispy Dill Pickle Cheese Bites
Step 1: Preheat Your Oven
Preheat your oven to 400°F (200°C) to ensure an even cooking process for your Crispy Dill Pickle Cheese Bites. This temperature helps to achieve that desired golden crust. If you’re using an air fryer, set it to the same temperature. While the oven warms up, gather your ingredients to streamline your cooking experience.
Step 2: Mix the Cheese and Pickles
In a large mixing bowl, combine shredded cheddar and mozzarella cheeses with finely chopped dill pickles and garlic powder. Gently fold the mixture to evenly distribute the ingredients, ensuring every bite is packed with the tangy and cheesy goodness. If you decide to add breadcrumbs for extra crunch, fold them in at this stage for a delightful texture.
Step 3: Prepare the Baking Sheet
Line a baking sheet with parchment paper to prevent sticking and facilitate easy cleanup. Use a tablespoon to scoop out the cheese and pickle mixture, forming flattened mounds. Place them evenly spaced on the prepared baking sheet, making sure they have room to expand as they bake for that perfect crispy texture.
Step 4: Bake Until Golden
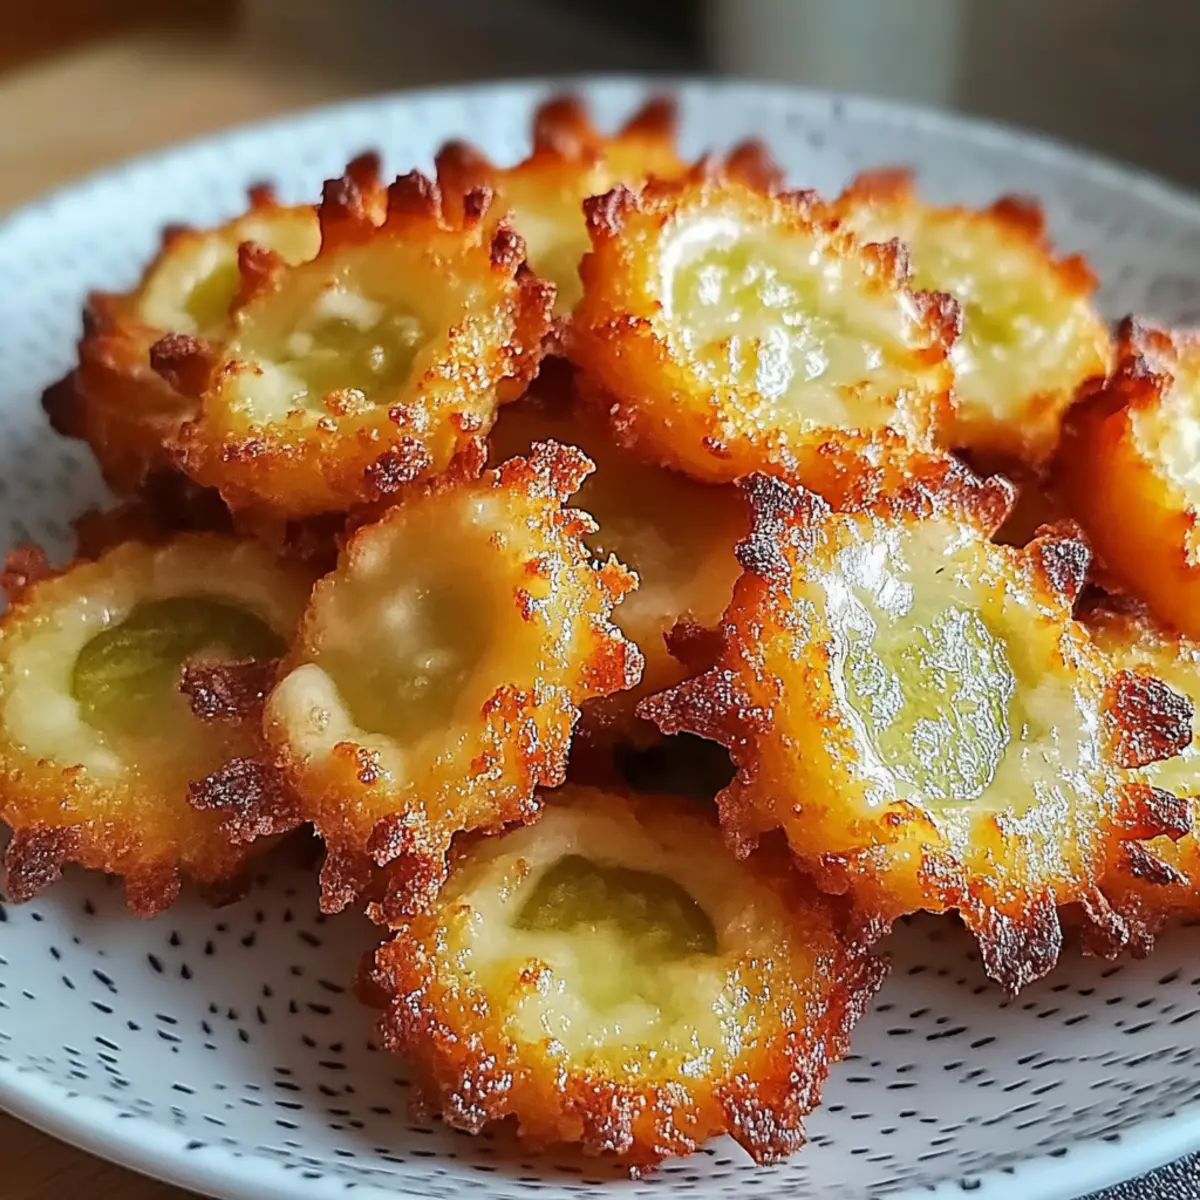
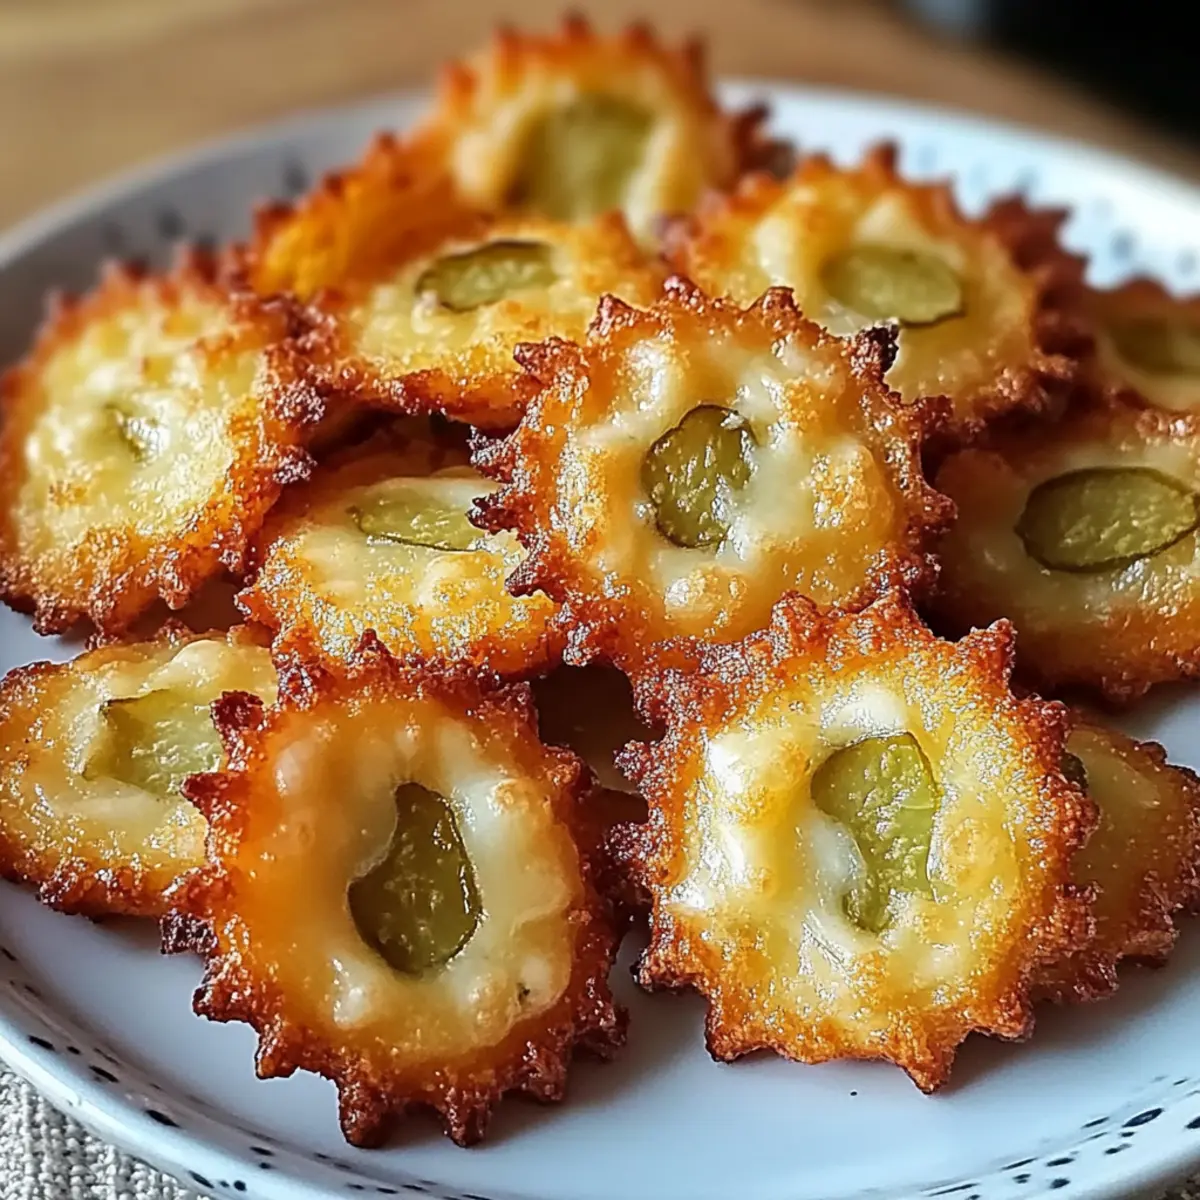
Place the baking sheet in the preheated oven and bake the Pickle Cheese Bites for 6-8 minutes. Keep a close eye on them as they cook; you’re looking for a bubbling, melted cheese texture and lightly golden edges. This is when the cheesy goodness starts transforming into a crispy delight that’s hard to resist.
Step 5: Cool for Crispness
Once baked, remove the Crispy Dill Pickle Cheese Bites from the oven and let them cool on the baking sheet for 2-3 minutes. This cooling period allows them to firm up for maximum crispness. You will notice the bites will continue to firm up as they cool, making them even easier to handle.
Step 6: Serve with Dipping Sauces
After cooling, serve these delightful Crispy Dill Pickle Cheese Bites warm with your favorite dipping sauces, such as creamy ranch dressing or spicy mayo. The combination of melted cheese and tangy pickles pairs perfectly with the sauces, enhancing their flavor. Enjoy your homemade snacks with family and friends for an enjoyable treat!
How to Store and Freeze Pickle Cheese Bites
Fridge: Store leftover Crispy Pickle Cheese Bites in an airtight container for up to 3 days. This helps to keep them fresh, though they may lose some crispness over time.
Freezer: For longer storage, freeze the cooled bites in a single layer on a parchment-lined baking sheet. Once frozen solid, transfer to a zip-top bag and store for up to 2 months.
Reheating: To restore crispiness, reheat frozen Pickle Cheese Bites in a preheated oven at 375°F (190°C) for about 10-12 minutes, or in an air fryer for 5-7 minutes until heated through.
Make-Ahead Tip: Prepare the cheese and pickle mixture a day in advance and refrigerate it. Bake fresh whenever you’re ready to serve for the best texture!
Pickle Cheese Bites Variations
Feel free to let your creativity shine through with these delightful twists to the Crispy Dill Pickle Cheese Bites!
-
Vegan Cheese: Use dairy-free cheese alternatives for a deliciously creamy, plant-based version. The flavors of dill pickles shine through perfectly, ensuring no one feels left out.
-
Spicy Bites: Add crushed red pepper flakes to the cheese mixture for a dash of heat. This fiery twist makes for an exciting and bold party snack!
-
Cheese Swap: Try substituting cheddar and mozzarella with Parmesan or Pepper Jack cheese. Each cheese brings its unique flavor twist to the bites, appealing to different palates.
-
Herby Infusion: Incorporate dried herbs like dill or chives to amp up the aroma and flavor. These fresh notes are perfect for seasoned pickle lovers!
-
Panko Perfection: Use panko breadcrumbs instead of regular breadcrumbs for an ultra crispy crunch. You’ll love the satisfying texture that panko provides!
-
Veggie Boost: Stir in finely chopped jalapeños or bell peppers for a burst of flavor and added nutrition. These chopped veggies make your bites even more colorful and hearty.
-
Low-Carb Option: Substitute the breadcrumbs with ground almonds or almond flour for a low-carb twist. These bites maintain their delightful flavor while catering to those watching their carbs.
Consider pairing your Crispy Dill Pickle Cheese Bites with a refreshing dip, such as creamy ranch dressing, or explore other fun snacks like Sweet Little Bites to complement your gathering! Enjoy experimenting with these variations, and make this recipe your own!
Expert Tips for Crispy Pickle Cheese Bites
-
Pat Pickles Dry: Reducing moisture from the pickles is key to achieving a crunchy texture, which enhances the overall flavor.
-
Equal Size Mounds: Forming uniformly sized mounds ensures even cooking, preventing some bites from being overcooked while others remain underdone.
-
Chill the Mixture: Allow the cheese and pickle mixture to chill in the fridge for 30 minutes before baking; this helps the bites hold their shape better.
-
Watch Cooking Time: Keep an eye on the baking time and check at the 6-minute mark. Remove them when edges are golden to achieve the perfect crispiness.
-
Customize Your Crunch: Explore variations with different breadcrumb types, such as panko or ground almonds, to switch up the texture of your Pickle Cheese Bites.
Make Ahead Options
These Crispy Dill Pickle Cheese Bites are fantastic for meal prep, helping you save time during busy weeknights! You can prepare the cheese and pickle mixture up to 24 hours in advance. Simply mix the shredded cheeses, finely chopped dill pickles, and garlic powder, and store the mixture in an airtight container in the refrigerator. To maintain their quality, pat the pickles dry before mixing to prevent excess moisture. When you’re ready to enjoy, scoop the mixture into mounds on a parchment-lined baking sheet and bake as directed. This way, you’ll have delicious, homemade snacks ready with minimal effort—perfect for a spontaneous movie night!
What to Serve with Crispy Dill Pickle Cheese Bites
Create a delightful snack spread that complements these crispy and cheesy morsels perfectly.
- Creamy Ranch Dressing: This classic dipping sauce adds a cool and tangy contrast to the crispy bites, enhancing their flavor.
- Spicy Mayo: A zesty kick from mayo mixed with Sriracha provides a delicious contrast, pairing wonderfully with the savory cheese.
- Fresh Veggie Platter: Crisp, colorful veggies like carrots, cucumbers, and bell peppers offer a refreshing crunch, balancing out the rich cheese bites.
- Sweet Tea: Chilled sweet tea acts as a delightful refresher, complementing the savory and tangy elements with its sweetness.
- Chocolate Chip Cookies: A sweet finish! Pairing warm, gooey cookies with salty snacks creates the perfect balance of flavors.
- Pickle Slices: Extra pickle slices on the side enhance the tangy flavor, making for a fun and thematic presentation.
- Fruit Skewers: Fresh fruits like strawberries and grapes provide a sweet and juicy contrast, brightening up the savory snack.
Crispy Pickle Cheese Bites Recipe FAQs
How do I select the right pickles for this recipe?
Absolutely! For the best flavor, choose dill pickles that are firm and crunchy. Avoid any pickles with dark spots all over, as they may have gone bad. Fresh, whole dill pickles are preferable since they have a perfect balance of tanginess and moisture.
What’s the best way to store leftover Pickle Cheese Bites?
Store your leftover Crispy Pickle Cheese Bites in an airtight container in the fridge for up to 3 days. This will keep them fresh; however, they may lose some of their crunchiness. For the best results when reheating, try to use the oven or air fryer to regain their crispy texture.
Can I freeze Crispy Pickle Cheese Bites?
Yes, indeed! To freeze, first bake and cool the bites completely. Line a baking sheet with parchment paper and place the bites in a single layer. Freeze them until solid, then transfer them into a zip-top bag or airtight container. They can be stored in the freezer for up to 2 months.
What can I do if the bites turn out soggy after baking?
No worries! If you find your bites are too soggy, ensure you pat your pickles dry before adding them to the cheese mixture to eliminate excess moisture. Also, check your baking time. If they didn’t cook long enough to get that golden brown exterior, pop them back in for a few extra minutes—just keep an eye on them!
Are Crispy Pickle Cheese Bites safe for those with gluten allergies?
Certainly! These bites can be made gluten-friendly by using gluten-free breadcrumbs, which are widely available. Just ensure that all other ingredients, like cheese and pickles, do not contain gluten, and you’re good to go!
Can I make these cheese bites dairy-free?
Absolutely! To create a dairy-free version, try using vegan cheese alternatives that melt well, such as cashew-based cheese or other plant-based products available in stores. You can also experiment with adding nutritional yeast for a cheesy flavor boost without the dairy.
Crispy Pickle Cheese Bites – Irresistibly Crunchy Goodness
Ingredients
Equipment
Method
- Preheat your oven to 400°F (200°C).
- In a large mixing bowl, combine shredded cheddar and mozzarella cheeses with finely chopped dill pickles and garlic powder. Fold in breadcrumbs if using.
- Line a baking sheet with parchment paper. Scoop out the mixture, forming flattened mounds on the prepared sheet.
- Bake for 6-8 minutes until golden and bubbling.
- Let them cool for 2-3 minutes to firm up.
- Serve warm with dipping sauces like creamy ranch or spicy mayo.
Leave a Reply