
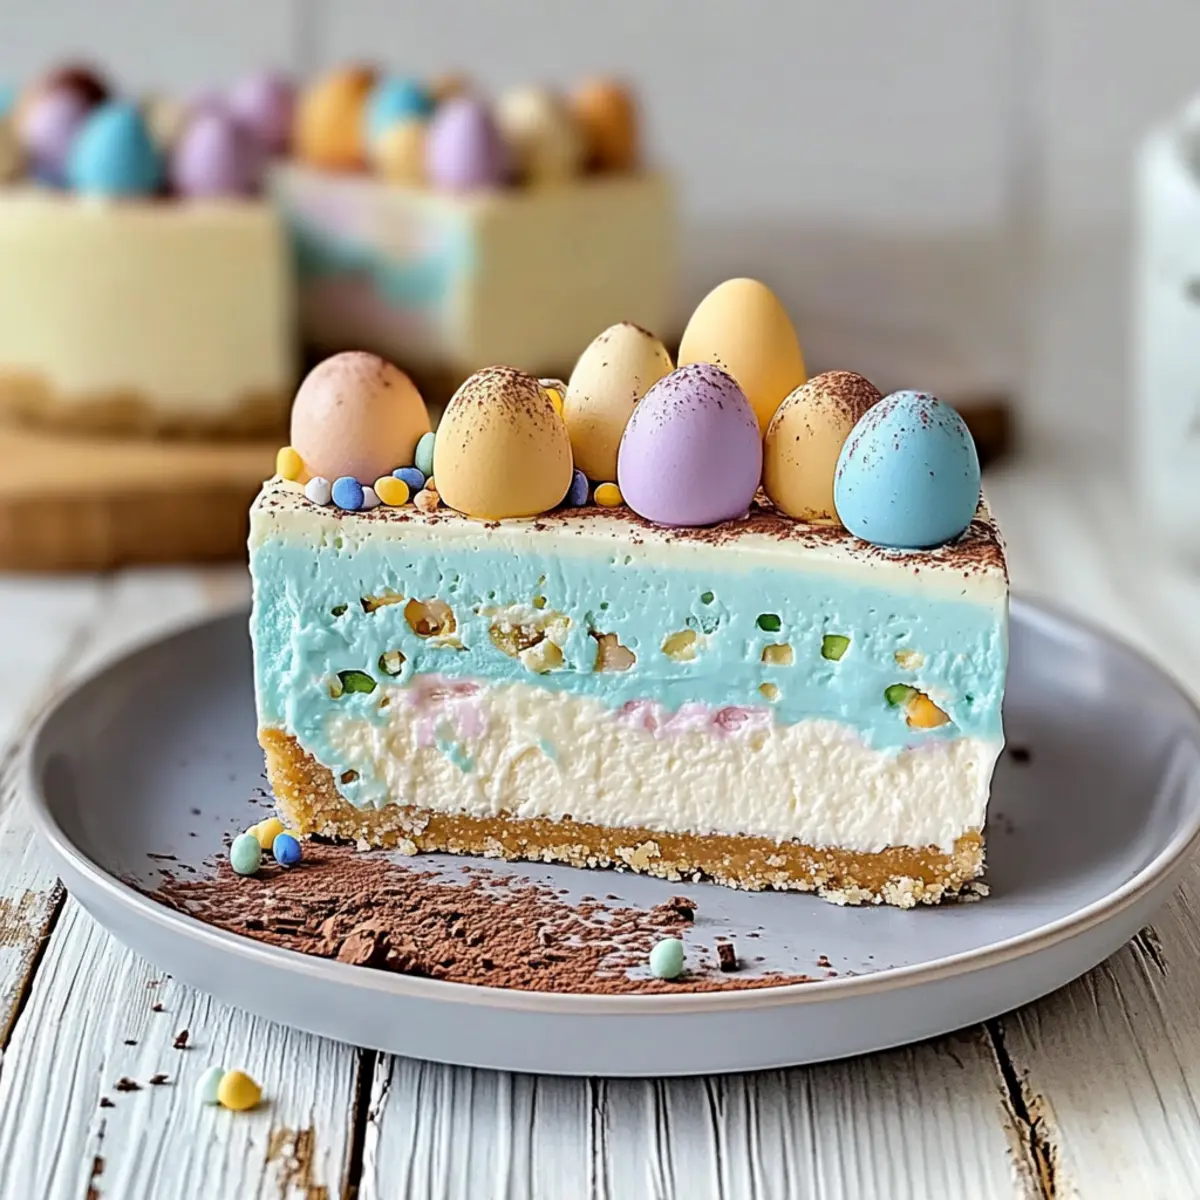
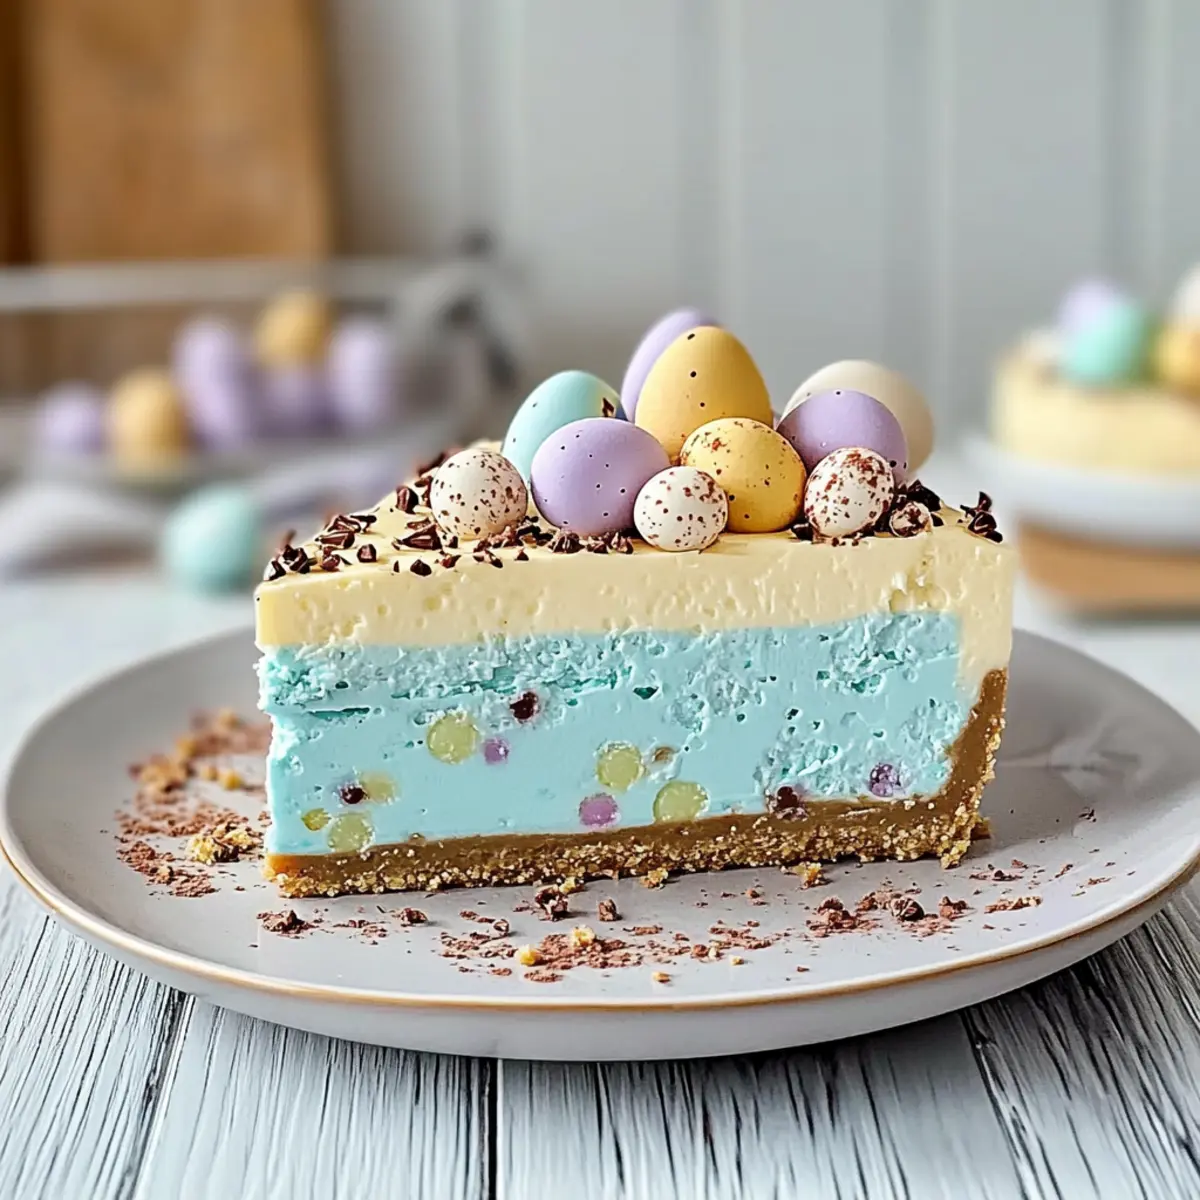
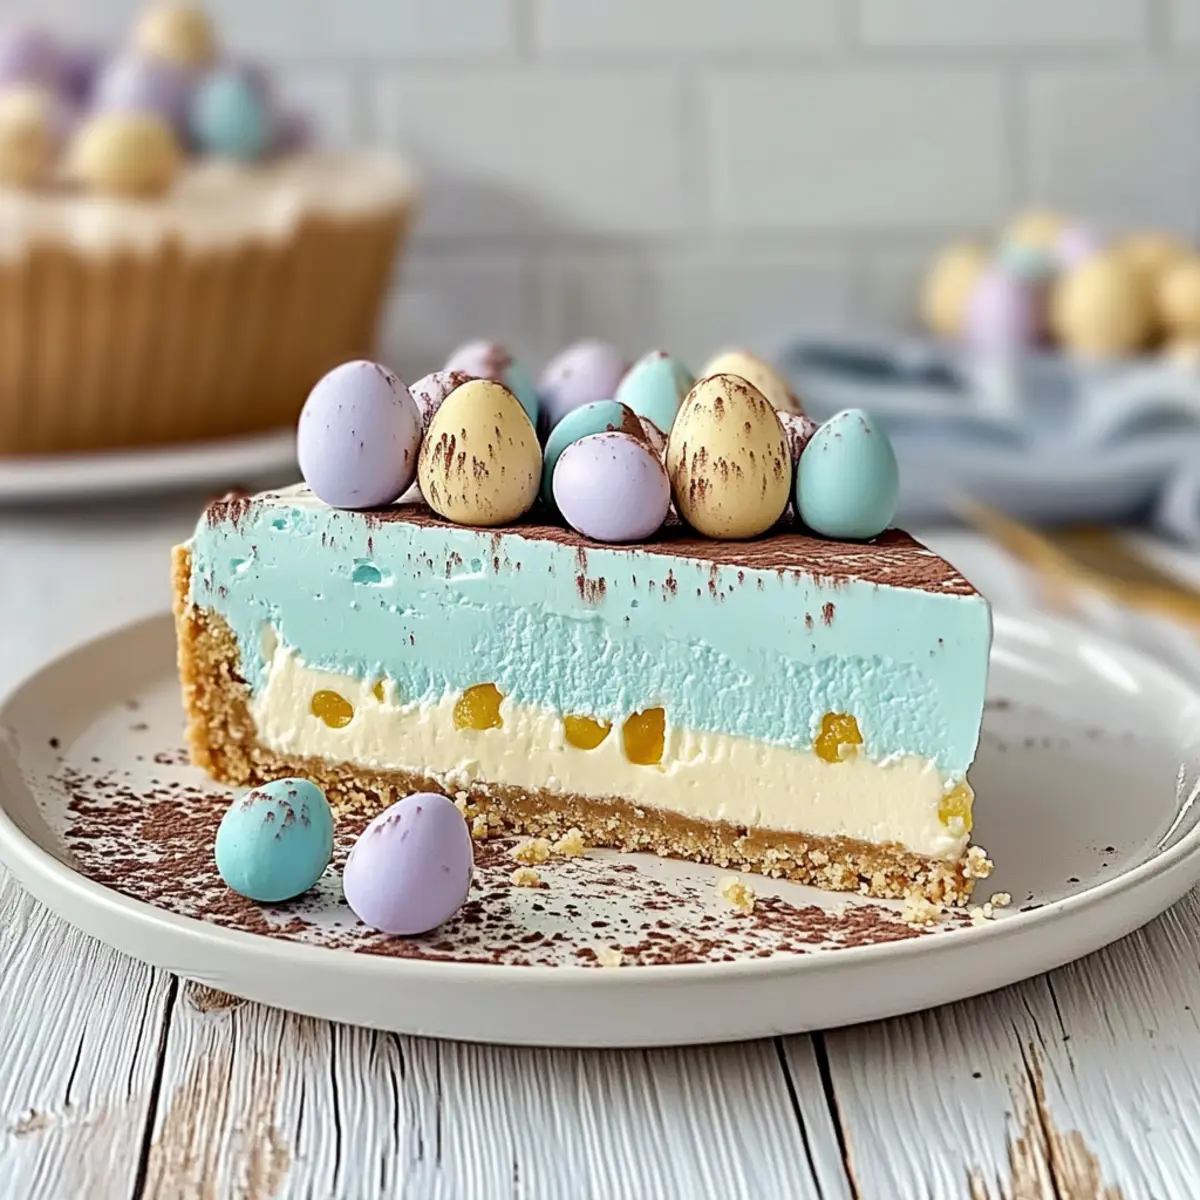
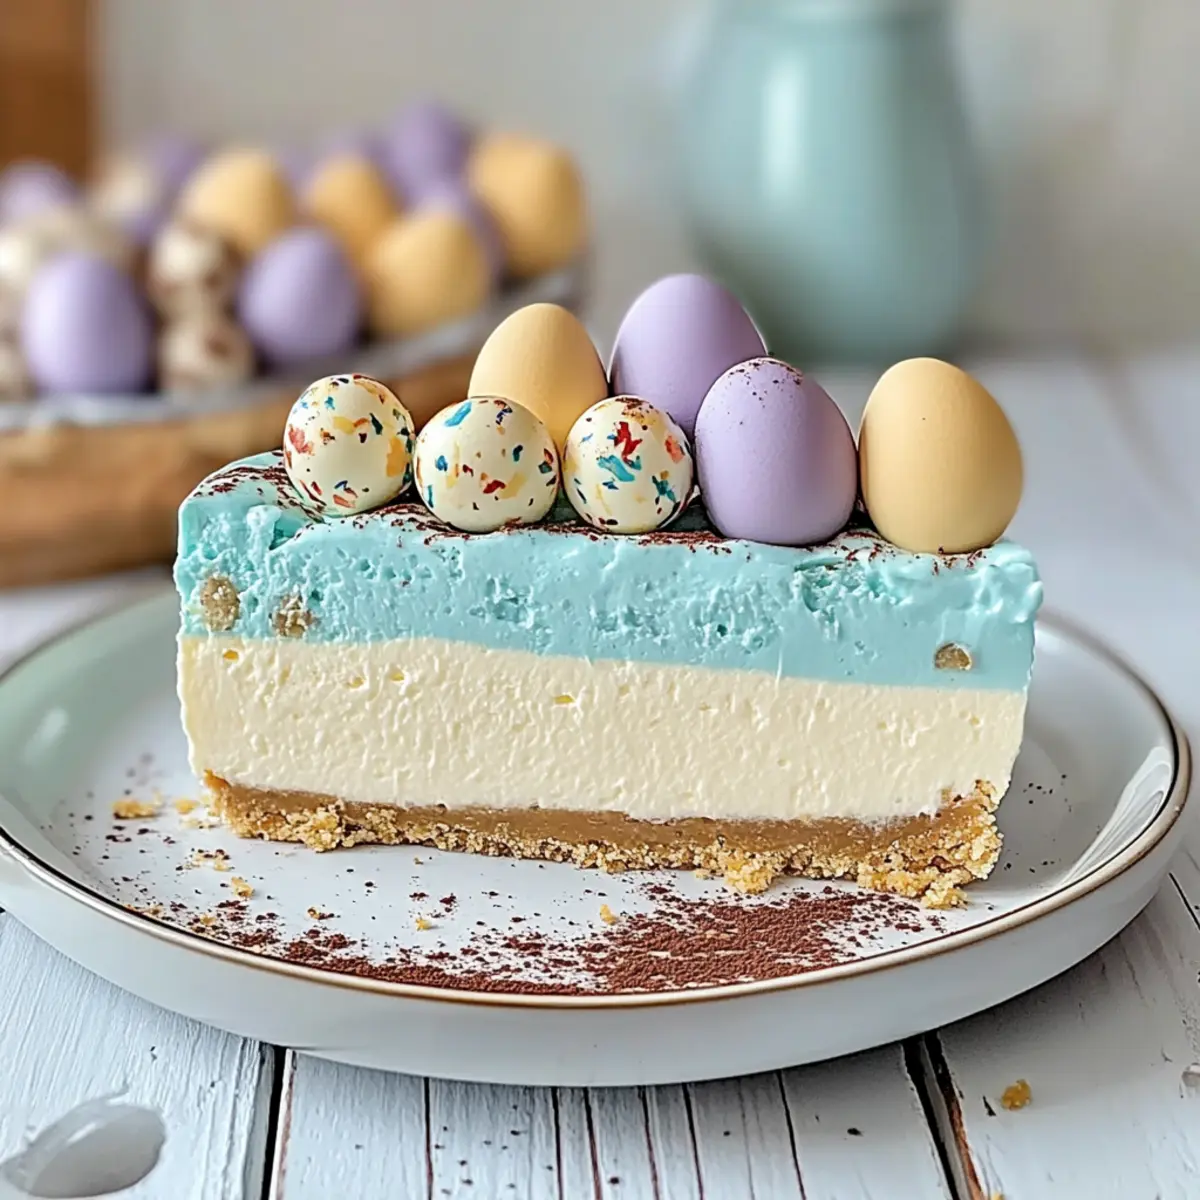
The scent of spring brings with it a sense of renewal, and what better way to celebrate than by sharing a decadent Easter Egg Cheesecake that brightens any gathering? This delightful recipe combines luscious layers of creamy cheesecake with an eye-catching blue hue, perfectly topped with whimsical Robin’s Egg Malt Balls. Not only is this dessert a feast for the eyes, but it’s also incredibly simple to whip up—ideal for those of us who love the charm of homemade treats without spending all day in the kitchen. This cheesecake is a delightful centerpiece that gives you the freedom to customize toppings and explore variations, whether you want a no-bake option or something that packs a fruity punch. Are you ready to create a deliciously festive dessert that will leave your guests in awe?
Why is this cheesecake a showstopper?
Unique Presentation: The vibrant blue hue and playful toppings make this cheesecake a true centerpiece for any spring gathering.
No-Bake Simplicity: Easy to prepare, this no-bake cheesecake saves you hours in the kitchen while delivering a deliciously rich flavor.
Crowd-Pleasing Flavors: The combination of creamy cheesecake and sweet malt balls appeals to both kids and adults alike.
Endless Variations: Feel free to customize with your favorite fruits or a decadent drizzle—check out our Healthy Tuna Egg for a savory twist or try adding some chocolate chips for a richer experience!
Quick Chill Time: With just a few hours in the fridge, you’ll have a stunning dessert ready to impress in no time!
Decadent Easter Egg Cheesecake Ingredients
For the Crust
- Graham Cracker Crumbs – Provides structure and a classic flavor; can be substituted with almond or pecan crumbs for a nutty twist.
- Granulated Sugar – Adds sweetness to the crust; no direct substitutes noted.
- Salted Butter – Binds crust ingredients and enhances flavor; unsalted butter can be used if preferred.
For the Cheesecake Filling
- Cream Cheese – The base for creaminess; use full-fat block cream cheese for the best texture.
- Sweetened Condensed Milk – Sweetens and thickens the filling; no direct substitutes suggested.
- Vanilla Extract – Adds warmth and aroma; can substitute with almond extract for a nutty flavor.
- Lemon Juice – Brightness and balance against sweetness; lime juice can serve as a zesty substitute.
- Cool Whip – Lightens the filling; whipped heavy cream can be used for a more homemade version.
- Gel Blue Food Coloring – Creates a festive appearance; can be omitted for a classic cheesecake look.
For the Toppings
- Robin’s Egg Malt Balls – Decorative topping for a whimsical touch; substitute with other candies or fresh fruit.
- Unsweetened Cocoa Powder – Adds a chocolatey speckled finish; omit if using other toppings like fresh fruit.
- Crushed Robin’s Egg Pieces – Provides added texture and visual appeal; use any chocolate or candy pieces as a substitute.
Step‑by‑Step Instructions for Decadent Easter Egg Cheesecake
Step 1: Prepare the Pan
Begin by lining a 9-inch springform pan with parchment paper, ensuring it covers the bottom and sides for easy removal later. This step is crucial for your decadent Easter Egg cheesecake to maintain its shape and presentation. Set the pan aside while you prepare the crust.
Step 2: Mix the Crust
In a mixing bowl, combine melted salted butter, graham cracker crumbs, and granulated sugar. Use a fork to blend these ingredients until the mixture feels damp and sandy. Next, press this crumb mixture firmly into the bottom of the prepared springform pan, creating an even layer. This forms the delicious base for your cheesecake.
Step 3: Chill the Crust
Once the crust is pressed into the pan, place it in the refrigerator for about 30 minutes. Chilling the crust helps it firm up, making it easier to slice the decadent Easter Egg cheesecake later. While the crust sets, you can begin preparing the filling.
Step 4: Blend the Filling
In a large mixing bowl, beat together the full-fat cream cheese, sweetened condensed milk, vanilla extract, and lemon juice. Use a handheld mixer on medium speed for about 2-3 minutes, or until the mixture is smooth and fluffy, with no lumps. This creamy filling is the heart of your cheesecake, so be sure to get it just right.
Step 5: Layer the Filling
Pour half of the smooth filling into the chilled crust, spreading it evenly with a spatula. For the remaining filling, add a few drops of gel blue food coloring and mix until fully incorporated. Pour this vibrant blue mixture over the first layer, spreading it gently to create a beautiful contrast.
Step 6: Add Decorations
To finish the top of your cheesecake, crush half of the Robin’s Egg Malt Balls and sprinkle them over the blue filling. Dust the surface lightly with unsweetened cocoa powder for a delightful chocolate speckled look. Finally, arrange the remaining whole and crushed candy eggs on top, creating a whimsical decoration that will delight everyone.
Step 7: Chill
Cover the springform pan with plastic wrap, and refrigerate the cheesecake for at least 4 to 6 hours, but ideally overnight. This chilling time allows the layers to set properly, developing the creamy texture that defines your decadent Easter Egg cheesecake.
Step 8: Serve
When ready to serve, carefully remove the cheesecake from the springform pan and place it on a serving platter. Slice into wedges and serve chilled. For an extra touch, consider adding whipped cream on the side or a decorative drizzle of sauce to elevate this delightful springtime treat.
Expert Tips for Decadent Easter Egg Cheesecake
-
Room Temperature Cream Cheese: Ensure your cream cheese is at room temperature to blend smoothly, avoiding any lumps in your decadent Easter Egg cheesecake.
-
Pack the Crust: Firmly pack your crust mixture into the pan to prevent it from crumbling during slicing—this gives you a beautiful, solid base.
-
Chilling Time is Key: Make sure to chill the cheesecake long enough, ideally overnight, to allow it to set properly and achieve that perfect creamy texture.
-
Avoid Overmixing: When blending the filling, mix just until smooth to prevent incorporating too much air, which can cause cracks later on.
-
Customize Wisely: Don’t hesitate to explore different toppings or colors, but remember to keep balance; too many flavors can overpower the cheesecake’s rich creaminess.
Make Ahead Options
Preparing your decadent Easter Egg cheesecake ahead of time is a fantastic way to save those precious moments for yourself, especially during the busy holiday season! You can make the crust and filling up to 24 hours in advance; simply prepare the crust as directed and chill it, then whip up the filling and layer it as instructed but skip the toppings. Refrigerate the assembled cheesecake, and cover it well with plastic wrap to maintain freshness. When you’re ready to serve, simply add the decorations and chilling toppings for a festive touch that’s just as delightful as if you made it the same day. Your guests will be amazed by how delicious and beautiful it is!
Decadent Easter Egg Cheesecake Variations
Feel free to put your creative touch on this delightful dessert and make it your own!
-
Fruit Lovers: Top with fresh berries like strawberries or blueberries for added freshness and color. The juicy bursts of fruit complement the creamy texture beautifully.
-
Chocolate Lovers: Incorporate mini chocolate chips into the filling for an indulgent texture. Chocolate brings a rich depth that pairs perfectly with the cheesecake base, making every bite a heavenly treat.
-
No-Bake Option: Use silken tofu instead of cream cheese for a lighter, dairy-free cheesecake. This twist allows those with dietary restrictions to indulge without missing out.
-
Caramel Drizzle: Finish off the dessert with a luscious drizzle of caramel sauce for an extra layer of sweetness. It adds a delightful contrast to the creamy cheesecake and brings a touch of decadence.
-
Nutty Crust: Swap graham cracker crumbs with crushed almonds or pecans for a nutty crust. This variation introduces a crunchy texture and a rich flavor that elevates the entire cheesecake experience.
-
Coconut Cream: Substitute half of the Cool Whip with coconut whipped cream for a tropical flair. This variation brings a delightful and unexpected twist, perfect for spring gatherings.
-
Lemon Zest: Enhance the flavor by adding a teaspoon of lemon zest to the filling. It brightens the cheesecake and accentuates the refreshing notes of spring.
Don’t forget to check our recipes for a Blueberry Cheesecake Cookie or a rich Sugar Cookie Cheesecake for more inspiration!
Storage Tips for Decadent Easter Egg Cheesecake
Fridge: Store your decadent Easter Egg cheesecake in an airtight container for up to 5 days. This helps maintain its creamy texture and flavor while keeping it fresh for enjoyment.
Freezer: For longer storage, freeze slices of the cheesecake in a single layer on a baking sheet, then transfer to a freezer-safe container. It will stay delicious for up to 2 months.
Thawing: When ready to indulge, move the frozen slice to the fridge to thaw overnight. This gentle thawing method keeps the cheesecake’s texture intact.
Reheating: While this cheesecake is best served cold, if you prefer a slightly softened texture, let it sit at room temperature for about 15 minutes before serving.
What to Serve with Decadent Easter Egg Cheesecake
Indulging in a creamy dessert like this will surely invite smiles, but let’s elevate your gathering with delightful pairings.
-
Fresh Berries: Bright, juicy strawberries or raspberries complement the cheesecake’s sweetness with a refreshing contrast, making each bite a delightful experience.
-
Whipped Cream: A dollop of freshly whipped cream adds an extra layer of creaminess that pairs beautifully with the cheesecake’s texture, enhancing every forkful.
-
Sparkling Lemonade: The zesty fizz of sparkling lemonade offers a light, tangy counterpoint to the rich cheesecake, refreshing your palate with each sip.
-
Mint Chocolate Chip Ice Cream: For an unexpected twist, serve a scoop of mint chocolate chip ice cream alongside the cheesecake, creating an exciting flavor combination.
-
Chocolate-Covered Strawberries: These sweet and slightly tart berries add an elegant flair and extra sweetness that perfectly contrasts the rich cheesecake.
-
Caramel Sauce Drizzle: A warm drizzle of caramel sauce brings out the cheesecake’s sweet notes while adding a sticky, buttery richness that’s utterly irresistible.
With these pairings, your Decadent Easter Egg Cheesecake will shine even brighter at your festive table!
Decadent Easter Egg Cheesecake Recipe FAQs
What type of cream cheese is best for this cheesecake?
I recommend using full-fat block cream cheese for the most luxurious texture. Avoid cream cheese spreads, as they can result in a runny filling. Be sure to let it reach room temperature before mixing—this helps ensure a smooth, lump-free consistency that’s essential for your decadent Easter Egg cheesecake.
How should I store my cheesecake?
To keep your cheesecake fresh, store it in an airtight container in the fridge for up to 5 days. This will allow you to enjoy its creamy texture and delightful flavor for several days. If you plan to keep it longer, you can freeze slices for up to 2 months. Just ensure they’re wrapped tightly to prevent freezer burn.
Can I freeze the decadent Easter Egg cheesecake? How do I do it?
Absolutely! Freezing this cheesecake is easy. First, slice it into individual portions and place the slices on a baking sheet lined with parchment paper. Freeze them for about 1-2 hours until solid, then transfer the slices into a freezer-safe container or bag, separating layers with parchment paper. Thaw in the fridge overnight when you’re ready to enjoy, and it will taste almost as good as fresh!
What if my cheesecake cracks while it’s chilling?
No need to worry! Cracks can happen, but there are ways to prevent them. Make sure not to overmix the filling, as incorporating too much air can lead to cracks during chilling. If you do notice a crack, dust the top with cocoa powder or add some whipped cream to cover it up—it’s still going to be delicious!
Is this cheesecake suitable for lactose-intolerant individuals?
If you or your guests are lactose intolerant, you can try using lactose-free cream cheese and whipped cream. Alternatively, consider making a no-bake version using silken tofu to create a dairy-free dessert that still captures the essence of a cheesecake. Enjoy experimenting, and happy baking!
Decadent Easter Egg Cheesecake: Spring's Creamy Treat
Ingredients
Equipment
Method
- Prepare the Pan: Line a 9-inch springform pan with parchment paper, ensuring it covers the bottom and sides.
- Mix the Crust: Combine melted salted butter, graham cracker crumbs, and granulated sugar in a mixing bowl and press into the prepared pan.
- Chill the Crust: Place the crust in the refrigerator for about 30 minutes to firm up.
- Blend the Filling: In a large mixing bowl, beat together cream cheese, sweetened condensed milk, vanilla extract, and lemon juice until smooth and fluffy.
- Layer the Filling: Pour half of the filling into the chilled crust, then mix gel blue food coloring into the remaining filling and pour over the first layer.
- Add Decorations: Crush half of the Robin's Egg Malt Balls and sprinkle them over the filling, dusting with cocoa powder and adding remaining candies for decoration.
- Chill: Cover and refrigerate the cheesecake for at least 4 to 6 hours, ideally overnight.
- Serve: Remove from the springform pan, slice, and serve chilled, optionally with whipped cream.
Leave a Reply