
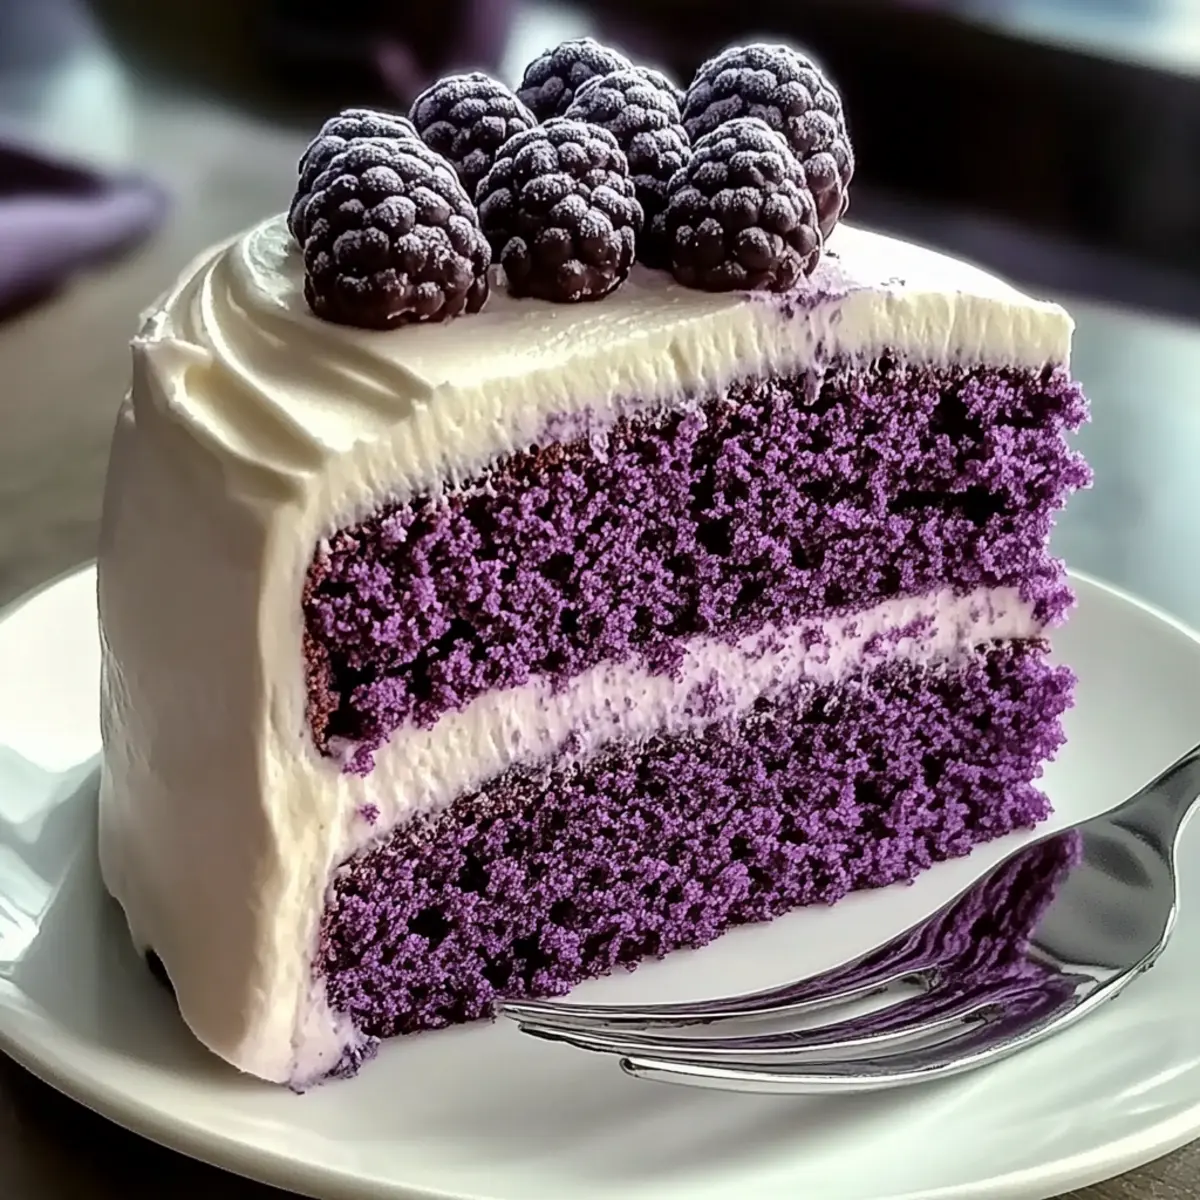
Have you ever felt that thrill when a dessert catches your eye, vibrant and inviting? Meet my Stunning Purple Velvet Cake, a delightful showstopper that’s sure to steal the spotlight at any gathering. With its moist crumb and creamy white chocolate cream cheese frosting, it’s the perfect blend of elegance and indulgence. Plus, this easy recipe comes with gluten-free options, ensuring that everyone can join in on the joy of homemade sweetness. Whether you’re celebrating a special occasion or just treating yourself on a cozy evening, this cake is sure to leave a lasting impression. Curious about how to make this culinary masterpiece? Let’s dive into the recipe together!
Why is Purple Velvet Cake so special?
Exquisite Color: This cake’s stunning purple hue captivates everyone at first glance, making it a perfect showstopper for any occasion.
Irresistible Moisture: Each slice is bursting with moisture and flavor, enhanced by a rich white chocolate cream cheese frosting that melts in your mouth.
Gluten-Free Adaptability: Friends with dietary restrictions can indulge too, thanks to the gluten-free option that doesn’t compromise on taste.
Easy-to-Make Delight: Simplicity reigns here; even novice bakers can create this elegant dessert without stress, making it accessible for everyone.
Versatile Flavor: Not only does this cake shine on its own, but you can also personalize it with zests or fruit layers for an extra touch! For more deliciously unique recipes, consider checking out my Carrot Cake Roll or Vegan Vanilla Cake, both sure to satisfy any dessert lover.
Purple Velvet Cake Ingredients
• Get ready to bake this stunning cake!
For the Cake
- All-Purpose Flour – Provides structure and texture; substitute with a gluten-free flour blend for a gluten-free option.
- Granulated Sugar – Sweetens the cake; light brown sugar can add a hint of molasses flavor.
- Baking Soda – Acts as a leavening agent; check for freshness to ensure the right rise.
- Salt – Balances sweetness; use sea salt for a touch of sophistication.
- Cocoa Powder – Adds a chocolatey depth; Dutch-processed cocoa yields a smoother taste.
- Vegetable Oil – Keeps the cake moist; melted coconut oil can introduce a subtle tropical flair.
- Buttermilk – Imparts tanginess and moisture; for a substitute, mix milk with vinegar.
- Eggs – Provide richness and bind the ingredients; flaxseed meal can replace eggs for a vegan version.
- White Vinegar – Helps with leavening; lemon juice works as a suitable replacement.
- Vanilla Extract – Adds flavor complexity; use pure vanilla for the best results.
- Red & Purple Food Coloring – Creates the iconic color; natural purple sweet potato powder can be a healthier alternative.
For the Frosting
- Cream Cheese – Key for a rich and creamy frosting base; use vegan cream cheese for a dairy-free option.
- Unsalted Butter – Contributes to a luscious texture; replace with coconut oil for a dairy-free frosting.
- Confectioners’ Sugar – Sweetens and smooths the frosting; sift for a lump-free consistency.
- White Chocolate – Elevates creaminess; high-quality chocolate makes a noticeable difference in taste.
Enjoy making this Purple Velvet Cake that’s sure to delight your friends and family!
Step‑by‑Step Instructions for Purple Velvet Cake
Step 1: Preheat the Oven
Begin by preheating your oven to 350°F (175°C). While the oven heats, prepare two 9-inch round cake pans by lining them with parchment paper and greasing the sides. This will ensure your Purple Velvet Cake releases easily after baking, setting you up for a beautiful presentation!
Step 2: Mix the Dry Ingredients
In a large mixing bowl, whisk together 2 cups of all-purpose flour, 1 ½ cups of granulated sugar, 1 teaspoon of baking soda, ½ teaspoon of salt, and ¼ cup of cocoa powder. Stir until the dry ingredients are well combined and have a consistent texture. The cocoa will add depth to the Purple Velvet Cake’s flavor, creating a tempting base for your cake layers.
Step 3: Combine the Wet Ingredients
In another bowl, mix 1 cup of vegetable oil, 1 cup of buttermilk, 2 large eggs, 1 tablespoon of white vinegar, 2 teaspoons of vanilla extract, and 1 tablespoon each of red and purple food coloring. Whisk until the mixture is smooth and uniform. The vibrant colors and rich ingredients will enhance the cake’s beautiful hue and moist texture.
Step 4: Blend Wet and Dry Ingredients
Carefully combine the wet and dry ingredients in one bowl, mixing just until combined. It’s crucial not to overmix to maintain a light and fluffy texture in your Purple Velvet Cake. You should see a soft batter with no visible dry flour.
Step 5: Distribute the Batter
Pour the batter evenly into your prepared cake pans, smoothing the tops with a spatula. Ensure each pan is filled evenly to promote even baking. Place the pans in the preheated oven and bake for 25 to 30 minutes, or until a toothpick inserted in the center comes out clean. The cakes should spring back when lightly pressed.
Step 6: Cool the Cakes
Once baked, remove the pans from the oven and allow them to cool in the pans for about 10 minutes. This cooling time is essential for the cakes to set properly. Afterward, gently invert the cakes onto a wire rack to cool completely, which will take roughly 30-45 minutes. This step ensures your Purple Velvet Cake layers are ready for frosting.
Step 7: Prepare the Frosting
To make the creamy frosting, start by melting 8 ounces of white chocolate and letting it cool slightly. In a bowl, beat together 8 ounces of cream cheese and ½ cup of unsalted butter until smooth. Gradually incorporate 4 cups of confectioners’ sugar and the cooled white chocolate, mixing until it’s light and fluffy. A perfect frosting awaits your beautiful cake!
Step 8: Frost the Cake
Make sure the cake layers are completely cool, then place one layer on a serving platter. Spread a generous amount of frosting on top, followed by placing the second layer on top. Use the remaining frosting to cover the sides and top of the Purple Velvet Cake, creating a smooth and elegant finish.
Step 9: Chill Before Serving
After frosting, refrigerate the cake for at least 30 minutes to set the frosting. This step helps with easier slicing and enhances the flavors as they meld together. Once chilled, your stunning Purple Velvet Cake is ready to be served, a delightful treat for any occasion or a cozy family dessert!
Purple Velvet Cake Variations
Feel free to get creative and make this Purple Velvet Cake your own with these easy swaps and delightful twists!
- Gluten-Free: Substitute all-purpose flour with a gluten-free flour blend to make this cake friendly for gluten-sensitive friends. It’s just as moist and fabulous!
- Dairy-Free: Replace cream cheese and butter with vegan cream cheese and coconut oil for a dairy-free frosting that doesn’t skimp on flavor.
- Citrus Zest: Add a touch of lemon or orange zest to the frosting or batter for a refreshing twist that brightens every bite. Your tastebuds will thank you!
- Jam-filled Layers: Incorporate a layer of fruit jam, like raspberry or blueberry, between the cake layers for an unexpected and fruity surprise. It adds a lovely tart contrast!
- Chocolate Coffee Boost: Swap one tablespoon of granulated sugar with coffee granules in the batter for a subtle coffee flavor that intensifies the cake’s richness.
- Nutty Crunch: Fold in chopped walnuts or pecans into the batter for a delightful texture contrast and a nutty flavor that elevates each bite.
- Color Variations: Experiment with natural food colorings, such as beet juice or spirulina powder, to create unique hues while keeping the cake deliciously moist.
- Spiced Version: Add a pinch of cinnamon or nutmeg to the batter for warm, inviting spices that complement the chocolate flavor. This will remind you of cozy winter evenings.
Consider pairing this cake with a scoop of vanilla bean ice cream or enjoying it alongside the stunning Cranberry Glaze Bundt Cake for a beautiful dessert spread!
Make Ahead Options
Preparing your Purple Velvet Cake in advance is a true time-saver for those busy days! You can bake the cake layers up to 24 hours ahead; simply cool them completely, wrap in plastic wrap, and refrigerate to keep them moist. The creamy white chocolate cream cheese frosting can be made up to 3 days in advance and stored in an airtight container in the fridge—just give it a quick stir before spreading. When it’s time to serve, layer and frost your cake, then refrigerate it for an additional 30 minutes to set the frosting. This way, you’ll enjoy a delicious, stress-free dessert that tastes just as delightful even after being prepped ahead!
Expert Tips for Purple Velvet Cake
- Room Temperature Ingredients: Ensure your eggs, butter, and cream cheese are at room temperature. This helps create a smoother batter and better texture in your Purple Velvet Cake.
- Don’t Overmix: Mix the wet and dry ingredients just until combined. Overmixing can lead to a dense cake, so be gentle!
- Fresh Baking Soda: Check that your baking soda is fresh for optimal rising. A stale leavening agent can ruin the lightness of your cake.
- Chill for Presentation: Refrigerate the cake after frosting for at least 30 minutes. This makes it easier to slice and enhances its stunning presentation.
- Color Adjustments: Use purple sweet potato powder for a natural, healthier coloring in your cake, which still retains that vibrant hue without artificial additives.
How to Store and Freeze Purple Velvet Cake
Fridge: Store your Purple Velvet Cake tightly covered in the refrigerator for up to 5 days to keep it fresh and moist.
Freezer: For longer storage, individual slices can be wrapped in plastic wrap and placed in an airtight container, freezing them for up to 3 months.
Reheating: When ready to enjoy, thaw slices in the fridge overnight, then allow to come to room temperature before serving for the best flavor and texture.
Frosting Storage: If you have leftover frosting, store it in an airtight container in the fridge for up to a week, and simply re-whip it before using.
What to Serve with Purple Velvet Cake?
Indulging in a slice of this vibrant cake is a treat on its own, but when paired with the right accompaniments, it truly shines.
- Vanilla Bean Ice Cream: A creamy scoop adds a delightful contrast to the cake’s texture, making each bite extra indulgent.
- Fresh Berries: Juicy strawberries or blueberries provide a refreshing burst of flavor that balances the cake’s sweetness beautifully.
- Chocolate Ganache Drizzle: A rich, silky chocolate sauce enhances the cake’s deep cocoa notes, making it a chocolate lover’s dream.
- Whipped Cream: Light and airy whipped cream adds a fluffy element, creating a delectable blend with the cake’s dense frosting.
- Citrus Salad: A refreshing medley of orange and grapefruit slices can cleanse the palate between bites while enhancing the cake’s vibrant color.
- Sparkling Wine: Serve with a glass of bubbly prosecco to elevate any occasion—its effervescence creates a fun celebration with each sip.
- Coffee or Espresso: The rich notes of coffee perfectly complement the cake’s sweet, creamy flavors for a luxurious dessert experience.
- Lemon Zest Garnish: Sprinkling lemon zest on top of each slice adds a zesty kick that brightens the overall richness of the cake.
- Nutty Cookies: Delicate almond or pecan cookies provide a nice crunch, contrasting with the cake’s soft crumb and elevating the dessert spread.
Purple Velvet Cake Recipe FAQs
How do I choose the best ingredients for my Purple Velvet Cake?
Absolutely! For the best results, look for high-quality ingredients. Use fresh all-purpose flour and granulated sugar, checking the expiration dates. If you want a gluten-free version, select a well-balanced gluten-free flour blend. For cocoa powder, Dutch-processed will yield smoother results. Also, ensure your baking soda is fresh; it’s essential for a light cake. When it comes to food coloring, opt for natural options like purple sweet potato powder where possible.
What’s the best way to store leftover Purple Velvet Cake?
Very! To keep your cake fresh, store it tightly covered in the refrigerator for up to 5 days. This helps maintain its moisture and flavor. If you want to enjoy it for a longer time, you can freeze it. Just wrap individual slices in plastic wrap and place them in an airtight container, freezing for up to 3 months. When you’re ready to serve, thaw the slices in the refrigerator overnight to retain their texture.
Can I freeze the Purple Velvet Cake? If so, how?
Definitely! Freezing your Purple Velvet Cake is simple. Once your cake has cooled completely, slice it into individual portions. Wrap each slice tightly in plastic wrap to prevent freezer burn and place them in an airtight container. You can freeze the wrapped slices for up to 3 months. When you’re ready to enjoy, simply take a slice out and let it thaw in the fridge overnight. After thawing, allow it to come to room temperature for the best taste.
What should I do if my Purple Velvet Cake is too dense?
Don’t worry—this is a common issue! To prevent density in your cake, be careful not to overmix the batter; mix just until the dry ingredients and wet ingredients are combined. Another tip is to ensure your baking soda is fresh, as this affects the rise. Additionally, make sure your oven is preheated to the correct temperature and calibrated. If your cake still turns out dense, try adding a bit more liquid next time to achieve a lighter texture.
Are there any dietary considerations for the Purple Velvet Cake?
Of course! This recipe can easily be adapted to accommodate dietary needs. For a gluten-free version, simply swap the all-purpose flour for a gluten-free flour blend. For those who are dairy-free, using vegan cream cheese in the frosting and coconut oil instead of butter will work wonderfully. If you’re concerned about egg allergies, you can replace the eggs with flaxseed meal—mix 1 tablespoon of flaxseed meal with 2.5 tablespoons of water, let it sit for five minutes, and use it as a substitute for one egg.
Irresistible Purple Velvet Cake That Will Steal the Show
Ingredients
Equipment
Method
- Preheat your oven to 350°F (175°C) and prepare two 9-inch round cake pans with parchment paper and greased sides.
- In a large mixing bowl, whisk together all-purpose flour, granulated sugar, baking soda, salt, and cocoa powder until combined.
- In another bowl, mix vegetable oil, buttermilk, eggs, white vinegar, vanilla extract, and food coloring until smooth.
- Carefully combine wet and dry ingredients, mixing just until combined to maintain a light and fluffy texture.
- Pour the batter evenly into the prepared cake pans and smooth the tops. Bake for 25-30 minutes or until a toothpick comes out clean.
- Once baked, cool the cakes in the pans for 10 minutes before inverting onto a wire rack to cool completely.
- Melt white chocolate and let it cool. Beat cream cheese and butter until smooth, then gradually incorporate confectioners' sugar and cooled white chocolate.
- Once layers are completely cool, spread frosting between layers and on top and sides for a smooth finish.
- Refrigerate the cake for at least 30 minutes to set the frosting.
Leave a Reply