
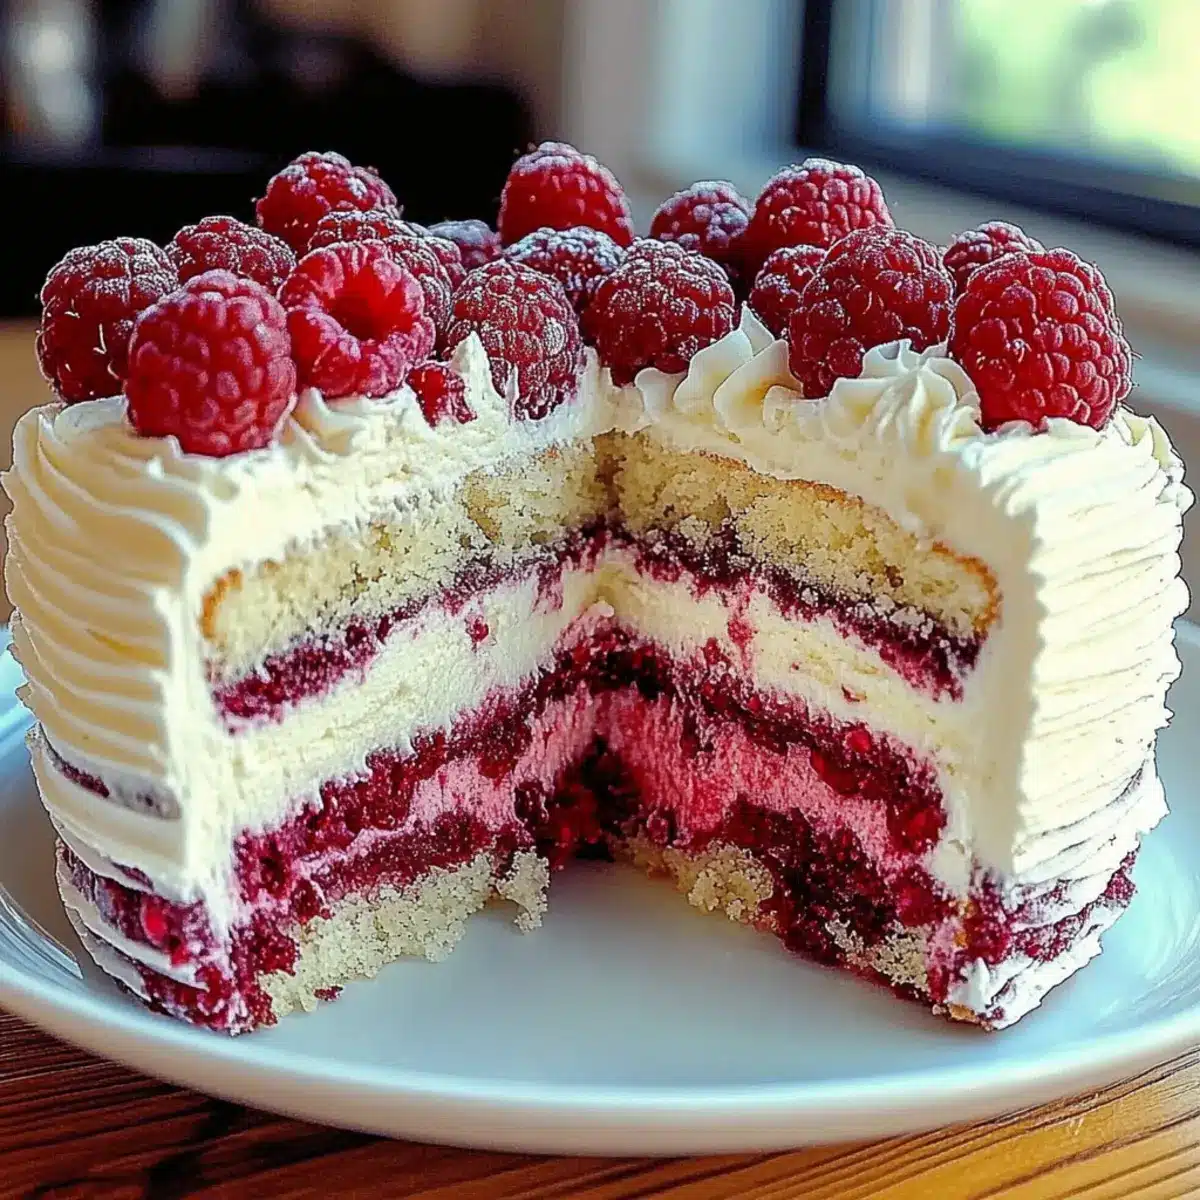
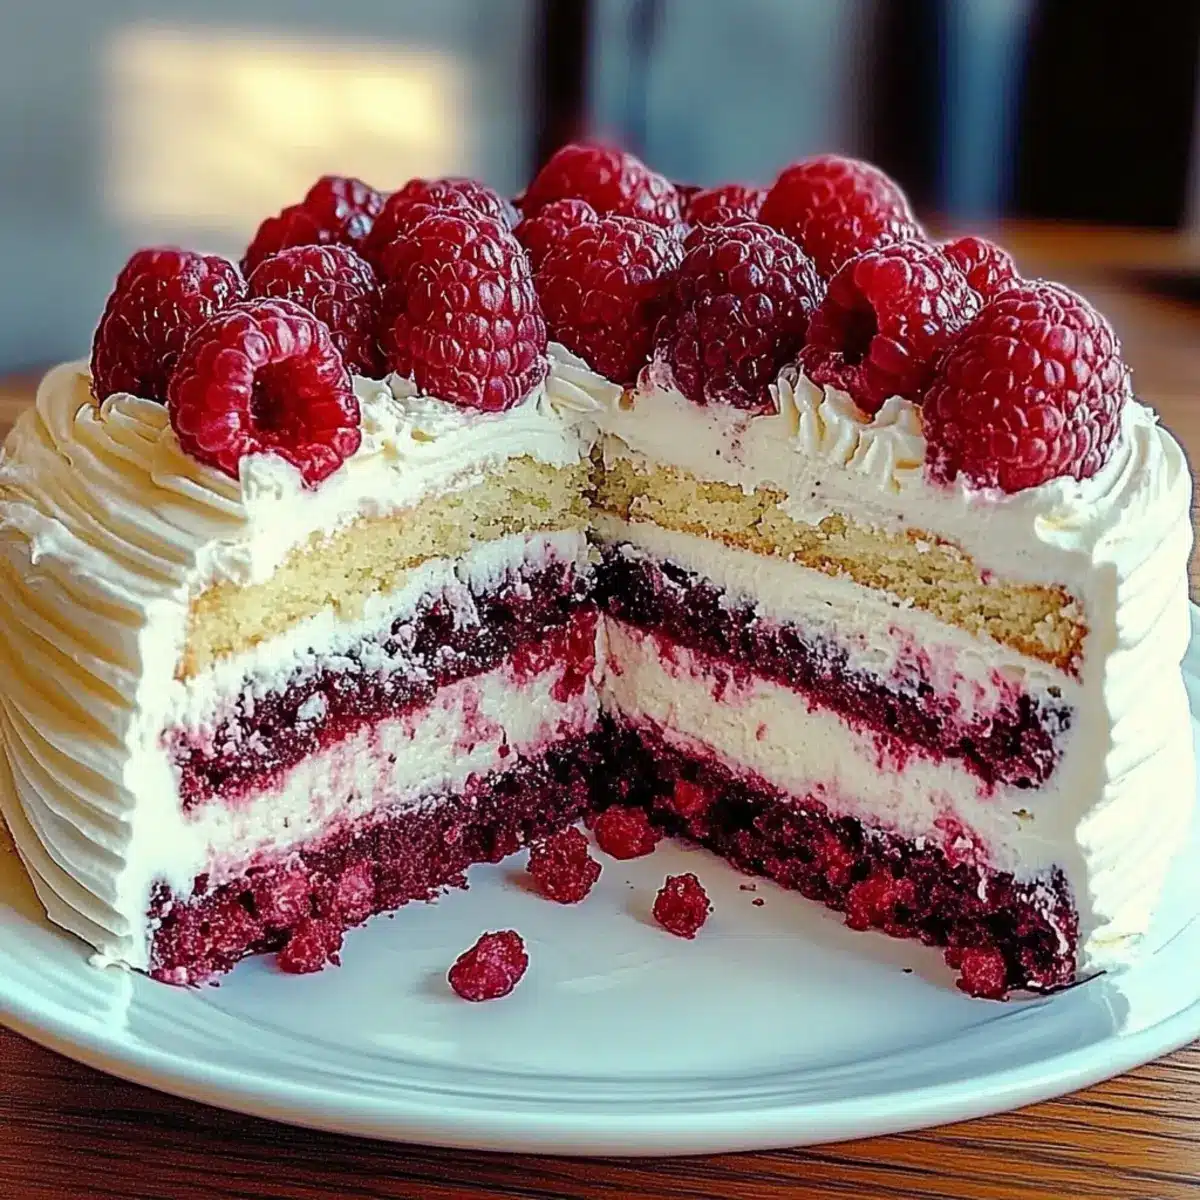
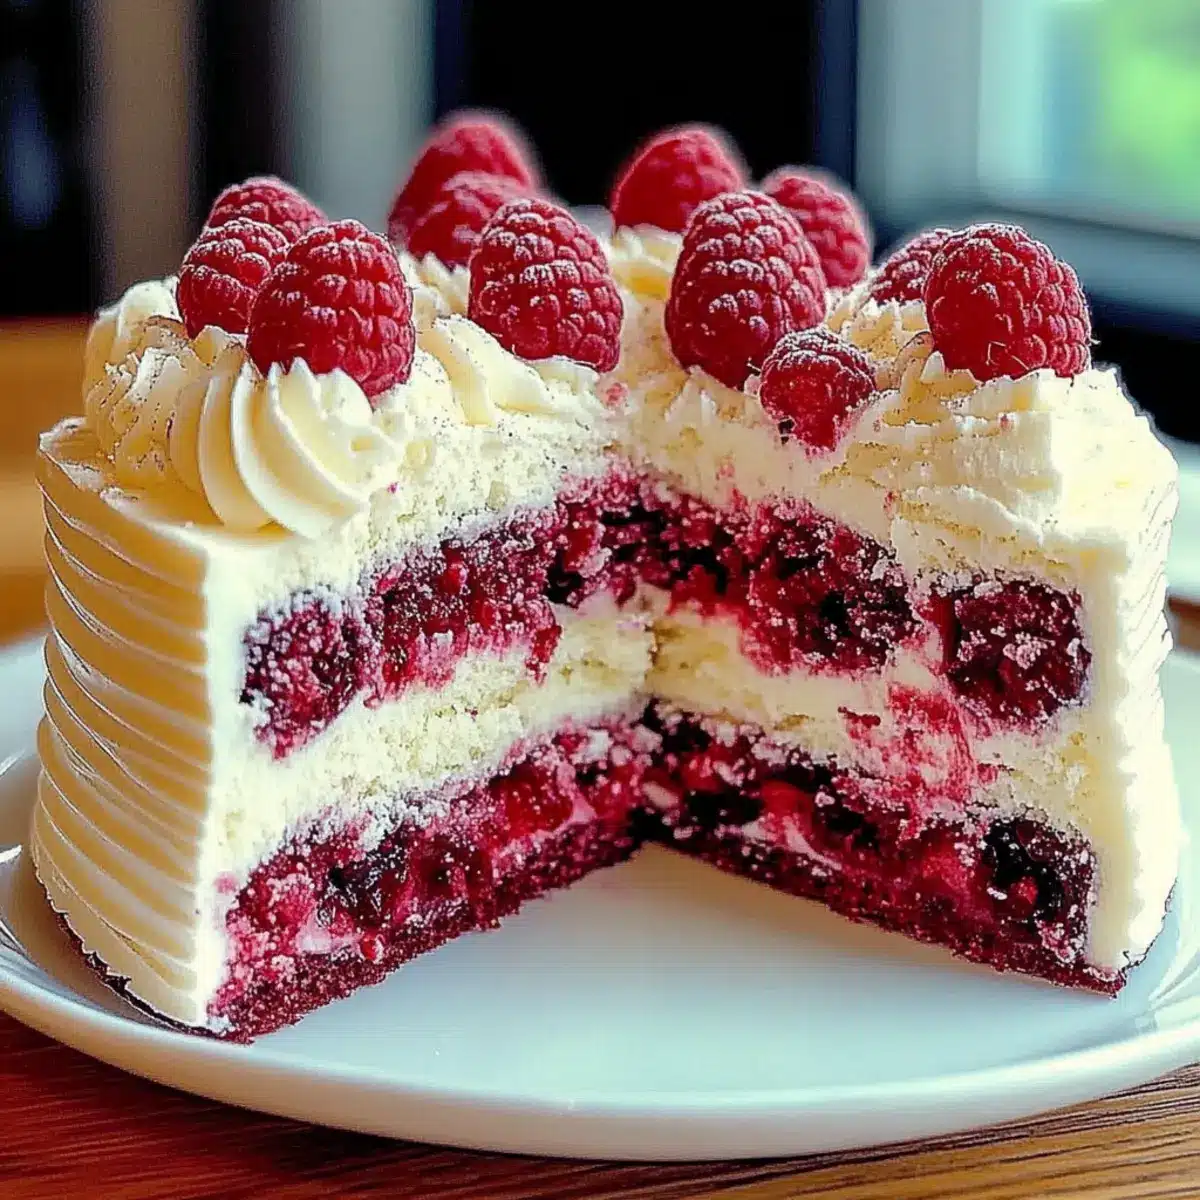
As I stood in my kitchen, the sweet scent of melting white chocolate filled the air, instantly transporting me to a sun-drenched bakery in Paris. This White Chocolate Raspberry Dream Cake is the embodiment of that moment: a luscious dessert that combines the creamy richness of white chocolate with the bright, tangy flavor of fresh raspberries. What makes this cake truly special is not just its stunning appearance—it’s a quick and easy crowd-pleaser that’s perfect for any occasion, from casual family gatherings to elegant dinner parties. Plus, it’s incredibly versatile, with simple substitutions so everyone can enjoy a slice (or two). Curious to learn how to create this dreamy delight in your own kitchen? Let’s dive in!
Why is This Cake So Irresistible?
Decadent Flavors: Each bite of the White Chocolate Raspberry Dream Cake is a blissful combination of creamy sweetness and tangy freshness, making it a true showstopper.
Effortless Preparation: This dessert is simple enough for beginners, yet impressive enough to wow your guests, making it a win-win option for any baker.
Versatile Ingredients: Easily swap out raspberries for strawberries or blueberries to cater to different preferences—everyone will find their favorite version!
Perfect for Any Occasion: Whether it’s a birthday celebration, holiday feast, or a cozy family dinner, this cake fits every gathering beautifully.
Make-Ahead Convenience: Bake it ahead of time and store it in the fridge, freeing up your schedule for other festivities—or enjoy a scrumptious treat whenever you crave a slice!
Say goodbye to the mundane and let your baking shine with this delightful recipe. If you’re looking for more sweet treats, consider trying my Pistachio Chocolate Babka or a delightful Pistachio Coffee Cake.
White Chocolate Raspberry Dream Cake Ingredients
Get ready to create a creamy masterpiece!
For the Cake
• All-Purpose Flour – Structure base; substitute with gluten-free flour blend for a gluten-free option.
• Granulated Sugar – Adds sweetness; can reduce by ¼ cup for a less sweet version.
• Unsalted Butter – Provides richness and moisture; ensure it’s softened for easy mixing.
• Milk – Adds moisture and balances the batter; use whole or 2% milk for best results.
• Eggs – Essential for structure and leavening; room temperature eggs create a lighter texture.
• Baking Powder – Works as a leavening agent; always check it’s fresh for proper rise.
• Vanilla Extract – Infuses aromatic flavor that enhances the overall taste.
• Salt – Enhances sweetness and balances the cake’s flavors.
• White Chocolate Chips – Offers rich creaminess; substitute with chopped white chocolate bar if desired.
• Fresh Raspberries – Brings tangy flavor and color; frozen raspberries can be used if thawed and drained.
For the Frosting
• Heavy Whipping Cream – Forms the base for the whipped frosting; ensure it’s cold for better whipping.
• Powdered Sugar – Adds sweetness and stabilizes the whipped cream for perfect texture.
Each ingredient plays a vital role in achieving the zesty flavors of the White Chocolate Raspberry Dream Cake. Let’s whip up something special!
Step‑by‑Step Instructions for White Chocolate Raspberry Dream Cake
Step 1: Preheat the Oven
Preheat your oven to 350°F (175°C) and prepare two 9-inch round cake pans by greasing them with butter and lightly dusting with flour. This step ensures the White Chocolate Raspberry Dream Cake will release smoothly after baking. Take a moment to gather your ingredients and kitchen tools like mixing bowls, a whisk, and a spatula.
Step 2: Cream Butter and Sugar
In a large mixing bowl, combine the softened unsalted butter and granulated sugar. Using an electric mixer, beat these together on medium speed until the mixture is light and fluffy, approximately 3 to 5 minutes. The key here is to achieve a pale color and a creamy texture, setting the foundation for your flavorful cake.
Step 3: Add Eggs and Vanilla
Add the eggs one at a time to the butter and sugar mixture, mixing well after each addition to ensure everything is well incorporated. Then, stir in the vanilla extract for a fragrant aroma that will enhance the overall flavors of the White Chocolate Raspberry Dream Cake. The mixture should look smooth and cohesive.
Step 4: Combine Dry Ingredients
In a separate bowl, whisk together the all-purpose flour, baking powder, and salt. Gradually add this dry mixture to the wet ingredients, alternating with the milk. Start and end with the dry mixture, mixing just until combined. Avoid overmixing to keep your cake tender and fluffy, as you prepare the batter for the next step.
Step 5: Fold in Chocolate and Raspberries
Gently fold in the white chocolate chips and fresh raspberries using a spatula. Be careful not to crush the raspberries; they should maintain their shape to create beautiful bursts of flavor throughout your White Chocolate Raspberry Dream Cake. This adds both texture and visual appeal to your delicious batter.
Step 6: Bake the Cake
Evenly distribute the cake batter between the prepared pans, smoothing the tops for even baking. Place your pans in the preheated oven and bake for 25-30 minutes, or until a toothpick inserted in the center comes out clean. The tops should be lightly golden and spring back when touched, indicating they are done.
Step 7: Cool and Transfer
Once baked, remove the cake from the oven and let it cool in the pans for about 10 minutes. Afterward, carefully transfer the cakes to a wire rack to cool completely. This step is crucial as it prevents the frosting from melting when you assemble the White Chocolate Raspberry Dream Cake later on.
Step 8: Prepare the Frosting
In a chilled mixing bowl, beat the heavy whipping cream, powdered sugar, and a splash of vanilla extract on medium speed. Whip until soft peaks form, which should take around 3 to 5 minutes. The cooled whipped cream will create a luscious frosting that complements the cake beautifully, so ensure to watch it closely to avoid overbeating.
Step 9: Assemble the Cake
To assemble your White Chocolate Raspberry Dream Cake, place one layer of cake on a serving plate. Spread a generous layer of the whipped frosting on top, then carefully add the second cake layer. Use the remaining frosting to cover the top and sides of the cake, creating a smooth and inviting finish that will impress your guests.
Step 10: Garnish and Serve
Finally, enhance the visual appeal of your cake by garnishing it with extra raspberries and white chocolate shavings on top. This adds a pop of color and a touch of elegance. Serve chilled, and watch as everyone delights in the luscious flavors of your White Chocolate Raspberry Dream Cake!

Make Ahead Options
These White Chocolate Raspberry Dream Cakes are perfect for meal prep enthusiasts! You can prepare the cake layers up to 3 days in advance, storing them un-frosted in an airtight container in the refrigerator to maintain their moisture and flavor. If you want to bake even further ahead, freeze the un-frosted layers for up to 3 months, thawing them in the fridge overnight before assembling. The frosting can be made 24 hours in advance and stored in the refrigerator, just be sure to rewhip gently before spreading for that light texture. When ready to serve, simply assemble the cake with those dreamy layers, and you’ll unveil a stunning dessert with minimal last-minute effort!
What to Serve with White Chocolate Raspberry Dream Cake
As you savor the rich flavors of this dessert, consider these delightful pairings that enhance your dining experience.
-
Velvety Ice Cream: A scoop of vanilla bean ice cream adds a creamy contrast to the cake’s richness, creating a dreamy combination.
-
Fresh Berries: A side of mixed fresh berries complements the cake’s raspberry flavor, offering a burst of freshness that balances the sweetness.
-
Whipped Cream: A dollop of extra whipped cream brings an added lightness and creamy texture, perfect for those who crave indulgence.
-
Coffee or Espresso: A warm cup of coffee or a shot of espresso emphasizes the cake’s flavors, making each bite even more satisfying.
-
Chocolate Fondue: For a fun, interactive twist, serve warmed chocolate fondue for dipping extra fruit pieces or cake slices, creating a unique experience.
-
Sparkling Water: Infuse some elegance with sparkling water or a light cocktail, as the bubbles cleanse the palate between bites of cake, enhancing every mouthful.
Let each of these additions take your White Chocolate Raspberry Dream Cake from dessert to a deliciously memorable occasion!
How to Store and Freeze White Chocolate Raspberry Dream Cake
Fridge: Store your White Chocolate Raspberry Dream Cake in an airtight container for up to 3 days to maintain its freshness and moist texture.
Freezer: If you want to keep the cake longer, unadorned layers can be wrapped tightly in plastic wrap and stored in the freezer for up to 3 months. Thaw in the fridge before frosting.
Reheating: To enjoy leftovers, serve chilled or let sit at room temperature for about 30 minutes before serving. The flavors will come alive even more!
Assembling Later: If you’ve frozen the layers, assemble the cake closer to serving time for a fresher taste; simply frost and garnish before eagerly serving!
White Chocolate Raspberry Dream Cake Variations
Feel free to make this dreamy cake your own with these delightful twists!
-
Gluten-Free: Use a gluten-free flour blend instead of all-purpose flour for a deliciously inclusive option without sacrificing taste.
-
Berry Medley: Swap out raspberries for a mix of strawberries, blueberries, and even blackberries for a colorful, vibrant twist that excites the palate.
-
Raspberry Puree Layers: For extra oomph, layer a thin spread of raspberry puree between cake layers to intensify the fruity flavor and moisture.
-
Nutty Crunch: Add chopped macadamia nuts or almonds into the batter for a lovely crunch that complements the creaminess of the frosting.
-
Chocolate Overload: Incorporate dark chocolate chips along with the white chocolate for a richer, more complex flavor profile.
-
Enhanced Creaminess: Whip in a bit of cream cheese to the frosting for a tangy, velvety addition that takes the cake to another level of deliciousness.
-
Add Spices: A touch of cinnamon or nutmeg added to the flour mixture can warm up the flavors, giving it a cozy feel.
-
Chilled Delight: Serve the cake with a drizzle of fresh cream or a scoop of vanilla ice cream on the side, especially delightful in warmer weather.
Feel inspired? By personalizing your creation, you can serve a loved one or a group of friends something special that’s truly your own! If you’re still in the mood for sweets, consider making a beautiful Raspberry Apple Gruyere Pizza with Balsamic Glaze for a savory treat or whip up some delightful Chocolate Chip Peanut Butter Banana Roll-Ups for a quick dessert.
Expert Tips for White Chocolate Raspberry Dream Cake
-
Softened Butter: Ensure your butter is at room temperature for the best mixing; cold butter can lead to uneven texture.
-
Avoid Overmixing: Gently fold ingredients to maintain the cake’s light and fluffy consistency. Overmixing can make it dense.
-
Cool Completely: Always let the cake layers cool fully before frosting to prevent the cream from melting off, ensuring a beautiful finish.
-
Monitor Whipping Cream: When whipping the cream for frosting, stop as soon as soft peaks form. Overbeating can turn it into butter!
-
Use Fresh Raspberries: For the best flavor and texture, use fresh raspberries. If using frozen, ensure they are well-drained to avoid excess moisture.
White Chocolate Raspberry Dream Cake Recipe FAQs
What type of raspberries should I use for the cake?
Absolutely! Fresh raspberries offer the best flavor and texture for the White Chocolate Raspberry Dream Cake. If fresh ones are not available, you can use frozen raspberries; just make sure to thaw and drain them before using to avoid excess moisture in your batter.
How should I store the White Chocolate Raspberry Dream Cake?
To keep your cake fresh, store it in an airtight container in the refrigerator for up to 3 days. This helps maintain its moist texture and flavor. If you want to enjoy it later, unadorned cake layers can be frozen for up to 3 months. Make sure to wrap them tightly in plastic wrap.
Can I freeze the White Chocolate Raspberry Dream Cake?
Yes! To freeze the layers of your White Chocolate Raspberry Dream Cake, wrap them tightly in plastic wrap after they’ve completely cooled. You can freeze them for up to 3 months. When you’re ready to enjoy, simply thaw in the refrigerator overnight and assemble the cake later for the freshest experience.
What should I do if my cake is too dense?
Very good question! A common reason for a dense cake is overmixing the batter. To avoid this, mix just until ingredients are combined and avoid overbeating the eggs. Also, make sure your baking powder is fresh, as expired leavening agents can lead to a less airy texture.
Are there any common allergies I should consider?
Yes, the White Chocolate Raspberry Dream Cake contains several potential allergens, including milk, eggs, and gluten. If you’re baking for someone with dietary restrictions, I recommend using a gluten-free flour blend and dairy-free alternatives for the butter and cream. Always check packages for allergen information!
Can I use a different type of chocolate?
Absolutely! If white chocolate isn’t your favorite, you can substitute it with dark chocolate or milk chocolate chips for a different flavor profile. Just keep in mind that it will slightly alter the taste, but it can create a delicious twist on your classic recipe!
White Chocolate Raspberry Dream Cake for Sweet Moments
Ingredients
Equipment
Method
- Preheat your oven to 350°F (175°C) and prepare two 9-inch round cake pans by greasing them with butter and lightly dusting with flour.
- In a large mixing bowl, combine the softened unsalted butter and granulated sugar. Beat on medium speed until light and fluffy, approximately 3 to 5 minutes.
- Add the eggs one at a time, mixing well after each addition. Stir in the vanilla extract.
- In a separate bowl, whisk together the all-purpose flour, baking powder, and salt. Gradually add this dry mixture to the wet ingredients, alternating with the milk.
- Gently fold in the white chocolate chips and fresh raspberries.
- Evenly distribute the batter between the prepared pans and smooth the tops. Bake for 25-30 minutes, or until a toothpick comes out clean.
- Once baked, let the cake cool in the pans for about 10 minutes, then transfer to a wire rack to cool completely.
- In a chilled mixing bowl, beat the heavy whipping cream, powdered sugar, and vanilla extract on medium speed until soft peaks form.
- To assemble, place one layer of cake on a serving plate. Spread a layer of the whipped frosting on top, then add the second layer. Use remaining frosting to cover the cake.
- Garnish with extra raspberries and white chocolate shavings before serving.
Leave a Reply