
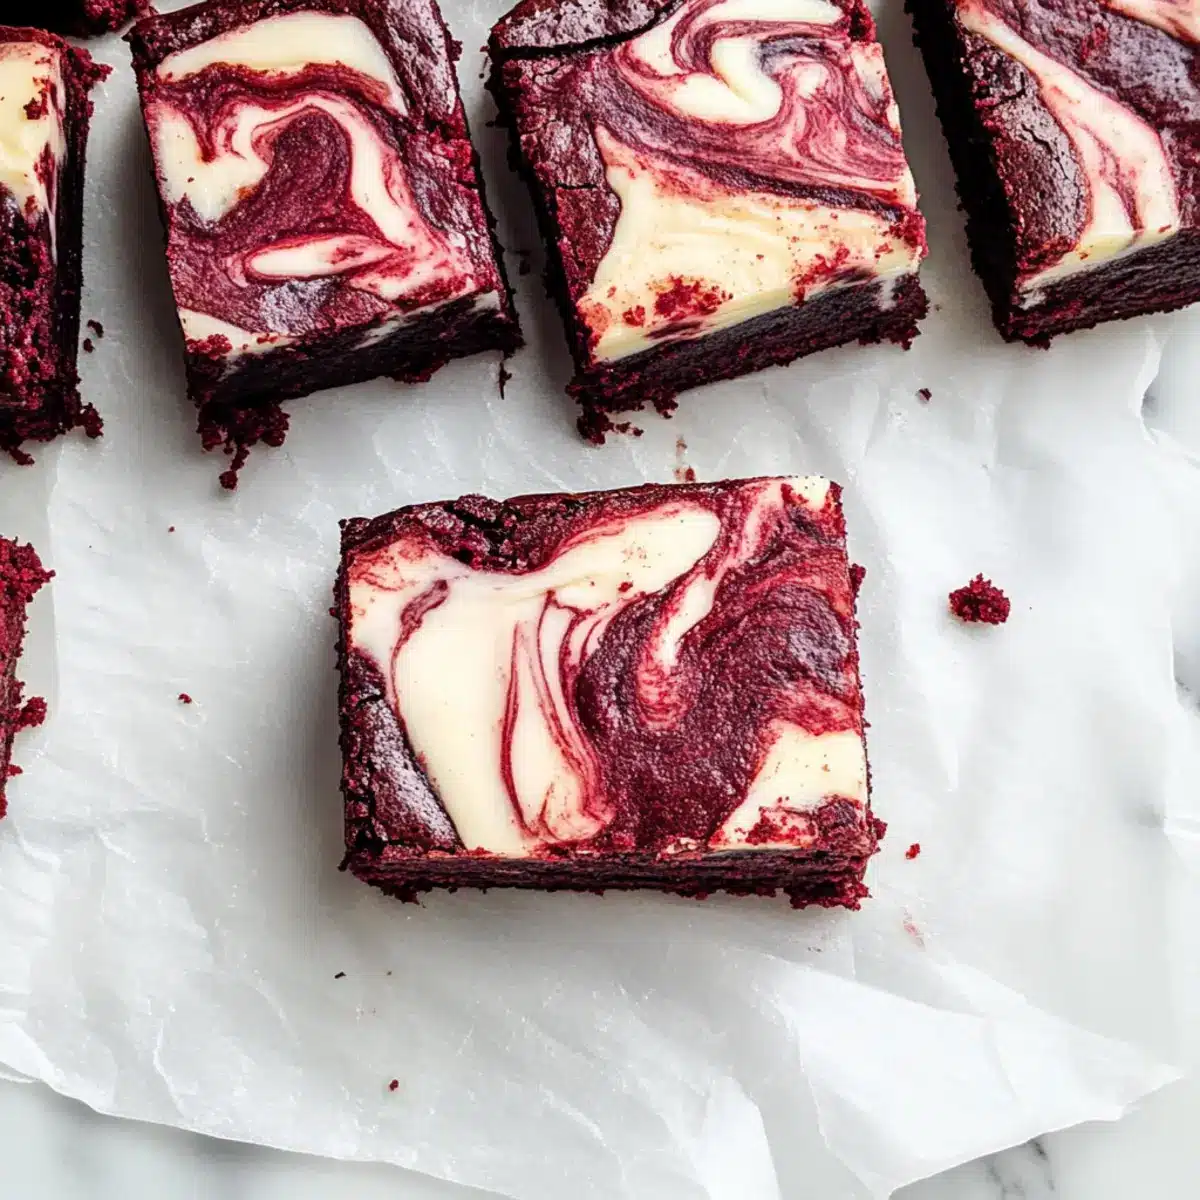
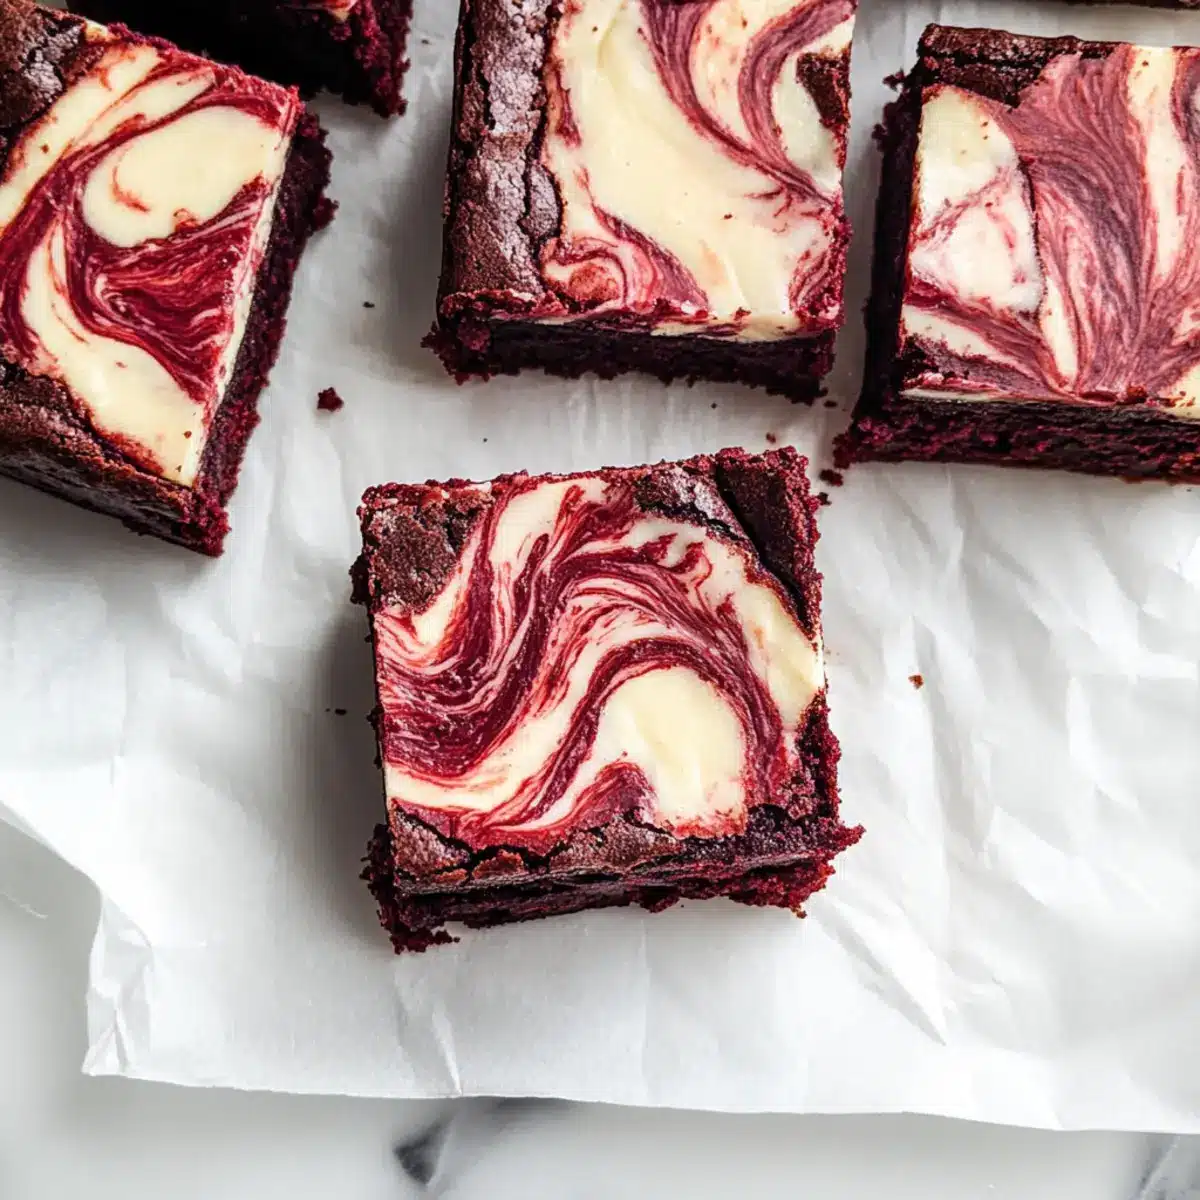
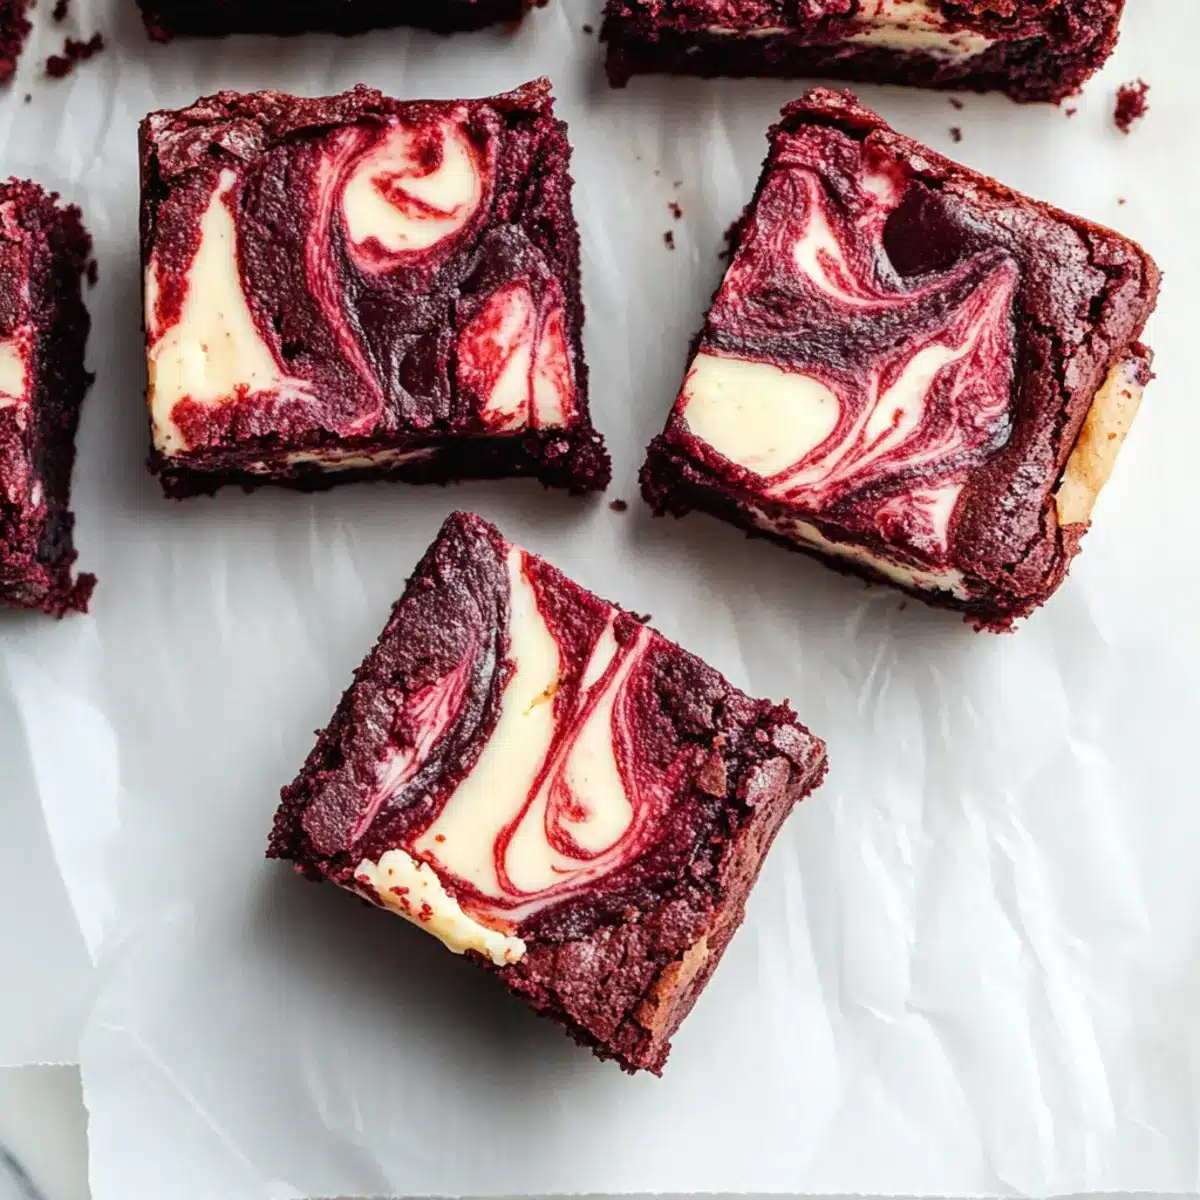
As I stirred the vibrant red batter, a wave of excitement swept over me—these weren’t just any brownies; they were Red Velvet Cheesecake Brownies, a dreamy blend of rich chocolate and creamy cheesecake. With every swirl, I knew I was about to create an indulgent treat that would steal the show at any gathering. The beauty of this recipe lies in its effortless preparation, making it perfect for those who crave homemade desserts without spending all day in the kitchen. These brownies deliver a mouthwatering experience that combines the classic appeal of red velvet with the luxurious texture of cheesecake, promising an irresistible treat for both the eyes and palate. Are you ready to be the star of your next dessert spread? Let’s dive in!

Why are these brownies so irresistible?
Decadent Flavor: The rich chocolatey base and creamy cheesecake swirl create an unforgettable taste sensation. Eye-Catching Appeal: Their vibrant red hue makes these brownies a showstopper at any gathering. Simple Preparation: No complex techniques here—just mix and bake for a fabulous treat. Perfect for Sharing: Ideal for special occasions, they’re sure to impress friends and family, making them a must-have for events like Valentine’s Day. Homemade Goodness: If you enjoy baking from scratch, these Red Velvet Cheesecake Brownies will satisfy your cravings for something truly indulgent. Don’t forget to check out our delightful Blueberry Cheesecake Cookie as another sweet option!
Red Velvet Cheesecake Brownies Ingredients
For the Brownie Base
- Unsalted Butter – Provides richness and moisture to the brownie base; substitute with coconut oil for a dairy-free version.
- Granulated Sugar – Sweetens the brownies and contributes to a glossy finish; brown sugar can be used for added moisture and flavor.
- Large Eggs – Act as a binder, providing structure; ensure they are at room temperature for proper emulsification.
- Red Food Coloring – Gives the brownies their signature red hue; natural alternatives include beet juice.
- Vanilla Extract – Adds depth of flavor; omit for a more neutral taste.
- Salt – Enhances sweetness and balances flavors; essential for flavor development.
- All-Purpose Flour – Provides structure to the brownies; can substitute with a gluten-free flour mix.
- Dutch Process Cocoa Powder – Adds a rich chocolate flavor and color; unsweetened cocoa powder is a decent alternative.
For the Cheesecake Swirl
- Cream Cheese – Creates a creamy swirl that complements the brownie; may use softened mascarpone cheese for similar results.
- Granulated Sugar (for cream cheese swirl) – Sweetens the cheesecake layer; can be replaced with powdered sugar for a smoother texture.
These Red Velvet Cheesecake Brownies are a blend of rich flavors and textures, making them a delightful addition to any dessert table!
Step‑by‑Step Instructions for Red Velvet Cheesecake Brownies
Step 1: Preheat and Prepare
Preheat your oven to 350°F (175°C) and line an 8 x 8-inch baking pan with parchment paper, allowing some overhang for easy removal later. This prep work is essential for your Red Velvet Cheesecake Brownies to bake evenly while creating a delightful fudgy texture.
Step 2: Mix Butter and Sugar
In a medium-sized mixing bowl, whisk together ½ cup of melted unsalted butter and 1 cup of granulated sugar until the mixture is glossy and well combined. Aim for a smooth texture, which will be the foundation of your brownies. This process takes about 1-2 minutes, so keep whisking until you see that shine.
Step 3: Incorporate Eggs and Flavor
Add in 2 large eggs, whisking vigorously for about 2 minutes until the mixture is emulsified and slightly frothy. Then, stir in 1 teaspoon of vanilla extract and the desired amount of red food coloring, mixing until everything is evenly distributed. This vibrant color is what makes your Red Velvet Cheesecake Brownies so eye-catching!
Step 4: Combine Dry Ingredients
Next, gradually add 1 cup of all-purpose flour, ¼ cup of Dutch process cocoa powder, and a pinch of salt to the creamy mixture. Stir gently until no flour streaks remain, ensuring a luscious and moist brownie base. Be careful not to overmix, as you want to maintain that fudgy consistency.
Step 5: Bake the Brownie Base
Pour the rich brownie batter into your prepared baking pan, spreading it evenly with a spatula. Place it in your preheated oven and bake for 20-25 minutes, or until a toothpick inserted into the center comes out with a few moist crumbs clinging. Your kitchen will soon fill with a lovely chocolate aroma!
Step 6: Prepare the Cream Cheese Swirl
While the brownie base is baking, prepare the cream cheese swirl by mixing 8 oz of softened cream cheese with 1 large egg and ¼ cup of granulated sugar in a separate bowl. Beat this mixture until it is smooth and creamy, resembling a cheesecake batter that will elevate your brownies.
Step 7: Swirl the Cream Cheese Mixture
Once the brownie base has finished baking, take it out and drop spoonfuls of the cream cheese mixture on top. Use a knife to gently swirl the cream cheese into the brownie batter, creating beautiful marble patterns. This step not only enhances flavor but also adds an enticing visual appeal to your Red Velvet Cheesecake Brownies.
Step 8: Final Baking
Return the pan to the oven and bake for an additional 10-15 minutes, or until the cream cheese layer is set and a toothpick comes out clean from the brownie section. Keep an eye on the brownies as they bake to ensure they do not overcook, maintaining that perfect fudgy texture.
Step 9: Cooling and Serving
Allow the brownies to cool in the pan for about 30 minutes before using the parchment overhang to lift them out onto a cutting board. Let them cool completely before slicing into 9 large or 16 smaller brownies. This step ensures clean cuts and a delicious treat worthy of any celebration!
Make Ahead Options
These Red Velvet Cheesecake Brownies are perfect for meal prep enthusiasts looking to save time on busy days! You can prepare the brownie batter up to 24 hours in advance; simply cover it tightly and refrigerate. The cream cheese swirl can also be mixed and stored in the fridge for up to 3 days. To maintain their delicious fudgy texture, do not bake until you’re ready to enjoy them. When you’re set to indulge, pour the brownie batter into your prepared pan, add the cream cheese swirl, and bake as instructed. You’ll have an irresistible dessert that’s just as delightful as if you made it fresh that day!
How to Store and Freeze Red Velvet Cheesecake Brownies
Fridge: Store the brownies in an airtight container in the fridge for up to 7 days to keep them fresh and fudgy.
Freezer: For longer preservation, wrap individual brownies tightly in plastic wrap or foil and place them in a resealable freezer bag. They will stay delicious for up to 3 months.
Thawing: When ready to enjoy, thaw the frozen brownies in the fridge overnight or at room temperature for a couple of hours. This ensures they retain their rich, decadent flavors.
Reheating: If you prefer warm brownies, gently heat them in the microwave for 10-15 seconds. This will soften the creamy cheesecake layer, enhancing their indulgent taste.
Expert Tips for Red Velvet Cheesecake Brownies
-
Cool Completely: Allow your brownies to cool entirely before slicing to prevent crumbling and maintain that beautiful cheesecake swirl.
-
Don’t Overmix: Be mindful when mixing the brownie batter—overmixing can lead to dense, dry brownies. Stir just until combined for a fudgy texture.
-
Swirl Carefully: When adding the cream cheese mixture, use a gentle hand with the knife to create swirls without over-mixing, ensuring a stunning visual effect in your Red Velvet Cheesecake Brownies.
-
Room Temperature Eggs: Make sure your eggs are at room temperature for proper emulsification; this helps achieve a smooth and airy texture in the batter.
-
Check for Doneness: Use the toothpick test! Insert it into the brownie section; a few moist crumbs should stick for perfectly fudgy brownies, ensuring they’re not overbaked.
Red Velvet Cheesecake Brownies Variations
Feel free to play with these tempting ideas to make your Red Velvet Cheesecake Brownies uniquely yours!
- Dairy-Free: Substitute the cream cheese with a dairy-free cream cheese alternative for a vegan-friendly treat. The taste remains delightful, ensuring everyone feels included at the dessert table.
- Nutty Crunch: Add chopped walnuts or pecans to the brownie batter for a satisfying crunch. This will create a beautiful contrast with the creamy cheesecake swirl, enhancing the overall texture.
- Chocolate Lovers: Fold in chocolate chips into the brownie base for an extra burst of chocolate flavor. Every bite will be even more indulgent—just heavenly!
- Flavored Extracts: Experiment with different flavor extracts such as almond or mint to elevate the brownie’s profile. A hint of mint could bring a refreshing twist that surprises your taste buds.
- Gluten-Free Option: Use a gluten-free flour mix in place of all-purpose flour for a delicious gluten-free dessert. Everyone deserves to enjoy the delightful fudginess of these brownies!
- Fruity Swirl: Add a layer of raspberry or cherry preserves to the cheesecake mixture before swirling for a fruity flavor boost. This will not only add exquisite taste but also a pop of color!
- Spicy Kick: Sprinkle in a tiny pinch of cayenne or chili powder to the brownie batter for a subtle heat that complements the sweetness of the cream cheese. It’s an adventurous twist that might just become your new favorite!
- Layered Delight: For a dessert that truly dazzles, layer this brownie with a scoop of vanilla ice cream and drizzle it with chocolate sauce. The combination of warm brownies and cold ice cream is simply irresistible!
You can also explore other delightful sweets like our mouthwatering Sugar Cookie Cheesecake or treat your taste buds with the refreshing Red Potato Salad. Enjoy your culinary adventures!
What to Serve with Red Velvet Cheesecake Brownies
Indulging in these visually stunning brownies is only half the magic; pairing them with complementary sides elevates the experience beyond belief.
- Vanilla Ice Cream: A scoop of creamy vanilla ice cream brings a luscious contrast to the rich chocolate and tangy cheesecake flavors.
- Fresh Berries: Juicy raspberries or strawberries add a bright, tart flavor that cuts through the sweetness, offering a refreshing balance.
- Whipped Cream: Light and airy whipped cream drizzled on top adds a delightful texture and a touch of elegance to your dessert.
- Chocolate Sauce: Drizzling warm chocolate sauce enhances the chocolatey goodness and creates a decadent moment with every bite.
- Mint Leaves: Fresh mint leaves provide a pop of color and a refreshing hint that beautifully complements the dessert’s richness.
- Coffee: A cup of strong coffee or espresso pairs well, enhancing the flavors and providing a delightful contrast to the creaminess.
- Red Wine: A glass of fruity red wine can add an unexpected sophisticated twist, enriching the overall dessert experience.
- Caramel Sauce: Drizzling caramel adds a sweet and buttery touch, making your brownies even more indulgent for special occasions.
- Hazelnut Spread: Serve a dollop of hazelnut spread on the side for a nutty richness that elevates the overall chocolate experience.
- Chocolate Chip Cookies: A few freshly baked cookies bring in a chewy texture that beautifully contrasts the fudgy brownies.
Red Velvet Cheesecake Brownies Recipe FAQs
How do I select ripe ingredients for my Red Velvet Cheesecake Brownies?
Absolutely! When choosing your ingredients, especially eggs and cream cheese, opt for those that are fresh. Large eggs should have firm whites and bright yellow yolks. For cream cheese, choose a package that feels smooth and free of any cracks. If you’re using food coloring, ensure it’s from a reliable brand for vibrant results.
What is the best way to store these brownies?
You can store your Red Velvet Cheesecake Brownies in an airtight container at room temperature for up to 3 days. However, for longer freshness, transfer them to the fridge where they can last for up to 7 days. Be sure they are completely cooled before storing to maintain that incredible texture!
Can I freeze my Red Velvet Cheesecake Brownies?
Yes, indeed! To freeze, wrap each brownie tightly in plastic wrap or foil, and then place them in a resealable freezer bag. They can be frozen for up to 3 months. When you’re ready to enjoy them, simply thaw in the fridge overnight or at room temperature for a few hours. A quick microwave reheat (10-15 seconds) can bring back their fudgy warmth!
What should I do if my brownies turn out too dry?
If your brownies are coming out dry, check your mixing technique – overmixing can lead to dense results. Also, always use fresh eggs and ensure the butter is not too hot when mixing to avoid cooking the eggs. If they’re already baked, serve them with a scoop of ice cream or drizzle some syrup to add moisture back into the dessert!
Are these brownies suitable for people with dietary restrictions?
While these Red Velvet Cheesecake Brownies contain dairy and gluten, adjustments can be made for dietary needs. You can substitute dairy with plant-based products, like coconut oil for butter and vegan cream cheese. For gluten-free options, use a gluten-free flour mix. Always be cautious of cross-contamination if allergies are a concern—clean your utensils thoroughly before prepping.
How should I slice my brownies for the best presentation?
I recommend allowing your brownies to cool entirely before slicing. For an attractive presentation, use a sharp knife, and wipe it between cuts with a damp cloth. This will help keep the layers distinct and visually appealing, ensuring that lovely cheesecake swirl shines through in each piece!
Red Velvet Cheesecake Brownies: Your Next Indulgent Obsession
Ingredients
Equipment
Method
- Preheat your oven to 350°F (175°C) and line an 8 x 8-inch baking pan with parchment paper.
- In a medium-sized mixing bowl, whisk together melted unsalted butter and granulated sugar until glossy.
- Add eggs, whisking vigorously, then stir in vanilla extract and red food coloring.
- Gradually add flour, cocoa powder, and salt to the mixture, stirring gently until no flour streaks remain.
- Pour batter into the prepared baking pan and bake for 20-25 minutes.
- Prepare the cream cheese swirl by mixing softened cream cheese, egg, and sugar until smooth.
- Drop spoonfuls of the cream cheese mixture on top of the baked brownie base and swirl gently.
- Return to the oven and bake for an additional 10-15 minutes.
- Allow the brownies to cool in the pan, then lift out using parchment overhang and cool completely before slicing.
Leave a Reply