
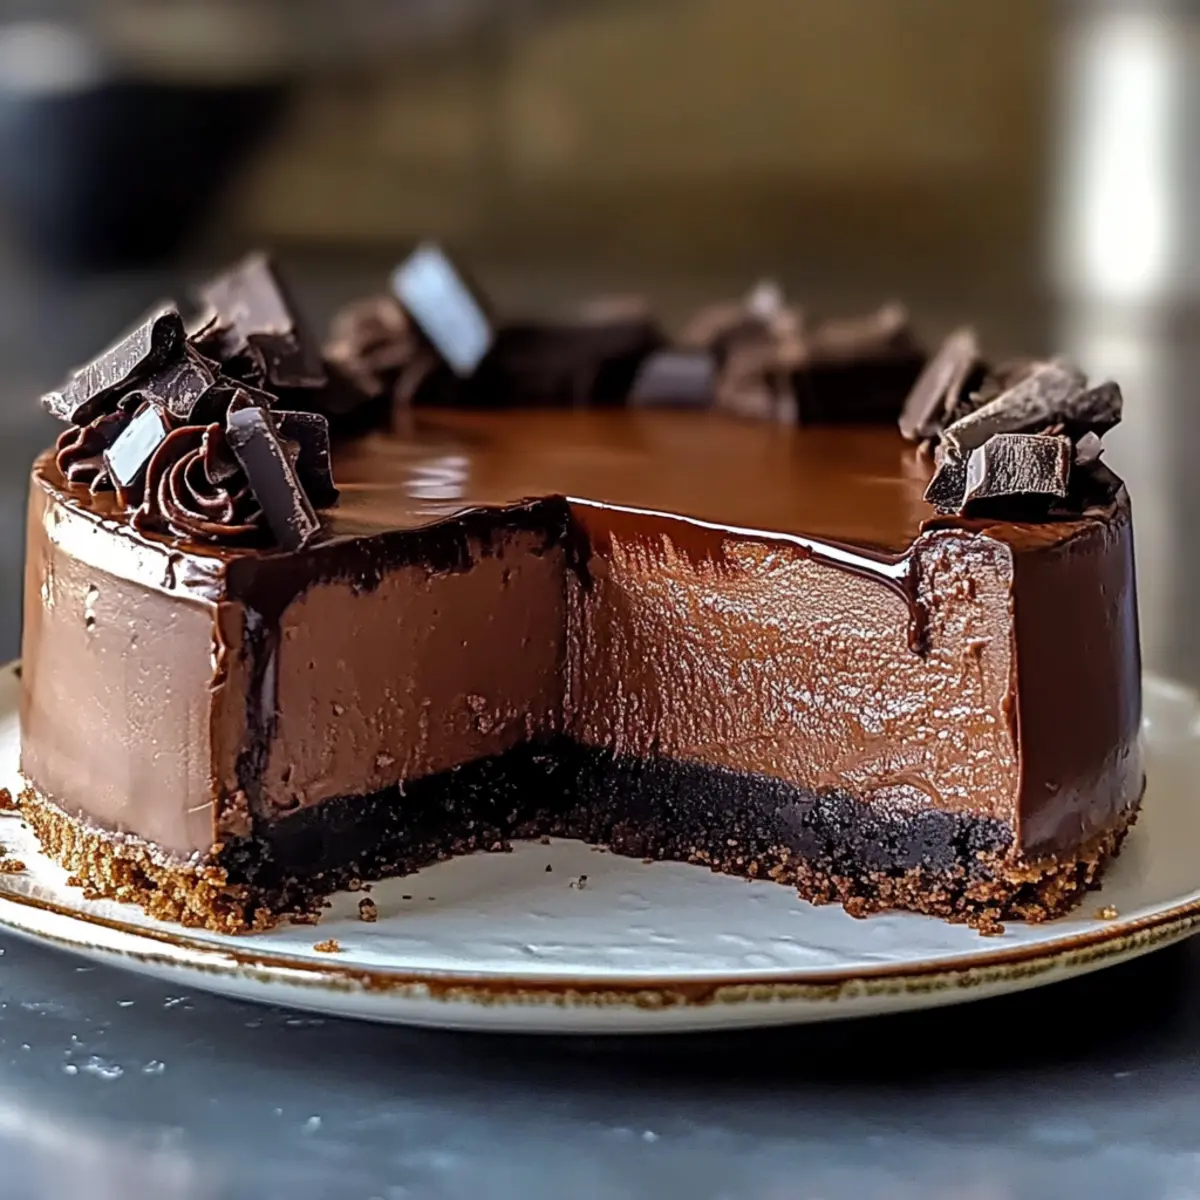
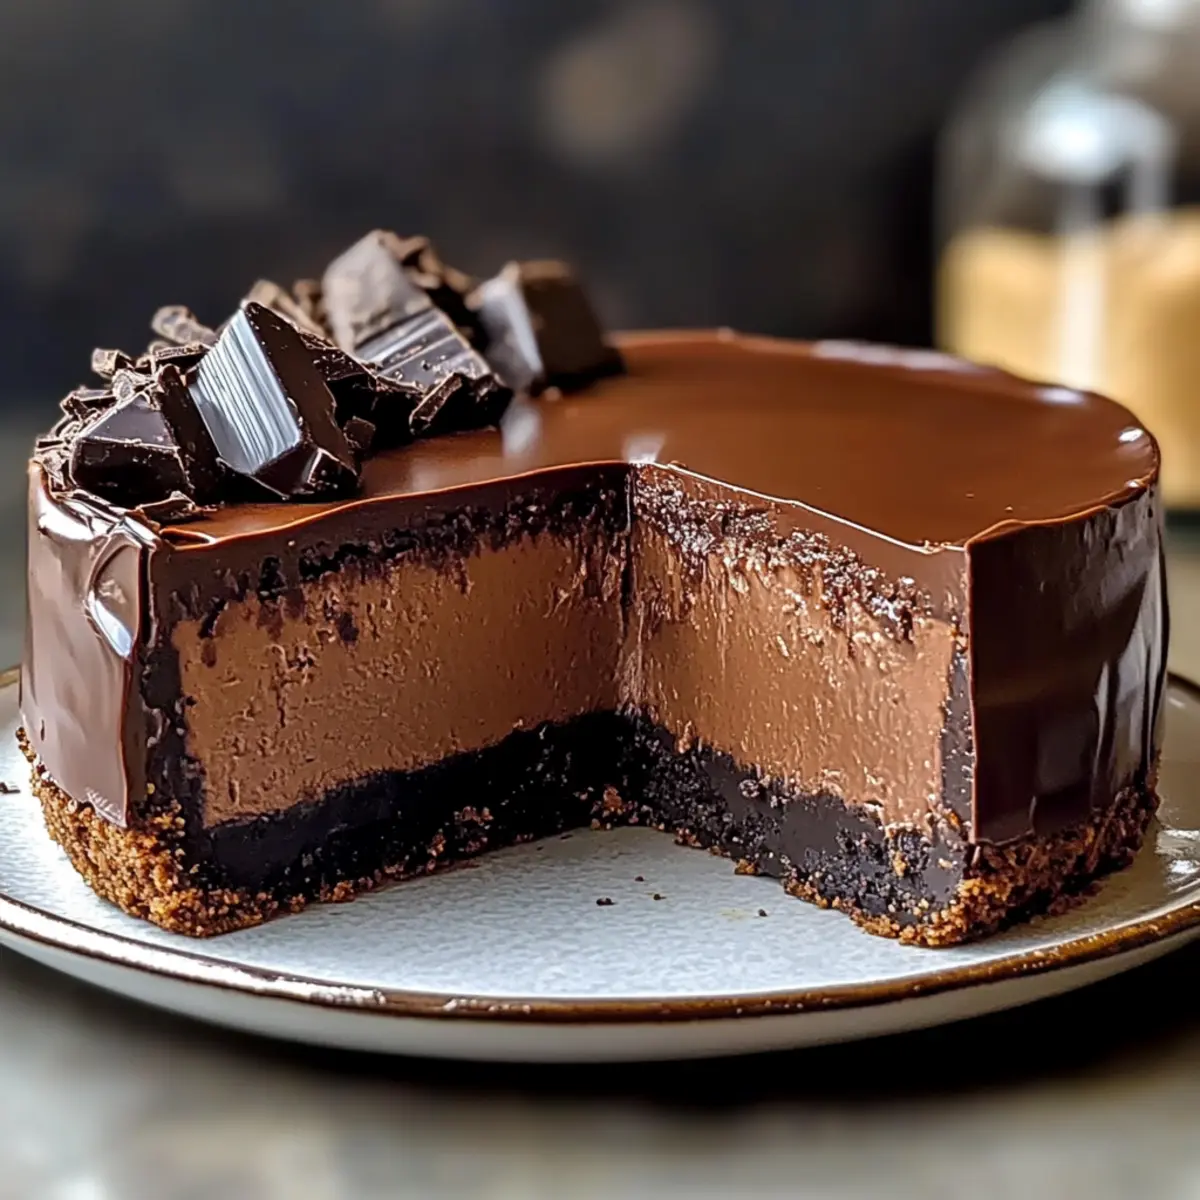
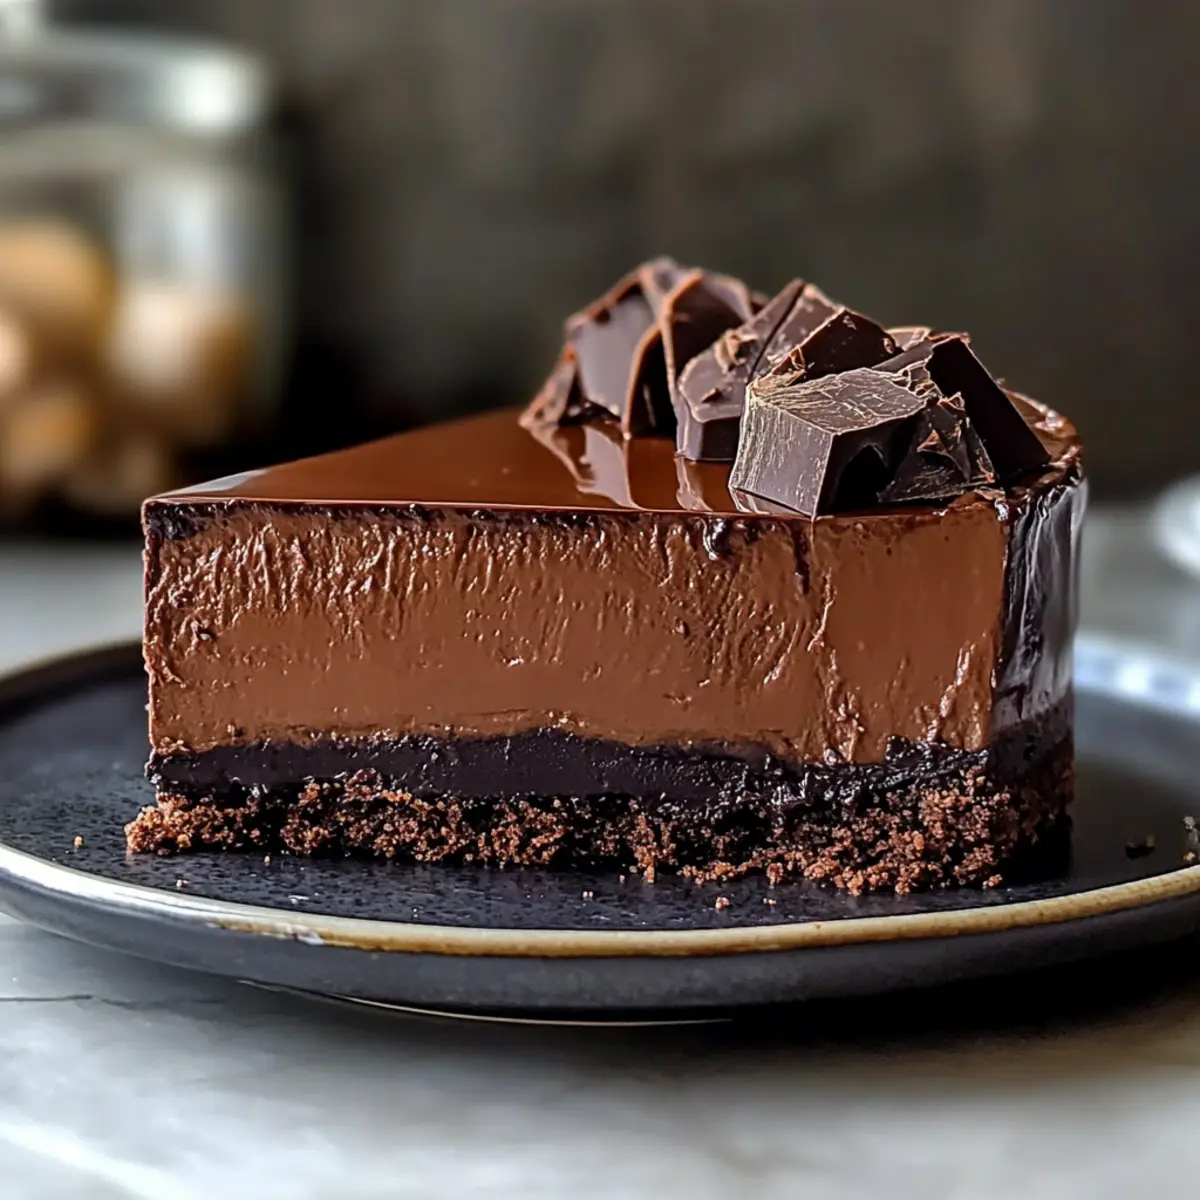
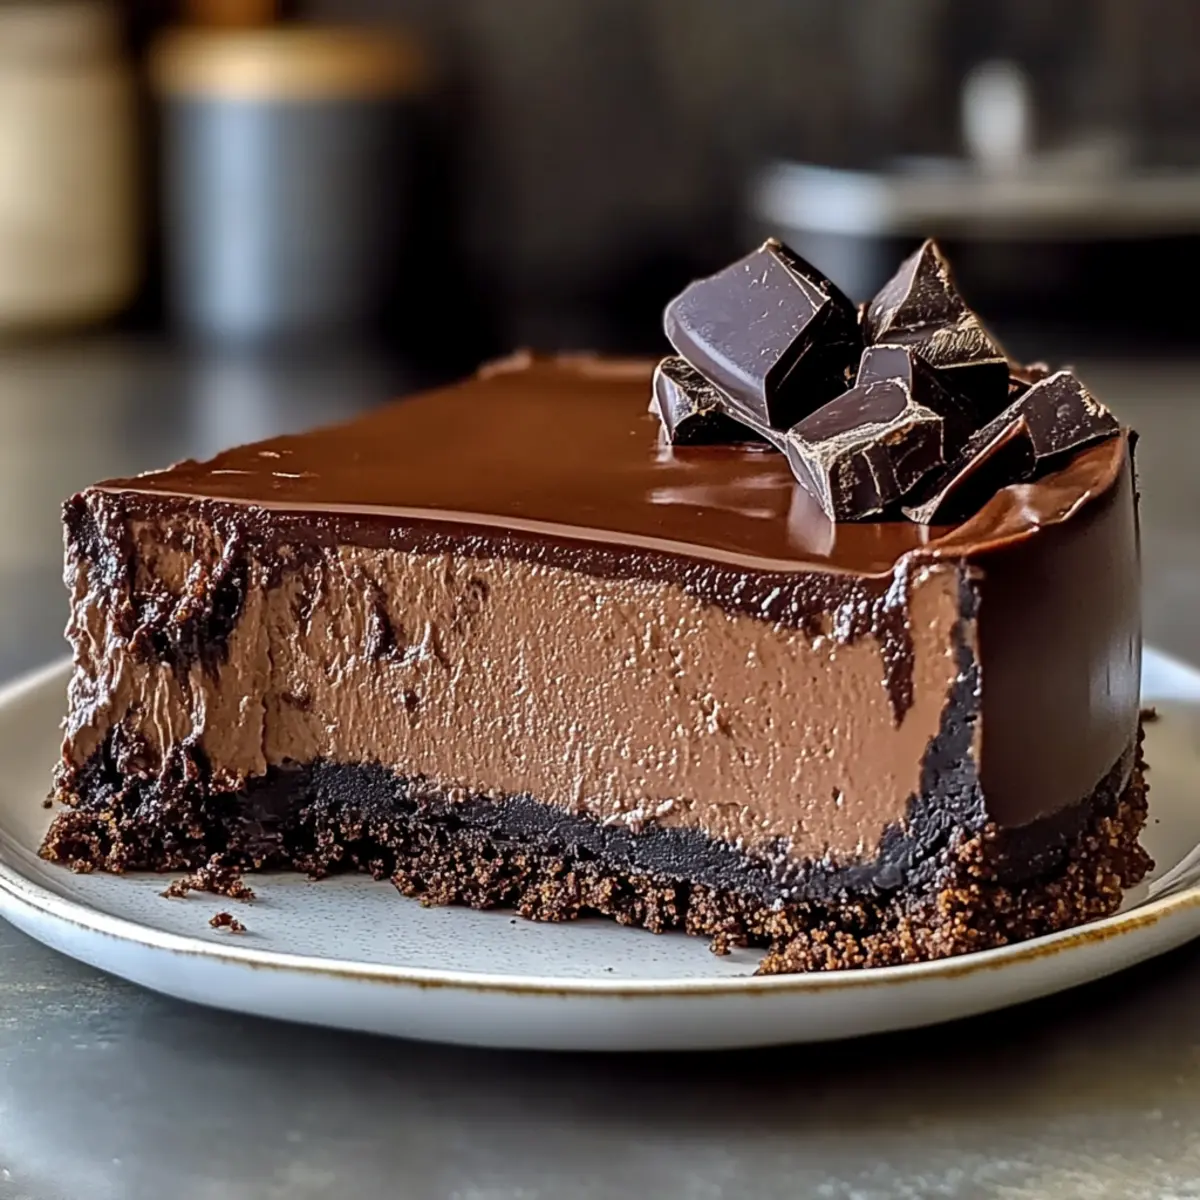
As I rummaged through my pantry for something sweet, the sight of rich chocolate morsels caught my eye, instantly sparking a craving for the Ultimate Chocolate Cheesecake. This timeless dessert, with its delectable chocolate cookie crust and velvety filling, is the epitome of indulgence, proving that homemade delights can easily outshine even the fanciest bakery offerings. Not only is this cheesecake a true crowd-pleaser at gatherings, it also boasts a freezer-friendly quality, making it perfect for those spontaneous dessert needs. With the option to swap for gluten-free and dairy-free alternatives, I can’t help but wonder—who will you share your first slice with?
Why Is This Chocolate Cheesecake Irresistible?
Decadent Flavor: The Ultimate Chocolate Cheesecake is packed with rich, chocolatey goodness that will satisfy your sweet tooth and leave you wanting more.
Freezer-Friendly: This recipe saves you time by allowing you to prepare it in advance, so it’s ready whenever a sweet craving strikes!
Customizable Options: With gluten-free and dairy-free alternatives available, you can easily adapt this recipe to fit your dietary preferences without sacrificing taste.
Stunning Presentation: The glossy ganache topping elevates this cheesecake, making it a show-stopping dessert for any occasion, whether it’s a dinner party or a casual family gathering.
Quick Prep: Most of your time is spent waiting for it to bake and cool, giving you plenty of opportunities to explore other recipes like Sugar Cookie Cheesecake or Chocolate Chip Peanut.
Get ready to enjoy the ultimate indulgence that will impress friends and family alike!
Chocolate Cheesecake Ingredients
For the Crust
- Chocolate Wafer Crumbs – This provides a deliciously crumbly base; graham cracker crumbs are a sweet alternative.
- Unsalted Butter – It binds the crust together smoothly; use coconut oil for a dairy-free option.
For the Filling
- Bittersweet Chocolate – The main flavor star; coarsely chop for easy melting, or use semi-sweet for a sweeter profile.
- Full-Fat Cream Cheese – Ensures that creamy, rich texture; low-fat varieties may alter the delightful creaminess.
- Granulated Sugar – Sweetens the rich filling; it’s best not to substitute for balanced flavors.
- Light Brown Sugar – Adds moisture and depth; consider dark brown sugar for a more intense flavor.
- Unsweetened Cocoa Powder – Enhances the chocolate flavor; swapping for Dutch cocoa can yield a smoother taste.
- Large Eggs & Egg Yolks – Essential for structure and richness; use flaxseed as a substitution with caution on texture.
- Heavy Cream – Provides creaminess; you can opt for a non-dairy cream if desired.
- Vanilla Extract – This enhances the entire flavor profile—no need for substitutes here!
For the Ganache
- Semi-Sweet Chocolate – Creates a sumptuous topping; use dark chocolate for an even deeper flavor.
- Heavy Cream – Adds to the luxurious texture; non-dairy cream works as an acceptable alternative.
- Unsalted Butter – Boosts richness and shine; feel free to omit for a non-dairy version.
Embrace this rich Chocolate Cheesecake journey that promises to delight every bite!
Step‑by‑Step Instructions for Ultimate Chocolate Cheesecake
Step 1: Preheat and Prepare the Pan
Begin by preheating your oven to 325°F (163°C). While the oven heats, grease a 9-inch springform pan with butter, then wrap the outside in aluminum foil to keep moisture from seeping in during the water bath process. This preparation ensures a smooth baking experience for your Ultimate Chocolate Cheesecake.
Step 2: Make the Crust
In a mixing bowl, combine chocolate wafer crumbs with melted unsalted butter, ensuring the crumbs are well-coated. Once mixed, firmly press this mixture into the bottom of the springform pan. Bake the crust in the preheated oven for 10 minutes, until set. This creates a rich, chocolatey base that pairs beautifully with the creamy filling.
Step 3: Melt the Chocolate
While the crust is baking, set up a double boiler on the stove by placing a heatproof bowl over a pot of simmering water. Add coarsely chopped bittersweet chocolate to the bowl, stirring until smooth and fully melted. Allow the chocolate to cool slightly; this will guarantee consistency when mixed into the cheesecake filling.
Step 4: Blend the Filling
In a food processor, blend full-fat cream cheese until smooth and creamy. Gradually add granulated sugar, light brown sugar, and unsweetened cocoa powder, blending until combined and silky. This step is crucial to achieve the perfect texture for your Ultimate Chocolate Cheesecake filling.
Step 5: Incorporate Eggs and Cream
With the processor running, carefully add large eggs and heavy cream into the mixture. Blend just until the ingredients are combined, ensuring not to overmix. The right consistency here will create a fluffy filling, enhancing the rich, chocolatey flavor of your cheesecake.
Step 6: Add Chocolate and Vanilla
Gently fold the cooled melted chocolate and vanilla extract into the cream cheese mixture with a spatula, being careful not to deflate the filling. Pour this luscious mixture over the cooled crust, spreading it evenly to create a perfect surface for baking your Ultimate Chocolate Cheesecake.
Step 7: Set Up the Water Bath
To prepare for baking, place the springform pan inside a larger roasting pan. Carefully pour hot water into the larger pan until it reaches about 1 inch up the sides of the springform pan. This water bath will help maintain moisture and prevent cracking during the baking process.
Step 8: Bake the Cheesecake
Transfer the setup to your preheated oven and bake for 1 hour and 10 minutes. The edges should be set while the center remains slightly jiggly. This gentle baking will yield a creamy and decadent filling in your Ultimate Chocolate Cheesecake, ensuring a delightful texture.
Step 9: Cool and Chill
Once done baking, carefully remove the cheesecake from the oven, allowing it to cool on a wire rack for about 1 hour. Then, refrigerate it for at least 6 hours, or overnight if possible. This chilling step is essential for a firm, sliceable cheesecake that holds its shape beautifully.
Step 10: Prepare the Ganache
For the glossy ganache, simmer heavy cream in a small saucepan until just boiling, then pour it over chopped semi-sweet chocolate in a bowl. Whisk until the chocolate is fully melted and smooth. Adding unsalted butter at this point enhances the richness of the ganache topping.
Step 11: Top the Cheesecake
Once the ganache is ready, gently pour it over the chilled cheesecake, tilting the pan slightly to ensure an even coating. Allow the ganache to set at room temperature for about 1 hour, creating a glossy, elegant finish for your Ultimate Chocolate Cheesecake, perfect for presentation.
Step 12: Slice and Serve
When ready to serve, run a warm knife around the edges of the springform pan to loosen the cheesecake. Release the sides and slice into neat pieces. Serve with fresh berries or a drizzle of chocolate sauce for an extra touch of indulgence with your homemade chocolate cheesecake delight.
Expert Tips for Perfect Chocolate Cheesecake
-
Pan Preparation: Ensure the springform pan is tightly wrapped in foil to prevent cracks and maintain moisture while baking. This step is essential for your chocolate cheesecake’s texture.
-
Cooling Patience: Allow the cheesecake to cool gradually to prevent cracks on the surface. Rushing this step can result in unsightly fissures.
-
Slicing Technique: Use a warm, clean knife when slicing to achieve neat, professional-looking edges. This simple technique enhances the presentation of your chocolate cheesecake.
-
Storage Wisely: Keep leftovers in the fridge for up to 5 days or freeze securely for up to 2 months. Proper storage keeps your cheesecake fresh and delectable!
-
Adapt Ingredients: Don’t hesitate to customize! You can swap ingredients like cream cheese for non-dairy options without sacrificing flavor, making it an inclusive chocolate cheesecake for everyone.
Chocolate Cheesecake Variations
Feel free to unleash your creativity and make this chocolate cheesecake your own with these delightful twists!
-
Dairy-Free: Substitute non-dairy cream cheese and heavy cream for a rich, indulgent option that everyone can enjoy. It’s a great way to cater to different dietary needs without compromising on flavor.
-
Gluten-Free: Swap out traditional chocolate wafer crumbs with ground almonds or gluten-free cookie crumbs. This adaptation maintains the rich crust while making the cheesecake accessible for gluten-sensitive friends.
-
Flavor Boost: Enhance the chocolate flavor by adding a splash of strong brewed espresso or flavored extracts like almond or mint. A little extra something can elevate your cheesecake into a unique experience.
-
Frozen Treat: Slice and freeze individual pieces of the cheesecake for a refreshing dessert on hot days. Just let them soften slightly before serving for a truly delightful treat!
-
Minty Freshness: Incorporate a teaspoon of peppermint extract into the filling for a refreshing mint chocolate twist that’s perfect for the holiday season. Each bite will feel like a winter wonderland in your mouth.
-
Top It Off: Get creative with toppings! Consider adding fresh berries, crushed nuts, or even a drizzle of caramel sauce on top of your ganache for extra flavor and texture. These additions can excite every palate.
-
Sugar-Free Option: Experiment with sugar alternatives like erythritol or monk fruit sweetener for a guilt-free dessert that’s still satisfying. Just make sure to find the right balance to keep that rich flavor intact.
-
Nutty Texture: For added crunch, blend in coarsely chopped hazelnuts or pecans into the crust. This addition will lend a delightful nutty flavor and texture that pairs beautifully with chocolate.
Looking for more ways to indulge your sweet tooth? Don’t miss out on our delicious Blueberry Cheesecake Cookie recipe or perhaps some Pistachio Chocolate Babka for a delightful variation!
Make Ahead Options
These Ultimate Chocolate Cheesecake preparations are perfect for busy home cooks! You can prepare the crust and filling up to 24 hours in advance. Simply bake the crust and let it cool completely before pouring in the filling. Cover tightly with plastic wrap and refrigerate until you’re ready to bake. To maintain that creamy texture, avoid overmixing the filling and refrigerate properly. Once baked, the cheesecake can chill in the refrigerator for up to 3 days before serving. For the ganache, prepare it the day you plan to serve the cheesecake, allowing it to set at room temperature; this ensures your decadent treat remains just as delicious. Enjoy the time-saving benefits while sharing a slice of homemade joy!
What to Serve with Ultimate Chocolate Cheesecake
Transform your dessert into a memorable feast with these delightful accompaniments.
-
Fresh Berries: Juicy raspberries or strawberries offer a refreshing contrast, balancing the rich chocolate with a burst of natural sweetness.
-
Whipped Cream: Light and fluffy whipped cream adds an airy texture that harmonizes beautifully with the dense cheesecake, enhancing each decadent bite.
-
Chocolate Sauce: A drizzle of warm chocolate sauce intensifies the chocolate experience, providing an inviting glossy finish to your cheesecake.
-
Caramel Sauce: Rich caramel sauce introduces a delightful sweetness, adding depth and complexity that pairs perfectly with the creamy filling.
-
Mint Leaves: Fresh mint leaves bring a burst of color and a refreshing surprise, perfectly complementing the rich chocolate flavors.
-
Espresso: Pairing your cheesecake with a cup of espresso or coffee creates the perfect ending, balancing sweetness with a robust flavor that enhances the dessert experience.
-
Chocolate Hazelnut Spread: A dollop of chocolate hazelnut spread adds an extra layer of richness and flavor, making each slice even more indulgent.
-
Ice Cream: A scoop of vanilla or coffee-flavored ice cream provides a creamy contrast that melts beautifully against the rich cheesecake, elevating your dessert moment.
-
Nutty Crust Cookies: Serve thin cookies with a nutty crust on the side to add an unexpected crunchy texture while enhancing the chocolate experience.
How to Store and Freeze Chocolate Cheesecake
Fridge: Store the chocolate cheesecake covered in an airtight container for up to 5 days. Be sure it’s completely cooled before covering to maintain its texture.
Freezer: Wrap the cheesecake tightly in plastic wrap and aluminum foil, then freeze for up to 2 months. Thaw it overnight in the refrigerator before serving for the best taste and texture.
Slicing: If you’ve frozen individual slices, allow them to sit at room temperature for about 15-20 minutes before enjoying. This softening time enhances the flavors of your chocolate cheesecake.
Reheating: If desired, lightly warm individual slices in the microwave for 10-15 seconds to bring back that creamy texture before serving.
Ultimate Chocolate Cheesecake Recipe FAQs
How do I choose ripe ingredients for this cheesecake?
Absolutely! When selecting ingredients, opt for full-fat cream cheese at room temperature, which blends better and ensures creaminess. For chocolate, choose high-quality bittersweet or semi-sweet varieties, ensuring they are well within their expiration date for optimal flavor. Fresh eggs are best; choose ones without any cracks, and for butter, creamy and smooth varieties yield the best results.
What’s the best way to store leftover cheesecake?
Very good question! Store your Ultimate Chocolate Cheesecake in an airtight container in the fridge for up to 5 days. Make sure it’s completely cooled before covering it to prevent condensation, which can affect the texture. If you’re not finishing it in that timeframe, wrap it tightly in plastic wrap and aluminum foil and freeze for up to 2 months.
Can I freeze this cheesecake? If so, how?
Absolutely! To freeze your chocolate cheesecake, start by allowing it to cool completely. Then, wrap it tightly with plastic wrap and aluminum foil to prevent freezer burn. For best results, freeze whole or in individual slices. It can be stored in the freezer for up to 2 months. When you’re ready to enjoy, simply thaw it overnight in the refrigerator for the best flavor and texture.
What if my cheesecake cracks during baking?
Don’t worry, it happens! If your Ultimate Chocolate Cheesecake cracks, it’s usually due to sudden temperature changes. To prevent this, always monitor your oven temperature and avoid opening the oven door frequently during baking. Remember to prepare your water bath correctly, as it helps regulate temperature. If a crack appears, you can cover it with ganache or whipped cream for a delicious fix!
Are there dietary considerations I should keep in mind?
Certainly! If you’re catering to dietary restrictions, this Ultimate Chocolate Cheesecake can be made dairy-free by using non-dairy cream cheese and heavy cream. For gluten-free options, replace chocolate wafer crumbs with gluten-free alternatives like ground almonds or gluten-free cookies. Always check ingredient labels for potential allergens and adjust accordingly.
How long should I cool the cheesecake before serving?
Great question! It’s essential to let the Ultimate Chocolate Cheesecake cool on a wire rack for about 1 hour, then refrigerate it for at least 6 hours, ideally overnight. This cooling time helps set the filling and makes slicing more manageable while ensuring the flavors meld beautifully together.
Decadent Chocolate Cheesecake That's Freezer-Friendly
Ingredients
Equipment
Method
- Preheat your oven to 325°F (163°C). Grease a 9-inch springform pan with butter, then wrap the outside in aluminum foil.
- In a mixing bowl, combine chocolate wafer crumbs with melted unsalted butter and press into the bottom of the springform pan. Bake for 10 minutes.
- Set up a double boiler and melt chopped bittersweet chocolate, then allow it to cool slightly.
- Blend full-fat cream cheese in a food processor until smooth. Add granulated sugar, light brown sugar, and unsweetened cocoa powder; blend until combined.
- With the processor running, add the large eggs and heavy cream. Blend until combined.
- Fold the cooled melted chocolate and vanilla extract into the cream cheese mixture, and pour over the cooled crust.
- Place the springform pan in a larger roasting pan. Pour hot water into the larger pan until about 1 inch up the sides of the springform pan.
- Bake for 1 hour and 10 minutes until edges are set and center is slightly jiggly.
- Allow the cheesecake to cool on a wire rack for about 1 hour, then refrigerate for at least 6 hours or overnight.
- For the ganache, heat heavy cream until boiling and pour over chopped semi-sweet chocolate, whisk until smooth.
- Pour ganache over the chilled cheesecake, allow to set at room temperature for about 1 hour.
- Run a warm knife around edges of springform pan, release sides and slice into neat pieces.
Leave a Reply