
As I stirred the creamy mixture on the stove, a wave of nostalgia washed over me, reminding me of family gatherings filled with laughter and indulgence. This Classic Homemade Banana Pudding is more than just a dessert; it’s a Southern tradition that wraps layers of ripe bananas and crunchy vanilla wafers in a luscious, scratch-made pudding. Making this quick dessert from scratch not only results in an undeniably comforting treat but also allows you to impress your loved ones without breaking a sweat. Plus, the best part? You can prepare it ahead of time, letting those rich flavors meld together beautifully, enhancing its sweetness as it chills. Ready to dive into this delightful recipe that will whisk you away to simpler times?
Why is Homemade Banana Pudding a Must-Try?
Nostalgic Flavor: Each bite of this homemade delight takes you back to cherished family moments.
Quick Preparation: With simple steps and common ingredients, you’ll have this dessert ready in no time.
Make-Ahead Magic: Prepare it a day in advance, allowing the flavors to deepen, making it a hassle-free dessert for gatherings.
Versatile Variations: Feel free to swap in graham crackers or non-dairy milk to cater to your taste and dietary needs.
Crowd-Pleasing Comfort: Perfect for both kids and adults, it’s a sure hit at any event—just like my Banana Rice Pudding, this dessert will have everyone raving!
Homemade Banana Pudding Ingredients
• Discover the delightful components of Homemade Banana Pudding!
For the Pudding
- Sugar – Sweetness that balances creaminess; you can use brown sugar for a deeper flavor.
- Flour – Thickens pudding for a smooth texture; all-purpose flour works best.
- Salt – Enhances overall flavor without adding saltiness.
- Milk – Provides creaminess; any milk variety, including non-dairy, is suitable.
- Eggs – Adds richness and is crucial for thickening; whole eggs are essential for this recipe.
- Vanilla Extract – Pure vanilla elevates the flavor; avoid imitation for best results.
For the Layers
- Vanilla Wafers – Provide structure and crunch; about 8 oz is ideal—consider using graham crackers for a twist.
- Bananas – Fresh, ripe bananas are vital for flavor and texture; plan for 4 medium bananas, sliced.
Step‑by‑Step Instructions for Homemade Banana Pudding
Step 1: Combine Dry Ingredients
In a medium saucepan, mix together 3/4 cup sugar, 1/3 cup flour, and a pinch of salt. Ensure the dry ingredients are well combined to create a smooth base for your pudding. This step is crucial as it lays the foundation for a creamy Homemade Banana Pudding.
Step 2: Whisk in Milk
Gradually add 3 cups of milk to the dry mixture while whisking continuously to prevent lumps. Turn the heat to medium and continue to cook for about 10 minutes, or until the mixture thickens and begins to bubble. You’ll notice a creamy texture as it heats up, signifying it’s time for the next step.
Step 3: Cook the Mixture
Once thickened, reduce the heat to low and let the pudding bubble gently for an additional 2 minutes. Stir constantly during this time to prevent sticking or burning on the bottom of the pan. This gentle cooking allows the flavors to develop further, enriching your Homemade Banana Pudding.
Step 4: Temper the Eggs
In a separate small bowl, whisk together 3 whole eggs. Gradually stir in 1 cup of the hot pudding mixture to temper the eggs, preventing them from scrambling. This step is essential for creating a rich, velvety texture in your pudding.
Step 5: Return to Heat
Pour the tempered egg mixture back into the saucepan with the rest of the pudding. Cook on low heat, stirring constantly, until the mixture comes to a gentle boil, approximately 2 minutes. You’ll see bubbles breaking the surface, indicating it’s ready to thicken even more.
Step 6: Add Vanilla and Cool
Remove the saucepan from heat and stir in 1 teaspoon of pure vanilla extract. Allow the pudding to cool for about 15 minutes, stirring occasionally to prevent a skin from forming on top. This step enhances the flavor of your Homemade Banana Pudding, making it even more delightful.
Step 7: Layer Ingredients
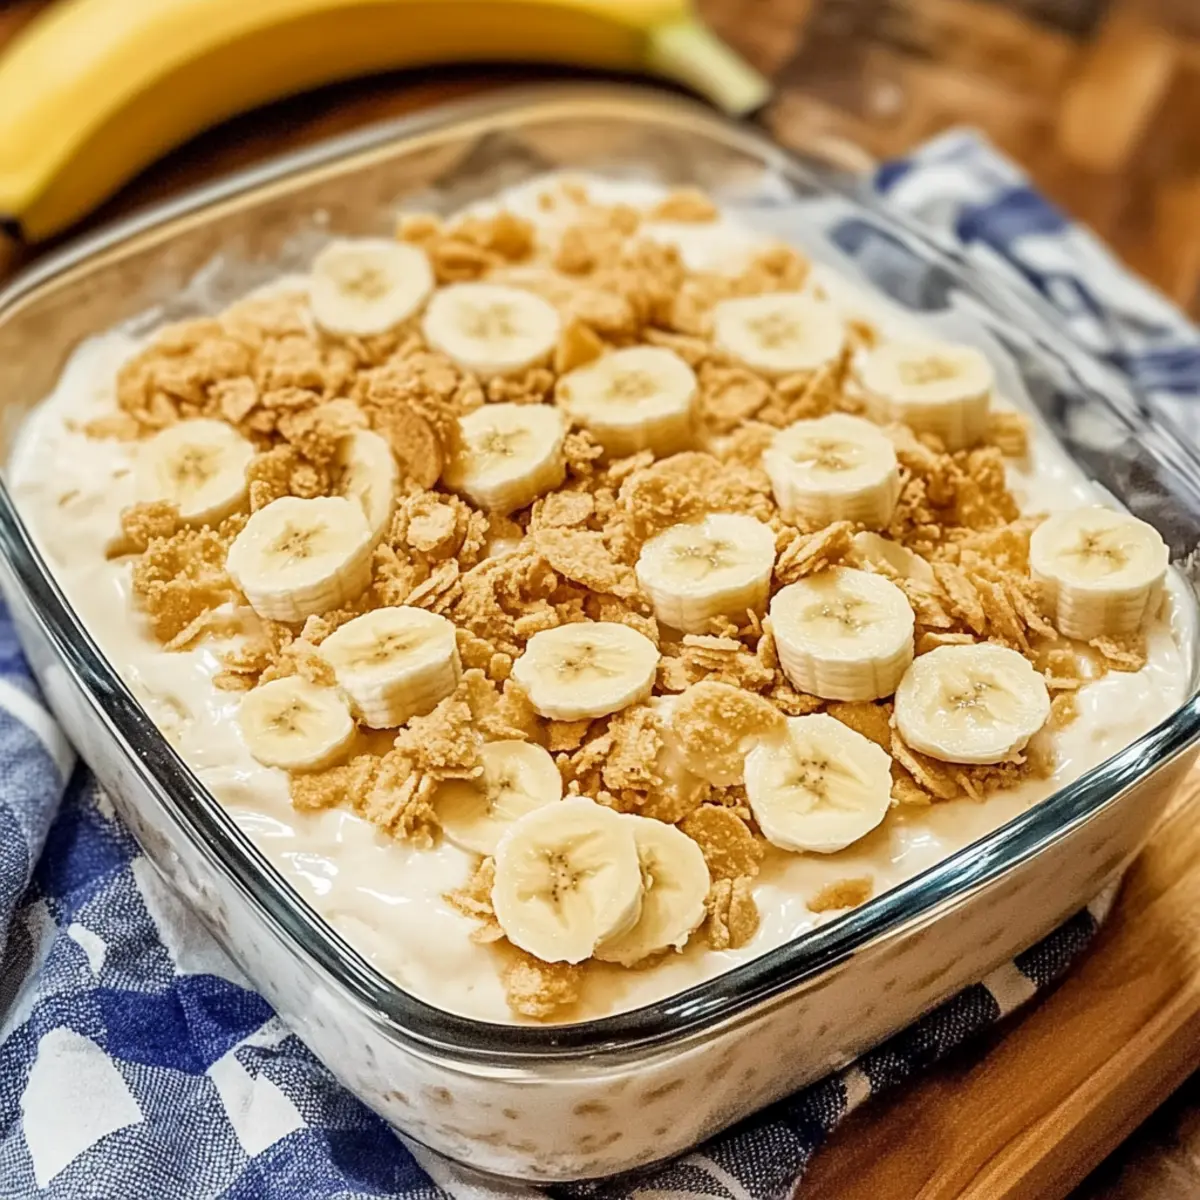
In an 8-inch square pan, lay down approximately 25 vanilla wafers at the bottom. Spread half of the sliced bananas evenly over the wafers, followed by pouring half of the creamy pudding over the top. Repeat this layering process to build a beautiful dessert that showcases each element of your Homemade Banana Pudding.
Step 8: Chill and Set
Cover the dessert tightly with plastic wrap and refrigerate for at least 4 hours, though overnight is preferred for the best flavor melding. This chilling time is crucial for allowing the layers to set properly and for the flavors to marry.
Step 9: Garnish and Serve
Just before serving, crush any remaining vanilla wafers and sprinkle them over the top of your Homemade Banana Pudding for added crunch. Serve chilled, and perhaps add an extra slice of banana for a fresh touch, bringing joy to your gathering.
Expert Tips for Homemade Banana Pudding
Cool Before Layering: Allow the pudding to cool completely before layering to maintain the crunch of the vanilla wafers.
Add Bananas Last: To prevent browning, layer bananas just before serving. This keeps them fresh and vibrant for your guests.
Choose Ripe Bananas: Use ripe but firm bananas for the best flavor and texture in your Homemade Banana Pudding layers.
Ensure Proper Thickness: If your pudding doesn’t thicken as expected, make sure it reaches a gentle boil after adding the eggs; this is crucial for a creamy consistency.
Make-Ahead Wonder: Prepare your pudding a day in advance. This not only enhances the flavors but also makes it an ideal stress-free dessert for gatherings.
What to Serve with Classic Homemade Banana Pudding
Treat your loved ones to a delightful spread that perfectly complements the creamy, nostalgic flavors of this beloved dessert.
-
Whipped Cream: A dollop of freshly whipped cream elevates each serving, adding a light, airy finish to the rich pudding.
-
Crispy Bacon: Sweet-savory crispy bacon bits offer a surprising crunch and a delightful contrast that amplifies the pudding’s flavors.
-
Peanut Butter Cookies: These chewy cookies add a nutty texture and richness that pairs wonderfully with the sweetness of the banana pudding.
-
Fresh Berries: Juicy strawberries or blueberries introduce a refreshing tartness that balances the creamy pudding, creating a well-rounded dessert experience.
-
Iced Tea: A chilled glass of sweet iced tea adds a classic Southern touch, enhancing the meal’s overall comfort and nostalgia.
-
Chocolate Sauce: Drizzling warm chocolate sauce over your banana pudding introduces a rich layer of flavor that makes each bite even more indulgent.
-
Almond Milkshake: This creamy drink’s nutty flavor complements the dessert beautifully and makes for a fun pairing that delights both kids and adults.
How to Store and Freeze Homemade Banana Pudding
Fridge: Keep your Homemade Banana Pudding tightly covered in the refrigerator for up to 4 days. This ensures it stays fresh and creamy while preventing any absorption of odors from other foods.
Freezer: Freezing is not advisable for Homemade Banana Pudding due to potential texture changes. The creamy consistency may become grainy upon thawing, affecting your dessert’s delightful mouthfeel.
Reheating: If you have leftovers, serve them chilled straight from the fridge. There’s no need to reheat, as it tastes best enjoyed cold, just like at family gatherings.
Homemade Banana Pudding Variations
Feel free to let your creativity shine by customizing this dessert to suit your taste and dietary preferences!
-
Graham Cracker Layers: Swap out vanilla wafers for graham crackers for a delightful twist on texture and flavor.
This change brings a nice buttery crunch and pairs beautifully with the creamy pudding. -
Non-Dairy Delight: Use almond or oat milk in place of regular milk for a lactose-free version.
You’ll still achieve that creamy consistency while keeping it suitable for vegans and lactose-intolerant friends. -
Sweetness Adjustment: Experiment with coconut sugar or agave syrup instead of granulated sugar.
These alternatives lend a unique sweetness that can elevate the overall flavor profile of your dessert. -
Flavor Infusions: Add a splash of rum or bourbon to your pudding for a subtle, sophisticated flavor twist.
Just a little bit can transform your classic recipe into a more grown-up treat, perfect for special occasions. -
Chocolate Twist: Incorporate cocoa powder or a layer of chocolate pudding for a chocolate banana pudding variation.
This decadent addition delights chocolate lovers and offers a rich contrast to the bananas. -
Banana Health Boost: Mix in some chia seeds for added nutrition and a fun texture in your pudding.
This not only enhances the health factor but also adds a delightful crunch, making every bite exciting. -
Spicy Kick: Add a pinch of cinnamon or a dash of nutmeg to the pudding for a warm spice flavor.
This simple addition can bring comfort, making it even more perfect for family gatherings. -
Nutty Surprise: Sprinkle some crushed nuts like pecans or almonds on top before serving for a crunchy finish.
This will add an exciting textural element and compliment the creaminess of the pudding, just like with my Vanilla Chia Pudding.
Embrace these delicious twists to make your Homemade Banana Pudding your own, no matter the occasion!
Make Ahead Options
These Classic Homemade Banana Pudding preparations are perfect for busy weeknights! You can prepare the pudding mixture up to 24 hours in advance and store it in the refrigerator, keeping it tightly covered to maintain its creamy texture. Additionally, layer the vanilla wafers and banana slices just before serving to prevent browning and maintain crispness. When you’re ready to enjoy, simply combine your prepped components, allow the pudding to sit for a bit at room temperature, garnish with crushed wafers, and serve chilled. This way, you’ll entertain effortlessly, impressing your guests with a delicious homemade dessert that tastes just as delightful as if you prepared it fresh!
Homemade Banana Pudding Recipe FAQs
What type of bananas should I use for Homemade Banana Pudding?
Absolutely, using fresh, ripe bananas is key! Look for bananas that are slightly speckled but firm; overripe bananas with dark spots can become too mushy in the pudding. This will help maintain a pleasant texture throughout your dessert.
How do I store Homemade Banana Pudding?
Store your Homemade Banana Pudding tightly covered in the refrigerator for up to 4 days. Make sure it’s in an airtight container to keep it fresh and prevent it from absorbing any unwanted smells from the fridge.
Can I freeze Homemade Banana Pudding?
Very! However, I wouldn’t recommend it. Since the consistency can change, freezing may result in a grainy texture when thawed, which isn’t ideal for this creamy dessert. Enjoy it fresh instead!
What should I do if my pudding doesn’t thicken properly?
If your pudding isn’t thickening as expected, ensure that it reaches a gentle boil after adding the tempered eggs. Stir constantly and allow it to cook on low for an extra minute or two—this will activate the thickening power of the flour, giving you that creamy consistency you desire.
Are there any dietary considerations for Homemade Banana Pudding?
You can easily adapt this recipe! For a lactose-free version, substitute the regular milk with non-dairy options like almond or oat milk. Additionally, be aware of allergies: if serving to others, make sure no one has a sensitivity to eggs or gluten, as both are key components of this traditional recipe.
Homemade Banana Pudding: Creamy Comfort in Every Bite
Ingredients
Equipment
Method
- In a medium saucepan, mix together 3/4 cup sugar, 1/3 cup flour, and a pinch of salt.
- Gradually add 3 cups of milk while whisking continuously, then heat on medium for about 10 minutes until it thickens.
- Reduce heat to low and let it bubble gently for 2 minutes, stirring constantly.
- Whisk together 3 whole eggs in a separate bowl and gradually stir in 1 cup of hot pudding to temper the eggs.
- Pour the tempered egg mixture back into the saucepan and cook on low until it comes to a gentle boil, about 2 minutes.
- Remove from heat and stir in 1 teaspoon of pure vanilla extract. Let it cool for about 15 minutes.
- In an 8-inch square pan, layer 25 vanilla wafers, half the sliced bananas, and half of the pudding. Repeat the layers.
- Cover tightly with plastic wrap and refrigerate for at least 4 hours, preferably overnight.
- Before serving, crush remaining vanilla wafers and sprinkle over the top. Serve chilled.
Leave a Reply