
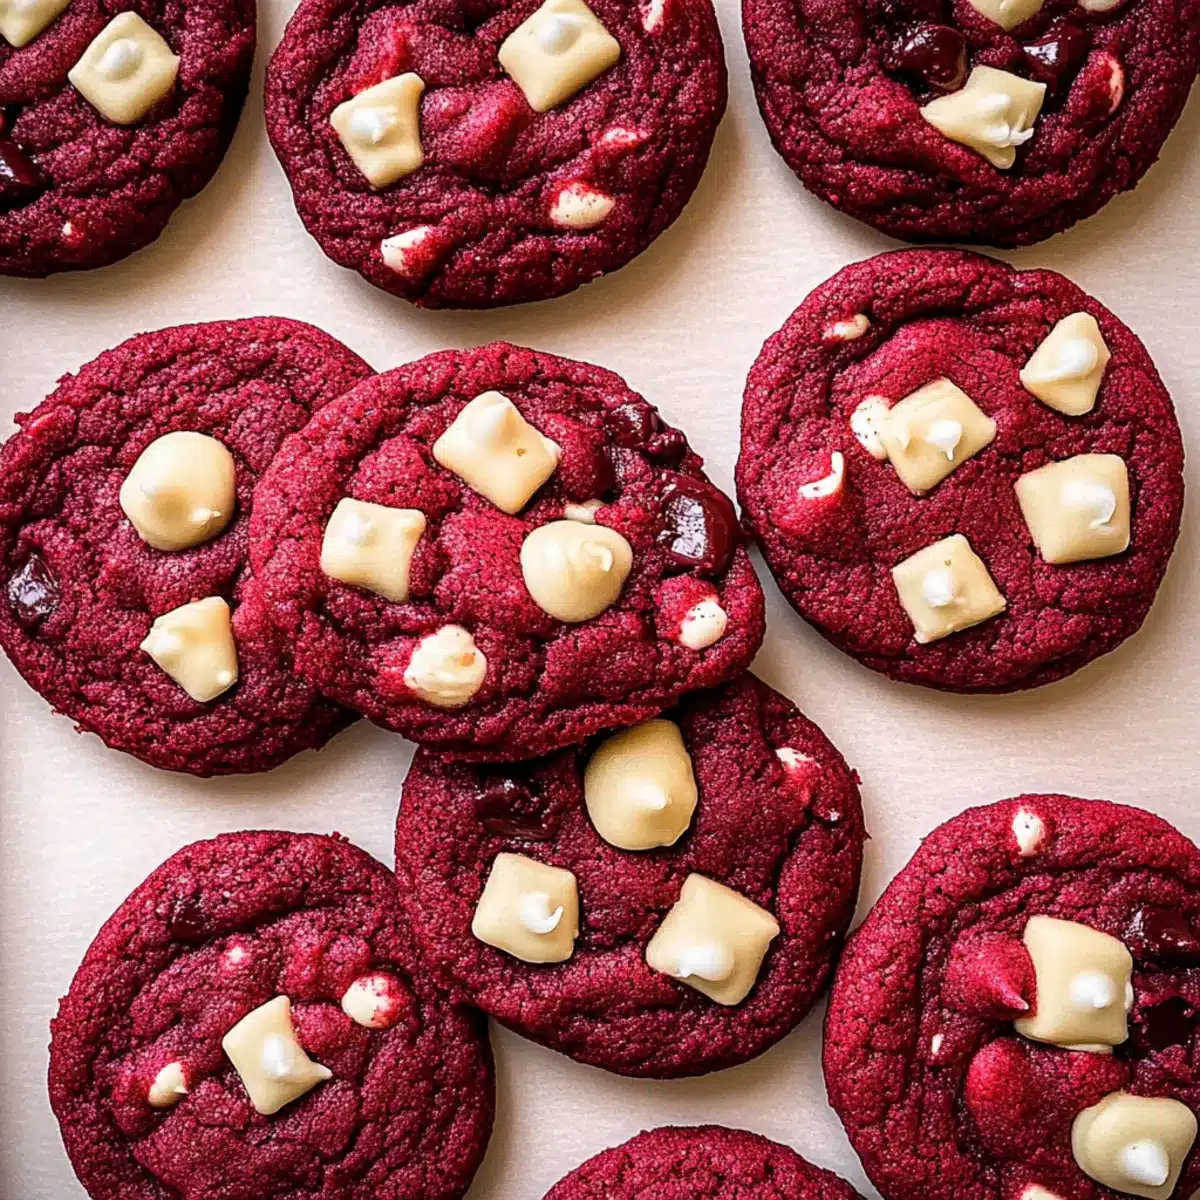
The aroma of freshly baked cookies dances through the air, wrapping you in a warm embrace that feels like home. Have you ever craved something that seamlessly blends nostalgia with a playful twist? Enter my Chewy Red Velvet Cookies with White Chocolate Chunks. These delightful treats aren’t just your average dessert; they transform classic red velvet flavors into chewy perfection, making them an absolute must for Valentine’s Day or any day you need a sweet pick-me-up. With no chill time required, you can whip up these cookies in under 30 minutes—ideal for those spontaneous baking moments without compromising quality. Plus, the combination of velvety cocoa and melty white chocolate is sure to win over everyone in your household. Curious about how to create these delights? Let’s dive in!
Why are Red Velvet Cookies so special?
Irresistible Flavor: With a unique blend of cocoa and white chocolate, these cookies create a rich and creamy bite everyone will adore.
Quick and Easy: This recipe requires no chill time, making it a hassle-free option for last-minute dessert cravings.
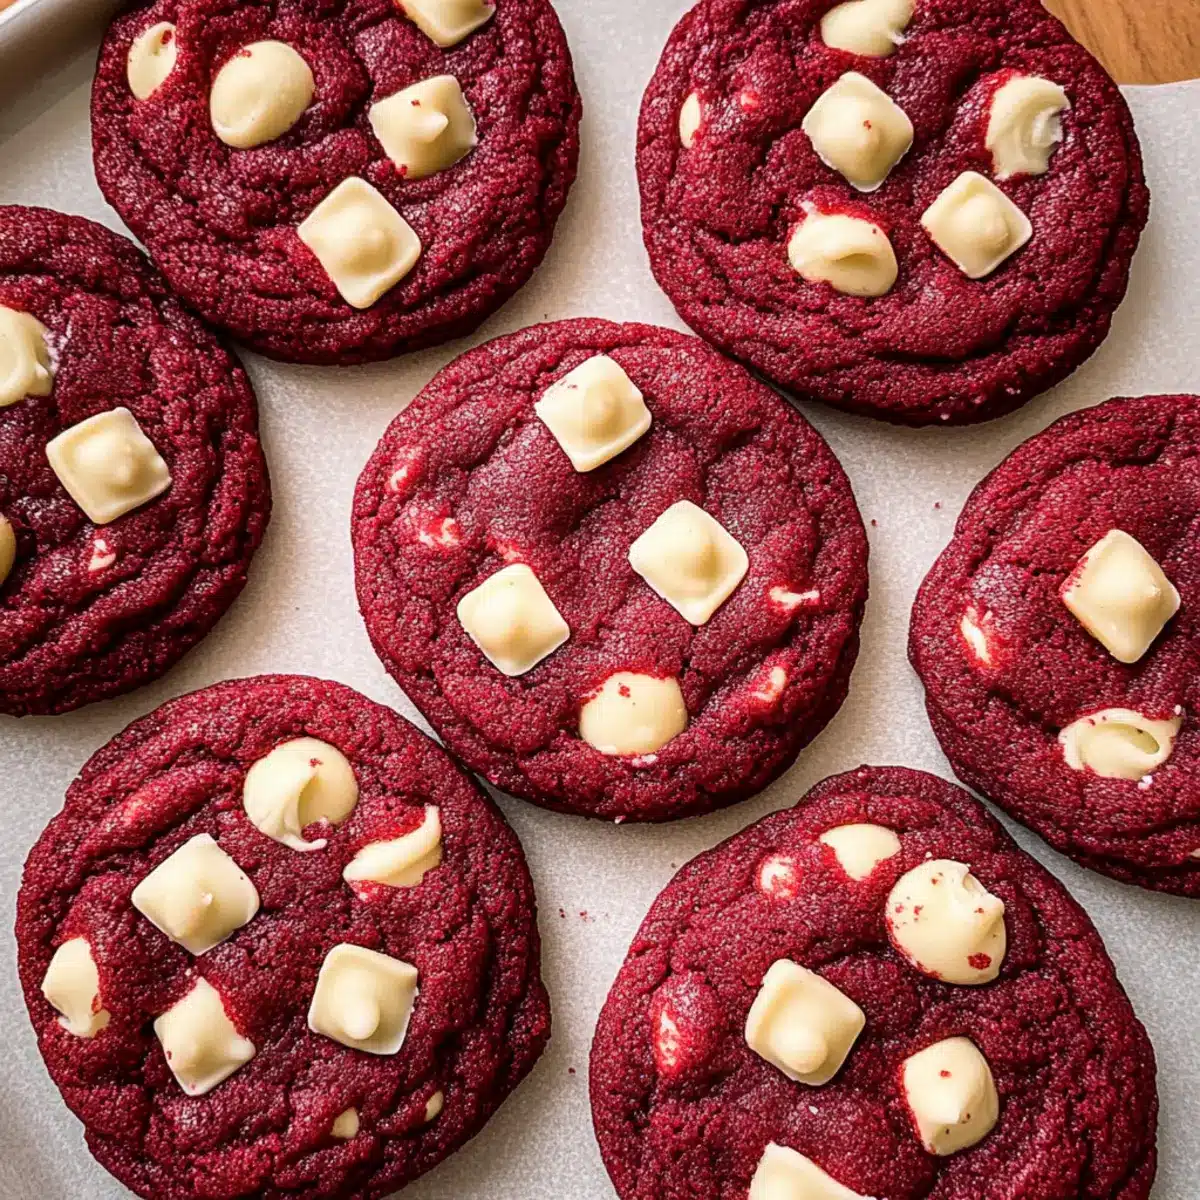
Chewy Texture: Enjoy that perfect chewiness that balances soft centers with crisp edges, reminiscent of beloved red velvet cake.
Versatile Treat: Whether it’s Valentine’s Day or just a sweet craving, these cookies fit any occasion beautifully! Want to try a delightful variation? Check out my Vegan Lemon Cookies for another sweet treat!
Crowd-Pleasing Appeal: These cookies are perfect for sharing, ensuring they’ll disappear fast at gatherings, leaving everyone wanting more.
Red Velvet Cookies Ingredients
For the Dough
• All-Purpose Flour – Provides structure; measure accurately to avoid excess.
• Dutch Process Cocoa Powder – Adds mild chocolate flavor without overpowering; substitute with regular cocoa if needed.
• Baking Soda – A leavening agent to help cookies rise.
• Baking Powder – Ensures a soft texture; essential for that chewy bite.
• Salt – Enhances overall flavor; don’t skip this ingredient!
• Salted Butter – Adds richness and moisture; should be softened for easy mixing.
• Light Brown Sugar – Infuses caramel notes and moisture; perfect for chewy cookies.
• Granulated Sugar – Provides sweetness and helps crisp the edges.
• Egg Yolks – Adds richness and moisture; use room temperature for better mixing.
• Vanilla Extract – A flavor enhancer; opt for pure vanilla for the best taste.
• Red Gel Food Coloring – Gives the classic red velvet appearance; adjust based on desired color intensity.
• Chopped White Chocolate or Chips – Adds melty sweetness and a contrasting texture in cookies; a must for red velvet cookies!
Step‑by‑Step Instructions for Chewy Red Velvet Cookies with White Chocolate Chunks
Step 1: Preheat the Oven
Begin by preheating your oven to 350°F (175°C) while you prepare the dough. Line two baking sheets with parchment paper to ensure your cookies bake evenly and won’t stick. This step is crucial for achieving the perfect chewy texture of your red velvet cookies.
Step 2: Mix Dry Ingredients
In a small mixing bowl, whisk together the all-purpose flour, Dutch process cocoa powder, baking soda, baking powder, and salt until well combined. This dry mixture creates a balanced foundation for your chewy red velvet cookies. Set the bowl aside, allowing you to blend the wet ingredients seamlessly in the next step.
Step 3: Cream Butter and Sugars
In a large bowl, use an electric mixer to cream the softened salted butter, light brown sugar, and granulated sugar together until the mixture is light and fluffy, about 2 minutes. You’ll know it’s ready when the color lightens and the texture becomes airy—this adds the necessary richness and moisture to your red velvet cookies.
Step 4: Incorporate Egg Yolks and Flavoring
Add the egg yolks, pure vanilla extract, and red gel food coloring to the butter-sugar mixture. Beat these ingredients together until they are fluffy, which should take another 2 minutes. The food coloring will enrich the cookies, giving them their signature vibrant hue while the egg yolks contribute to the delightful chewiness.
Step 5: Combine Dry and Wet Ingredients
Gradually add the dry ingredient mixture to the wet mixture, mixing until just combined. Be careful not to overmix, as this can affect the texture of your chewy red velvet cookies. The dough should come together beautifully, reflecting a rich red color with the hints of cocoa peeking through.
Step 6: Fold in White Chocolate
Gently fold in the chopped white chocolate or chocolate chips, ensuring they’re evenly distributed throughout the dough. This step is essential as the melty white chocolate provides a sweet contrast to the rich red velvet flavor. Your dough is now ready for shaping and baking!
Step 7: Scoop the Dough
Using a cookie scoop or tablespoon, portion out the dough into 18 balls, placing them about 2 inches apart on the prepared baking sheets. This spacing ensures the chewy red velvet cookies have enough room to spread while baking, maintaining their perfect shape and texture.
Step 8: Bake the Cookies
Bake the cookies in your preheated oven for 10-12 minutes, keeping an eye on them to achieve your desired texture. If you prefer soft, chewy centers, aim for the shorter baking time; for crunchier edges, let them bake a couple of minutes longer. They will look set but slightly underbaked in the center.
Step 9: Cool the Cookies
Once baked, remove the cookies from the oven and let them cool on the baking sheet for 5 minutes. This resting period allows the cookies to firm up without losing that irresistible chewy texture before transferring them to a wire cooling rack to cool completely. Enjoy the delightful aroma filling your kitchen!
Expert Tips for Chewy Red Velvet Cookies
-
Measure Wisely: Accurate flour measurement is key; spoon flour into the measuring cup and level off to avoid dense cookies.
-
Proper Mixing: Cream the butter and sugars until fluffy to incorporate air, ensuring a light texture in your chewy red velvet cookies.
-
Avoid Overmixing: Combine dry and wet ingredients gently; overmixing can lead to tough cookies. Stop as soon as you see no dry flour.
-
Baking Timing: Keep an eye on your cookies in the oven. For optimal chewy centers, bake them just until the edges set and the centers look slightly underdone.
-
Reshape if Needed: If cookies spread unevenly, use a spatula to gently reshape them immediately after baking for perfect circular treats.
-
Storage Tip: Store cookies in an airtight container at room temperature to keep them fresh for up to 3 days; remember, they’re best enjoyed fresh!
How to Store and Freeze Red Velvet Cookies
Room Temperature: Keep your cookies in an airtight container to maintain freshness for up to 3 days; store them away from direct sunlight.
Fridge: If you prefer, refrigerate the cookies for up to a week; just ensure they’re in a sealed container to prevent them from drying out.
Freezer: For longer storage, freeze the baked cookies in a single layer, then transfer to a freezer-safe bag for up to 2 weeks; thaw at room temperature before enjoying.
Reheating: To enjoy a warm treat, reheat cookies in the microwave for about 10-15 seconds; they’ll regain that lovely, chewy texture!
What to Serve with Chewy Red Velvet Cookies with White Chocolate Chunks
The joy of baking these delightful cookies comes alive when you think of the perfect companions to elevate your dessert experience.
- Vanilla Ice Cream: A scoop of creamy vanilla ice cream adds a luscious contrast to the warm, chewy cookies, making each bite a heavenly combination.
- Cream Cheese Frosting: A dollop of rich cream cheese frosting creates a smooth and tangy counterpart that echoes the classic red velvet cake flavor beautifully.
- Fresh Berries: Juicy strawberries or raspberries provide a refreshing burst of tartness, balancing the sweetness of the cookies and adding a pop of color to your dessert plate.
- Milk or Almond Milk: A cold glass of milk makes for a classic pairing that perfectly complements the rich flavors while keeping your cookie experience nostalgic and comforting.
- Chocolate-Covered Strawberries: These sweet treats harmonize exceptionally well, enhancing the romantic vibes that red velvet cookies naturally exude, perfect for special occasions.
- Coffee or Espresso: Sipping on a warm cup of coffee or espresso alongside these cookies enriches the experience, bringing out the chocolate notes in a delightful way.
- Whipped Cream: Light and airy whipped cream adds a luxurious touch, giving a lovely texture contrast alongside the chewy, chocolate-studded cookies.
Make Ahead Options
These Chewy Red Velvet Cookies are perfect for meal prep enthusiasts looking to save time during busy weeknights! You can prepare the dough up to 24 hours in advance by mixing it and refrigerating it in an airtight container. This not only allows the flavors to develop but also keeps the cookie dough fresh. If you’re planning further ahead, scoop the dough into individual balls and freeze them for up to 3 months; just place them on a baking sheet to freeze solid, then transfer to a zip-top bag. When you’re ready to bake, there’s no need to thaw—just add a couple of minutes to your baking time for perfectly fresh cookies. Enjoy the luxury of freshly baked cookies with minimal effort!
Red Velvet Cookies Variations
Feel free to get creative with your red velvet cookies—there’s a world of possibilities to explore!
-
Nutty Crunch: Add chopped pecans or walnuts for a delightful crunch and rich flavor. Nuts enhance the textural contrast, making each bite even more enjoyable.
-
Cream Cheese Swirl: For a true red velvet experience, incorporate a cream cheese swirl in the center. Just mix together cream cheese, sugar, and a dash of vanilla, then add a dollop to the cookie dough before baking.
-
Colorful Sprinkles: Top your cookies with festive sprinkles for a fun pop of color. This twist is especially perfect for celebrations and adds an extra layer of sweetness!
-
Spicy Heat: Introduce a pinch of cayenne pepper to the dry ingredients for a surprising twist and warmth; this complements the creamy sweetness of the white chocolate beautifully. The subtle heat will make your taste buds dance!
-
Alternative Chocolate: Swap white chocolate for milk or dark chocolate chips if you’re craving a different flavor. This can create a deep, rich contrast that may appeal to chocolate lovers.
-
Gluten-Free Delight: Substitute all-purpose flour with a 1:1 gluten-free blend to make these cookies suitable for gluten-sensitive friends. They’ll remain wonderfully chewy and delicious!
-
Reduced Sugar Option: For a healthier version, try using less sugar or a natural sweetener like maple syrup. This allows you to enjoy the cookie without all the sweetness.
If you’re looking for another delightful dessert, don’t miss out on my Matcha Butter Cookies—they offer a unique flavor that’s sure to surprise you! Each variation is a chance to explore new flavors and textures while enjoying the classic comfort of red velvet goodness.
Red Velvet Cookies Recipe FAQs
What should I look for when selecting ingredients for my cookies?
Absolutely! For the best results, choose all-purpose flour that feels soft and is devoid of lumps. Opt for Dutch process cocoa powder for that mild chocolate flavor—make sure it’s fresh. When picking your red gel food coloring, ensure it’s a deep red for vibrant cookies. Always go for quality white chocolate to enhance the overall taste and texture!
How do I store my Red Velvet Cookies, and how long do they last?
For optimal freshness, store your Red Velvet Cookies in an airtight container at room temperature for up to 3 days. If you’d like to keep them longer, consider refrigerating them, which extends their life to about a week. Just ensure they’re sealed well to prevent drying out!
Can I freeze Red Velvet Cookies for later use?
Yes, absolutely! To freeze your cookies, place them in a single layer on a baking sheet and freeze until solid. Then, transfer them to a freezer-safe bag or container. They can be stored for up to 2 weeks in the freezer. When you’re ready to enjoy, simply thaw them at room temperature for a delightful treat!
What should I do if my cookies spread too much while baking?
Don’t worry; this happens to many bakers! If your cookies spread too much during baking, you might not have enough flour in your dough. Double-check your measurements next time. If it happens while baking, take a spatula and gently reshape them right out of the oven for that perfect circular look!
Can pets eat Red Velvet Cookies? Are there any allergies I should be aware of?
I wouldn’t recommend sharing these cookies with pets, as ingredients like chocolate can be harmful to them. If you have allergies, be sure to check all packaged ingredients carefully, especially for gluten, dairy, and eggs. If you’re looking for alternatives, consider using gluten-free flour or egg substitutes like flax eggs in your next batch.
Are there vegan options available for Red Velvet Cookies?
Yes, indeed! You can create vegan-friendly Red Velvet Cookies by substituting the egg yolks with flaxseed meal or chia seeds—mix 1 tablespoon of either with 2.5 tablespoons of water to replace one egg. Use vegan butter and dairy-free white chocolate chips to complete the transformation while keeping that chewy goodness intact!
Chewy Red Velvet Cookies that Make Every Day Special
Ingredients
Equipment
Method
- Preheat the oven to 350°F (175°C) and line two baking sheets with parchment paper.
- In a small mixing bowl, whisk together all-purpose flour, Dutch process cocoa powder, baking soda, baking powder, and salt.
- In a large bowl, cream the softened salted butter, light brown sugar, and granulated sugar until light and fluffy, about 2 minutes.
- Add the egg yolks, pure vanilla extract, and red gel food coloring to the butter-sugar mixture and beat until fluffy.
- Gradually add the dry mixture to the wet ingredients until just combined.
- Fold in the chopped white chocolate or chips evenly throughout the dough.
- Using a scoop or tablespoon, portion out the dough into 18 balls and place them 2 inches apart on the baking sheets.
- Bake for 10-12 minutes, keeping an eye on them for desired texture.
- Let the cookies cool on the baking sheet for 5 minutes before transferring to a wire rack.
Leave a Reply