
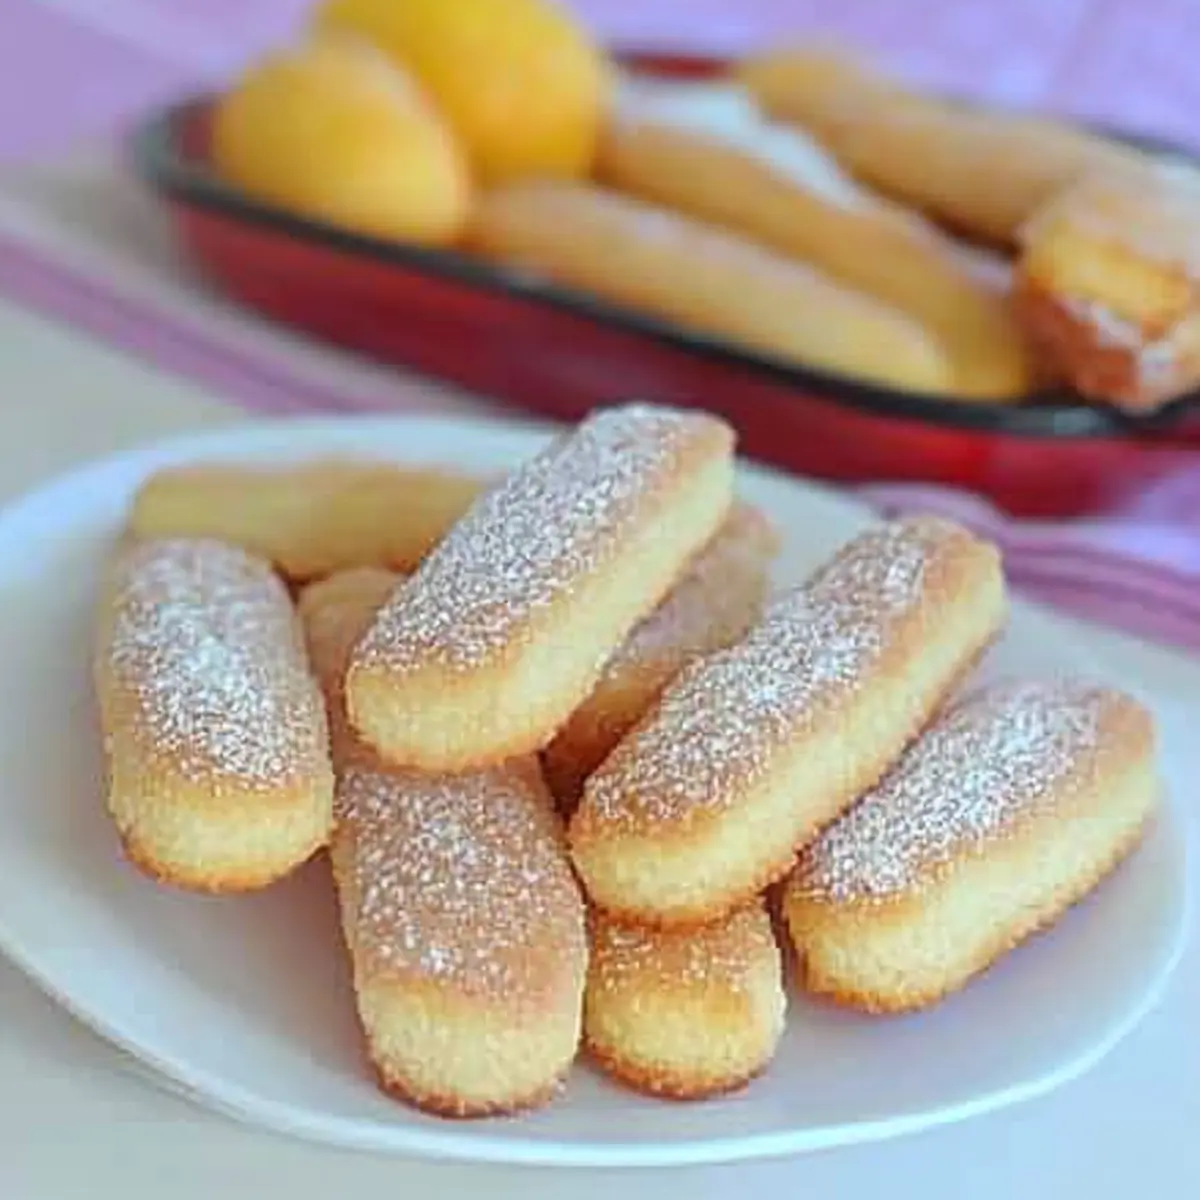
As I took my first bite, the delicate snap of the homemade ladyfinger cookie had me smiling ear to ear. These light and airy delights are the quintessential building blocks for Tiramisu, transforming a simple dessert into a show-stopping creation. Creating your own homemade ladyfinger cookies is not only a fun way to elevate your baking skills, but it’s also a guilt-free indulgence that’s perfect for any occasion. This easy recipe ensures you’ll have a fresh batch ready in no time, adding rich texture to layered desserts or trifles that will impress your loved ones. Are you curious about how these delightful cookies can elevate your dessert game? Let’s dive in!
Why make homemade ladyfinger cookies?
Elevate Your Desserts: By making your own homemade ladyfinger cookies, you ensure that each bite is fresh, light, and perfectly crisp, enhancing classics like Tiramisu and trifles.
Quick and Easy: This straightforward recipe requires just a few simple ingredients and minimal effort, making it ideal for bakers of all skill levels.
Versatility: Use these cookies not only in Tiramisu but also in other desserts—think charlotte cakes or even with a scoop of ice cream for a delightful treat.
Guilt-Free Indulgence: At just 41 calories per cookie, they’re perfect for satisfying your sweet tooth without the guilt, unlike typical store-bought options.
Impress Guests: Homemade ladyfingers are sure to wow your family and friends, creating layers of flavor and nostalgia in each dessert. Try pairing them with our delicious Blueberry Cheesecake Cookie or serve alongside a cup of espresso for a charming finishing touch!
Homemade Ladyfinger Cookies Ingredients
• Unlock the secrets to airy perfection!
For the Batter
- Large Eggs – Essential for structure; yolks add richness, while whipped whites incorporate air for fluffiness.
Substitution: Egg replacer for a vegan option, but the texture may vary. - Granulated Sugar – Provides sweetness and aids in whipping the egg whites to stiff peaks.
Substitution: Coconut sugar can be used for a slightly different flavor. - Salt – Enhances the sweetness and balances flavors.
- Vanilla Extract – Adds depth of flavor and sweetness.
Prep Note: Pure vanilla extract is preferred for best flavor. - All-Purpose Flour – Main structure; helps cookies hold shape.
Substitution: Gluten-free all-purpose flour can be used, but results may vary. - Cornstarch – Contributes to a lighter texture, making cookies airy.
- Lemon Zest (optional) – Adds a fresh citrus note.
For Dusting
- Powdered Sugar – For dusting; adds sweetness and visual appeal.
These homemade ladyfinger cookies will not only be a delightful addition to your Tiramisu but will also elevate any dessert with their light, airy texture!
Step‑by‑Step Instructions for Homemade Ladyfinger Cookies for Tiramisu
Step 1: Preheat and Prepare
Begin by preheating your oven to 350°F (175°C). While it heats, line two baking sheets with parchment paper to ensure your homemade ladyfinger cookies don’t stick. This setup will create an ideal space for baking, making it easy to transfer your cookies once they’re ready.
Step 2: Separate the Eggs
Carefully separate the egg yolks from the whites, placing them in two different bowls. Beat the yolks with half of the granulated sugar using a hand mixer on medium speed until the mixture turns pale and fluffy, which should take about 3-4 minutes. Add in the vanilla extract to deepen the flavor.
Step 3: Whip the Egg Whites
In a separate bowl, whip the egg whites using a clean mixer bowl on medium-high speed until soft peaks form; this should take around 2-3 minutes. Gradually add the remaining sugar while continuing to beat until you achieve stiff peaks. The egg whites should look glossy and hold their shape firmly, perfect for folding into your ladyfinger batter.
Step 4: Combine Mixtures
Gently fold the whipped egg whites into the yolk mixture with a spatula. Use a careful and smooth motion to maintain the airiness that you’ve created. This step is crucial for achieving the light texture of your homemade ladyfinger cookies, so be patient and mix until just combined.
Step 5: Add Dry Ingredients
Sift the all-purpose flour and cornstarch together, ensuring they are well combined and free of lumps. Gradually fold this dry mixture into the batter until fully incorporated; stop mixing as soon as you no longer see any flour. This gentle handling is key to retaining the delicate airiness of your cookies.
Step 6: Pipe the Cookies
Transfer the batter to a piping bag fitted with a round tip. Pipe your ladyfingers onto the prepared baking sheets in 3-inch-long lines, leaving about 1 inch of space between each piped cookie. This spacing helps them bake evenly and puff up beautifully in the oven.
Step 7: Dust and Bake
Once piped, lightly dust the cookies with powdered sugar, which will add a touch of sweetness and help create a lovely crust. Place the baking sheets in the preheated oven and bake for 12-15 minutes, or until the cookies are lightly puffed and golden brown.
Step 8: Cool and Store
After baking, remove the cookies from the oven and let them cool completely on a wire rack. This cooling process allows your homemade ladyfinger cookies to firm up and reach the perfect texture, so they’re ready for pairing with coffee or layering in Tiramisu. Store any leftovers in an airtight container to maintain crispness.
What to Serve with Homemade Ladyfinger Cookies for Tiramisu
Indulging in homemade ladyfinger cookies is just the start of your dessert adventure; let’s explore what will elevate your experience!
-
Rich Espresso: A small cup of espresso perfectly complements the sweetness of the ladyfingers and enhances the coffee notes in Tiramisu.
-
Whipped Cream: Light and airy, whipped cream adds a luxurious touch when layered with ladyfingers in desserts or served on the side.
-
Fruity Trifle: Create a stunning trifle with layers of fresh berries and cream, which contrast the crispness of the cookies and highlight their versatility.
-
Chocolate Sauce: A drizzle of warm chocolate sauce over ladyfinger cookies creates a delightful decadence that satisfies chocolate cravings.
-
Limoncello: This Italian lemon liqueur adds a refreshing brightness that cuts through the richness of Tiramisu, making each bite feel light.
-
Custard: Soft, creamy custard can be served alongside for dipping, enhancing the cookies’ texture while adding a rich flavor.
-
Berry Compote: The tartness of a berry compote balances the sweetness of the ladyfingers and gives you a fresh, fruity kick.
Enjoy mixing and matching these delightful pairings to create your perfect dessert experience!
Make Ahead Options
Homemade ladyfinger cookies for Tiramisu are perfect for meal prep enthusiasts looking to save time during busy weeknights! You can prepare the batter up to 48 hours in advance and store it in the refrigerator (this helps the flavors meld beautifully). When ready to bake, simply pipe the cookies onto baking sheets and bake as directed—fresh out of the oven is always best! Alternatively, you can bake them ahead of time, allowing them to cool completely, then store in an airtight container for up to 3 days. To maintain their crispiness, avoid stacking them directly on top of one another. Just wait to layer them in your Tiramisu until you’re ready to serve, ensuring they remain light and airy!
Expert Tips for Homemade Ladyfinger Cookies
-
Whip to Perfection: Ensure to whip egg whites until stiff peaks form; this is vital for achieving the light and airy texture in your homemade ladyfinger cookies.
-
Avoid the Draft: Resist the urge to open the oven door during baking. Frequent openings can cause your delicate cookies to deflate, ruining their perfect puff.
-
Gentle Folding: When combining whipped egg whites into the yolk mixture, fold gently to keep the air incorporated. Too much stirring can lead to dense cookies.
-
Perfect Piping: Use a piping bag for uniform ladyfingers. Ensure 1-inch spacing between the cookies to allow them to rise without sticking together.
-
Cooling Time: Allow cookies to cool completely on a wire rack before using. This step is key to achieving the crispiness needed for a perfect Tiramisu base.
How to Store and Freeze Homemade Ladyfinger Cookies
Airtight Container: Store cooled homemade ladyfinger cookies in an airtight container at room temperature for up to 3 days to maintain their crispness and texture.
Refrigerator: If you need to keep them longer, you can refrigerate the cookies for up to a week, but this may soften them slightly.
Freezer: For extended storage, freeze the cookies in a single layer on a baking sheet, then transfer to a freezer-safe bag or container. They can be frozen for up to 2 months.
Reheating: When ready to use, thaw at room temperature or reheat in a 350°F oven for 5-7 minutes for that fresh-baked flavor.
Homemade Ladyfinger Cookies Variations
Feel free to explore these delightful twists that will elevate your homemade ladyfinger cookies even further!
-
Vegan Delight: Substitute egg whites with aquafaba (chickpea water) for a vegan-friendly option; whip until stiff peaks form.
This swap keeps the cookies light while being suitable for plant-based diets. -
Chocolate Indulgence: Add 2 tablespoons of cocoa powder to the dry ingredients for a chocolate version that’s rich and satisfying.
These cookies become a decadent treat on their own or a fantastic layer in desserts. -
Almond Infusion: Incorporate 1 teaspoon of almond extract for a nutty flavor that beautifully enhances the classic recipe.
The subtle hint of almond pairs wonderfully with coffee-infused desserts. -
Citrus Zing: Boost your cookie’s freshness by adding 1 tablespoon of orange zest to the batter, creating a delightful fruity note.
These ladyfingers will deliver a bright flavor twist in your favorite desserts. -
Spicy Kick: Mix in a pinch of ground cinnamon or nutmeg for a warm, aromatic burst that’s perfect for fall-themed desserts.
This simple addition transforms your cookies into a cozy delight for chilly evenings! -
Mocha Bliss: Combine coffee extract into the batter for a caffeinated flavor kick that pairs perfectly with Tiramisu.
Pair these cookies with a cup of espresso for an indulgent treat. -
Dip in Chocolate: For added luxury, dip the finished cookies in melted dark chocolate before serving.
This rich layer creates an unforgettable treat that will impress your guests. -
Nutty Option: Fold in finely chopped nuts, such as hazelnuts or pistachios, for a delightful crunch and added flavor.
These variations bring texture and personality to your cookies, making each bite an adventure!
Don’t forget, these homemade ladyfinger cookies can be used in our delicious Blueberry Cheesecake Cookie and serve as the ultimate base for Tiramisu. Enjoy the process of baking and make it uniquely yours!
Homemade Ladyfinger Cookies for Tiramisu Recipe FAQs
How do I choose the best eggs for homemade ladyfinger cookies?
Absolutely! When selecting eggs, look for large, fresh eggs with no cracks or dark spots on the shells. Fresh eggs will provide better structure and fluffiness, essential for the airy texture of your ladyfingers.
Can I store homemade ladyfinger cookies, and for how long?
Yes, you can store your cooled ladyfinger cookies in an airtight container at room temperature for up to 3 days. If you want to keep them longer, refrigeration is an option for up to a week, but be aware that it may slightly soften their crispness.
How do I freeze homemade ladyfinger cookies?
Very! To freeze your ladyfinger cookies, start by placing them in a single layer on a baking sheet. Once they are frozen solid (after about 1-2 hours), transfer them to a freezer-safe bag or container. They can be stored in the freezer for up to 2 months. When you’re ready to enjoy them, either thaw at room temperature or reheat in a 350°F oven for 5-7 minutes for that delightful, fresh-baked taste.
What should I do if my ladyfinger cookies turn out dense?
If your cookies are denser than expected, it might be due to over-mixing when folding the whipped egg whites into the yolk mixture. Ensure to fold gently to maintain the airiness. Also, make sure your egg whites are whipped to stiff peaks; this step is key for the perfect texture. If they deflated while baking, avoid opening the oven door too frequently.
Are homemade ladyfinger cookies suitable for those with gluten allergies?
Indeed! You can make gluten-free ladyfinger cookies by substituting all-purpose flour with a gluten-free all-purpose blend. Just be cautious that the texture may vary slightly compared to traditional cookies. Always check ingredient labels to ensure they’re safe for anyone with gluten sensitivities or allergies.
Delicious Homemade Ladyfinger Cookies for Tiramisu Bliss
Ingredients
Equipment
Method
- Preheat your oven to 350°F (175°C) and line two baking sheets with parchment paper.
- Separate the egg yolks from the whites and beat yolks with half of the sugar until pale and fluffy. Add vanilla extract.
- Whip the egg whites until soft peaks form. Gradually add remaining sugar until stiff peaks form.
- Gently fold the whipped egg whites into the yolk mixture.
- Sift and fold the all-purpose flour and cornstarch into the batter until just combined.
- Transfer the batter to a piping bag and pipe ladyfingers onto baking sheets, leaving space between each.
- Dust cookies lightly with powdered sugar and bake for 12-15 minutes until puffed and golden brown.
- Cool cookies completely on a wire rack before using or storing.
Leave a Reply