
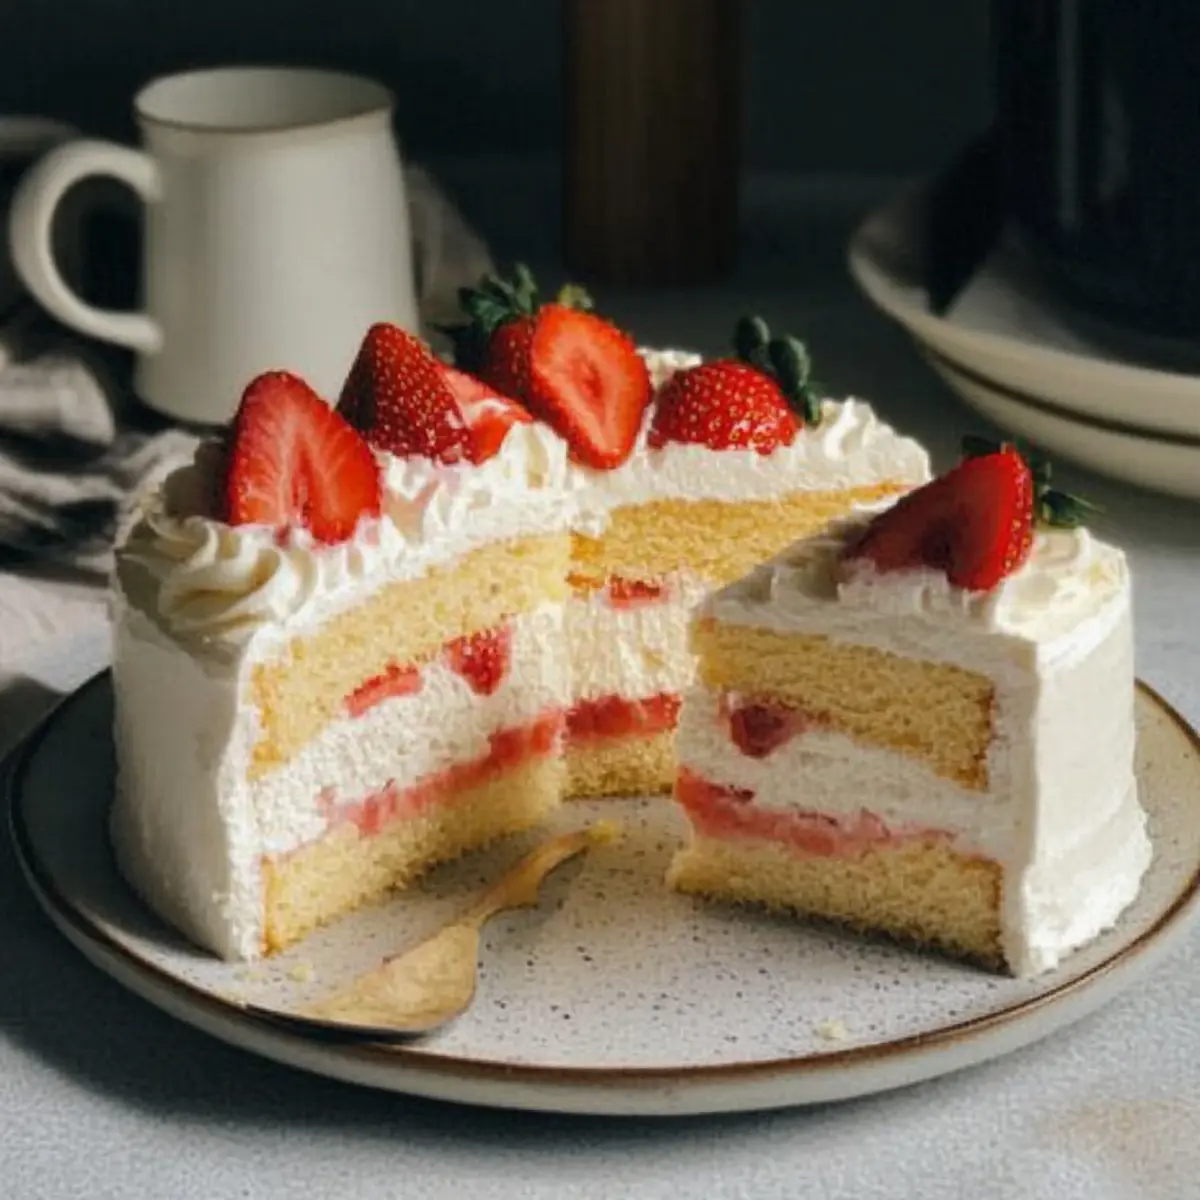
As I walked through a charming Japanese bakery, I was struck by the delicate allure of their strawberry cakes, each one a masterpiece whispering to be admired and savored. This Light & Fluffy Japanese Bakery-Style Strawberry Cake is inspired by those dreamy creations, offering a light and airy texture that’s nothing short of enchanting. Made with fresh strawberries and topped with either stabilized or regular whipped cream frosting, this dessert strikes the perfect balance without being overly sweet. It’s the ultimate crowd-pleaser, ideal for special occasions or simply to indulge in a slice of homemade bliss after dinner. Plus, with its straightforward preparation and a vegetarian option for the frosting, you can whip it up effortlessly. Are you ready to discover the joys of baking this delightful treat?
Why is this cake a must-try?
Light and Airy Texture: Each bite of this Japanese Strawberry Cake feels like a cloud, making it a delightful experience for your taste buds.
Natural Sweetness: With fresh strawberries and lightly sweetened whipped cream, it’s perfect for those who prefer desserts without an overpowering sweetness.
Versatile Frosting Options: Choose between stabilized and regular whipped cream to match your desired level of indulgence, or even try pairing it with a delightful Vegan Strawberry Muffins twist.
Easy to Make: The straightforward steps ensure that both novice and experienced bakers can easily create this masterpiece.
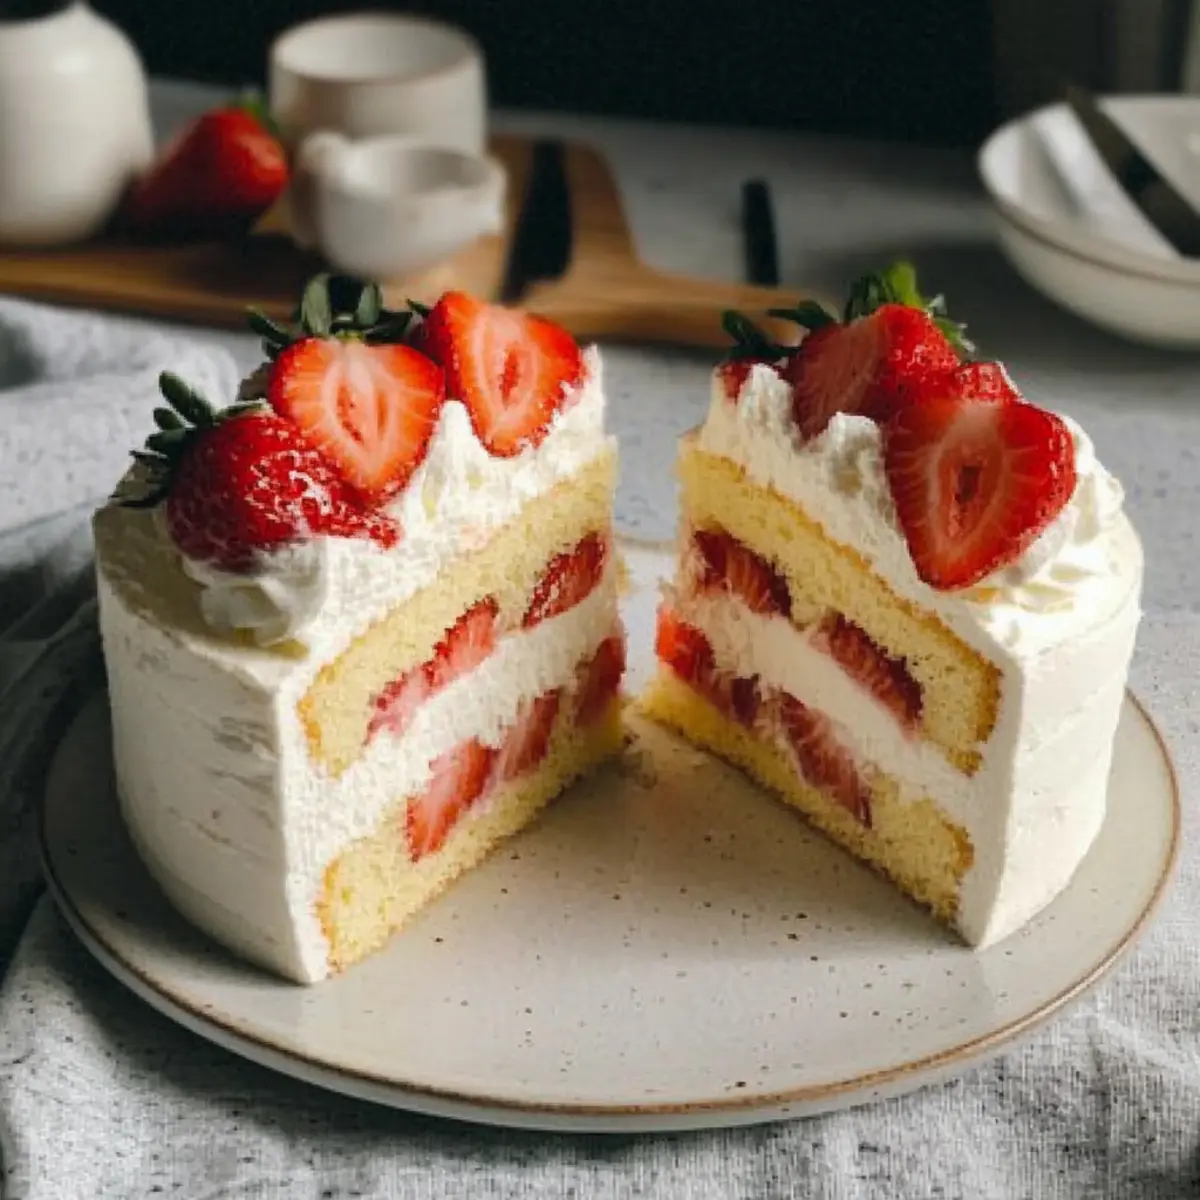
Impressive Presentation: It’s visually stunning, making it an ideal showstopper for parties or family gatherings. Serve it alongside a cup of green tea for a true cultural experience!
Japanese Strawberry Cake Ingredients
Let’s gather everything you need to create this delightful treat!
For the Cake
- Whole Milk – Provides moisture for a light texture; substitute with almond milk for a non-dairy option.
- Unsalted Butter – Adds richness; you can use coconut oil to keep it dairy-free.
- Cake Flour – Essential for a tender crumb; mix all-purpose flour and cornstarch (110 g flour + 16 g cornstarch) if unavailable.
- Large Egg Yolks – Contributes to structure and richness; use at room temperature for best results.
- Large Egg Whites – Whipped to firm peaks to bring airiness; a key ingredient for the cake’s lightness.
- Caster Sugar – Sweetens the cake; swap out for granulated sugar if needed.
For the Filling
- Strawberries – Provide fresh flavor and moisture; feel free to replace with raspberries for a unique twist.
For the Frosting
- Heavy Whipping Cream – Necessary for frosting that’s rich and creamy; be careful not to over-whip.
- Confectioners Sugar – Sweetens your cream; a sugar substitute can be used for a lower-sweetness version.
- Gelatin (Optional) – Helps to stabilize whipped cream, preventing it from deflating; omit for regular whipped cream.
- Cold Water (Optional) – Needed for blooming gelatin if using; ensure it stays cold until you need it.
For the Cake Syrup
- Sugar (for Cake Syrup) – Increases moisture and sweetness; honey can be a good alternative.
- Hot Water – Activates the sugar in the syrup; necessary for proper mixing.
Now that you have all the ingredients for the Japanese Strawberry Cake, you’re ready to indulge in a little baking magic! Let’s bring that fluffy sweetness to life!
Step‑by‑Step Instructions for Japanese Strawberry Cake
Step 1: Preheat Oven
Begin by preheating your oven to 325°F (160°C). Prepare a water bath by placing a larger baking pan filled with hot water on the bottom rack of the oven. This will create steam, ensuring your Japanese Strawberry Cake remains moist and tender during baking.
Step 2: Cake Batter Preparation
In a small saucepan, melt together the whole milk and unsalted butter over low heat until smooth. Remove from heat and sift in the cake flour, stirring gently to combine. Next, whisk in the large egg yolks until the mixture is well blended and creamy, creating the base for your light and fluffy cake.
Step 3: Whip Egg Whites
In a clean, dry mixing bowl, start whipping the large egg whites with an electric mixer at medium speed. Gradually add in the caster sugar as the whites become frothy. Continue beating until you achieve medium peaks, which will provide the necessary structure and lightness for your Japanese Strawberry Cake.
Step 4: Combine Mixtures
Gently fold the whipped egg whites into the beaten yolk mixture using a spatula. It’s crucial to fold carefully to maintain the airiness of the batter. This combination will give your cake its signature light and fluffy texture, essential for the final result.
Step 5: Pour Batter
Once the mixtures are combined, pour the cake batter into a lined 8-inch cake pan. Tap the pan gently on the countertop to release any trapped air bubbles, ensuring an even rise during baking. The smooth and velvety batter should fill the pan evenly, ready for the oven.
Step 6: Bake
Place the filled cake pan in the preheated water bath on the oven rack. Bake your Japanese Strawberry Cake for approximately 1 hour and 30 minutes. Keep an eye on it; the cake should rise beautifully and become a light golden color on top. Test for doneness by inserting a toothpick; it should come out clean.
Step 7: Cool
Once baked, carefully remove the cake from the oven and let it cool in the pan for about 10 minutes. Then, turn it out onto a wire rack to cool completely. This step is crucial in achieving the perfect texture for your Japanese Strawberry Cake before assembly.
Step 8: Prepare Strawberries
While the cake is cooling, slice fresh strawberries and sprinkle them with a little sugar to enhance their sweetness. Allow the strawberries to sit for about 15-20 minutes, letting them macerate. This will bring out their juices and create a delicious filling for the layers of your cake.
Step 9: Make Frosting
In a chilled mixing bowl, whip the heavy whipping cream until it begins to thicken. Gradually add the confectioners sugar, and continue whipping until you reach soft peaks. For a stabilized version, incorporate bloomed gelatin at this point for a frosting that holds its shape wonderfully on the Japanese Strawberry Cake.
Step 10: Assemble Cake
Once the cake has cooled, slice it horizontally into two layers. Start by brushing each layer with a simple syrup or the sweetened fruit juices from the macerated strawberries. Layer the cream and berries between the cake layers, then use the remaining whipped cream to frost the top and sides, creating a beautiful finish.
Step 11: Chill
If you have chosen to use stabilized whipped cream, place the assembled Japanese Strawberry Cake in the refrigerator for about 30 minutes. This will help set the frosting and keep every layer intact when serving. The chilling enhances the flavors and makes for a refreshing dessert experience.

What to Serve with Japanese Bakery-Style Strawberry Cake?
Pairing this delightful creation with complementary flavors will elevate your dessert experience to new heights.
-
Green Tea: Offers a soothing contrast to the cake’s sweetness, enhancing the light and refreshing nature of the dessert.
-
Whipped Yogurt: A tangy alternative to frosting, it provides a creamy texture while balancing the sweetness of strawberries.
-
Fresh Berries: A medley of blueberries, raspberries, and blackberries can add vibrant color and a mix of tartness and sweetness to your plate.
-
Pistachio Nuts: Their crunchy texture adds a delightful contrast to the soft cake, and the nuttiness complements the strawberries beautifully.
-
Chocolate-Dipped Strawberries: For a touch of luxury, these sweet bites add elegance and enhance the fruity flavor of the cake.
-
Mochi Ice Cream: This Japanese treat provides a unique chewy texture and pairs wonderfully with the airy cake, creating an exciting flavor fusion.
-
Lemon Sorbet: Its zesty acidity cuts through the richness, refreshing your palate while enhancing the cake’s delicate sweetness.
Transform your gatherings with these delightful pairings and indulge in a slice of joy alongside each serving of Japanese Strawberry Cake!
Make Ahead Options
These delightful Japanese Strawberry Cakes are perfect for meal prep enthusiasts! You can make the cake itself up to 24 hours in advance; simply bake it, let it cool completely, and then wrap it tightly in plastic wrap to prevent drying out. The strawberries can also be sliced and macerated ahead of time; store them in the fridge for up to 3 days to maintain their freshness and flavor. When you’re ready to serve, whip the cream and assemble the layers, finishing with a light frosting. This way, you’ll enjoy a beautiful, homemade dessert with minimal effort, making it an excellent choice for busy weeknights or gatherings!
Expert Tips for Japanese Strawberry Cake
-
Measure Precisely: Use a digital kitchen scale for accurate measurements; even slight variations can affect the cake’s light texture.
-
Check Oven Temperature: Use an oven thermometer to ensure accurate baking temperatures; this is essential for achieving a perfect rise.
-
Avoid Over-Whipping: When whipping egg whites, stop at medium peaks; over-beating can result in a dry and crumbly texture that won’t yield your desired Japanese strawberry cake.
-
Use Hot Water for the Bath: Always use hot water in the baking pan; room temperature water may hinder the cake’s rise and moisture retention.
-
Chill Before Serving: Let the assembled cake chill in the refrigerator for at least 30 minutes if using stabilized cream; this helps maintain the integrity of the layers and enhances flavors.
Japanese Strawberry Cake Variations
Feel free to personalize this delightful cake with your own creative twists and substitutions that inspire your palate!
-
Gluten-Free: Substitute cake flour with a gluten-free flour blend to accommodate gluten sensitivities while still enjoying the fluffy texture.
-
Dairy-Free: Swap out whole milk and unsalted butter for almond milk and coconut oil, maintaining that scrumptious flavor without dairy.
-
Alternative Fruits: Instead of strawberries, experiment with seasonal fruits like blueberries or peaches for a refreshing change of taste; each bite will surprise you!
-
Chocolate Lovers: Add unsweetened cocoa powder to the batter for a chocolate version, and top with chocolate whipped cream for extra indulgence.
-
Less Sweet: Reduce the amount of sugar in the cake batter or use a sugar substitute to dial back the sweetness, perfect for those watching their sugar intake.
-
Fruit Syrup: Try brushing the cake layers with a syrup made from blended strawberries or other fruits for an extra burst of flavor and moisture.
-
Cream Cheese Whipped Frosting: For a richer option, blend cream cheese with whipped cream for a decadent twist that complements the light cake wonderfully.
-
Spice It Up: Add a dash of cinnamon or vanilla extract to the cake batter for a warm, aromatic twist that elevates the flavor profile beautifully.
And for even more sweetness, consider pairing your cake with a side of delightful desserts like Strawberry Honey Custard or a comforting slice of Pistachio Coffee Cake for a delightful dessert spread!
How to Store and Freeze Japanese Strawberry Cake
Fridge: Store leftovers in an airtight container in the refrigerator for up to 2 days. This keeps the layers moist and fresh for your enjoyment.
Freezer: For longer storage, carefully wrap the cooled cake layers in plastic wrap and foil, then freeze for up to 3 months. Thaw in the fridge before serving.
Reheating: If you prefer warm cake, gently reheat individual slices in the microwave for 10-15 seconds, being careful not to overheat and dry it out.
Assembling Tips: If freezing, consider adding the frosting and strawberries after thawing to maintain that delightful fresh taste and texture in your Japanese Strawberry Cake.
Japanese Bakery-Style Strawberry Cake Recipe FAQs
What type of strawberries should I use for the cake?
Absolutely! Using ripe and fresh strawberries is key to achieving the best flavor. Look for strawberries that are bright red, firm, and free of dark spots. If you can’t find strawberries, raspberries make a delicious alternative with a slightly tart flavor.
How can I store the cake, and how long will it last?
You can store any leftover cake in an airtight container in the refrigerator for up to 2 days. Just be sure to keep it covered to maintain its moisture. For longer storage, wrap the cooled cake layers tightly in plastic wrap and aluminum foil, and they can be frozen for up to 3 months! Just make sure to thaw them in the refrigerator before serving.
Can I freeze the Japanese Strawberry Cake?
Certainly! To freeze, carefully wrap the cooled layers in plastic wrap and aluminum foil to prevent freezer burn. Thaw them in the fridge overnight before assembling with frosting and strawberries for the best taste and texture. This way, you can enjoy a slice of joy whenever you wish!
What should I do if my cake doesn’t rise properly?
If your cake doesn’t rise as expected, it might be due to under-whipped egg whites or over-mixing the batter. Ensure your egg whites are beaten to medium peaks, and fold them gently into the yolk mixture. Also, always check your oven temperature with a thermometer. Baking it in a water bath helps too, as this creates a moist environment.
Are there any dietary considerations when making this cake?
Very! This recipe offers options for various dietary needs. You can use almond milk instead of whole milk for a non-dairy version. For the frosting, skip the gelatin for a vegetarian option. If allergies are a concern, be cautious with the strawberries, and always double-check all ingredient labels.
How do I make the whipped cream frosting thick enough to hold its shape?
You can achieve stabilized whipped cream by incorporating gelatin. Start by blooming the gelatin in cold water and then heating it until dissolved. Slowly mix this into your whipped cream once it begins to thicken, and continue to whip until soft peaks form. This will create a sturdy frosting that keeps its shape beautifully on your cake!

Fluffy Japanese Strawberry Cake: A Sweet Taste of Heaven
Ingredients
Equipment
Method
- Preheat your oven to 325°F (160°C) and prepare a water bath with a larger pan filled with hot water on the bottom rack.
- Melt together the whole milk and unsalted butter in a saucepan over low heat. Remove from heat and sift in cake flour, stirring gently.
- Whisk in the egg yolks until the mixture is creamy.
- Whip egg whites in a separate bowl, gradually adding caster sugar until medium peaks form.
- Fold the whipped egg whites gently into the beaten yolk mixture.
- Pour the batter into a lined 8-inch cake pan and tap gently to release air bubbles.
- Bake for 1 hour and 30 minutes in the water bath.
- Cool the cake in the pan for 10 minutes, then transfer to a wire rack.
- Slice fresh strawberries, sprinkle with sugar, and let sit for 15-20 minutes to macerate.
- Whip the heavy cream until it begins to thicken, then gradually add confectioners sugar until soft peaks form.
- Assemble the cake by brushing each layer with syrup, filling with cream and strawberries, and frosting the top with remaining whipped cream.
- Chill for about 30 minutes if using stabilized cream before serving.
Leave a Reply